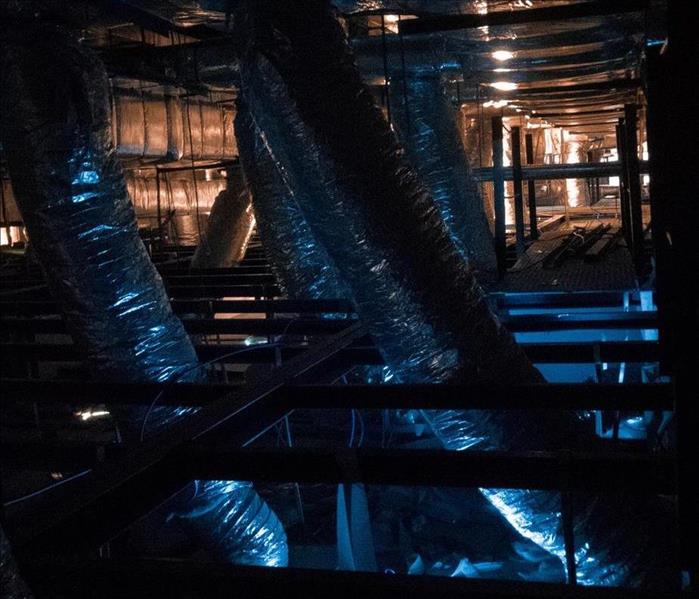
The air quality in your home or business is important. Keeping dust, pollen, pet dander, and other irritants out of the air you or your customers breathe involves more than changing the air filter(s). What about your air ducts? Contaminants collect in the duct system too, and regular cleaning of the air channel is important.
Energy Consumption
Dirty HVAC systems consume more energy than clean ones. Older ductwork starts leaking and not only do irritants enter through cracks, but air escapes too. Dirty ductwork also impedes airflow that drives up energy bills as much as 20 percent. Plus, dirt stresses your system causing frequent breakdowns. Clean ductwork helps lower your utility bill and helps your HVAC unit last longer.
Smelly Air
If someone in your home or business smokes, an odor hangs not only in the air but in the ductwork. Likewise, if you burned something on the stove, the smoke must go somewhere. These smells and other household odors collect in the ductwork and get circulated five to seven times per day, on average. Odors continue to plague your home or business long after you remove the offensive item(s).
More Reasons
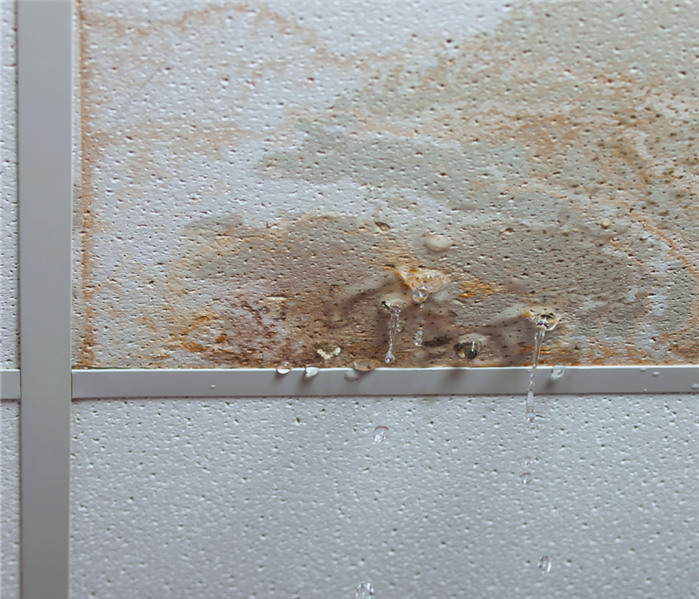
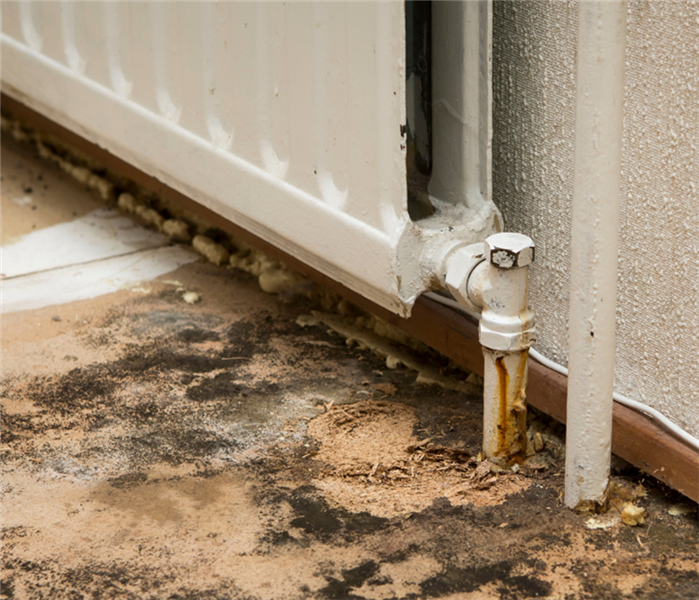
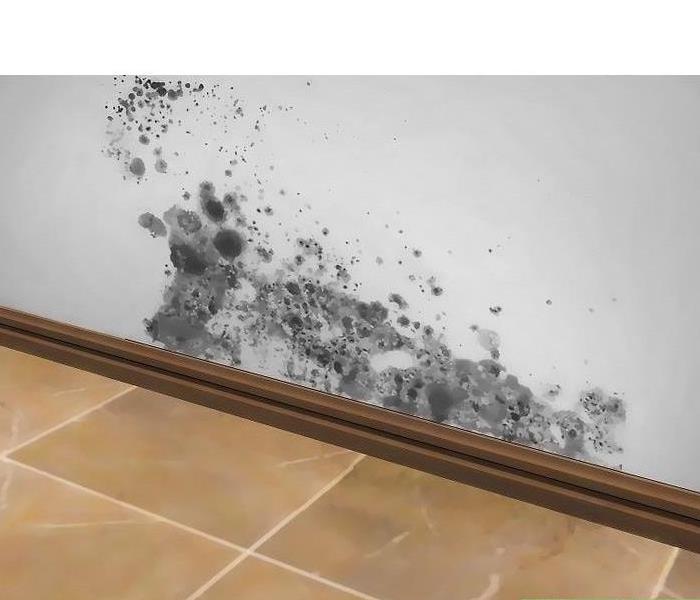
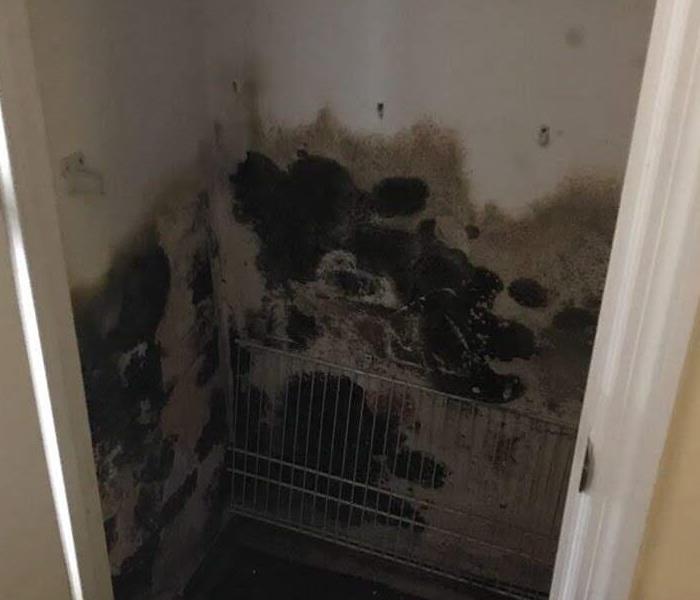
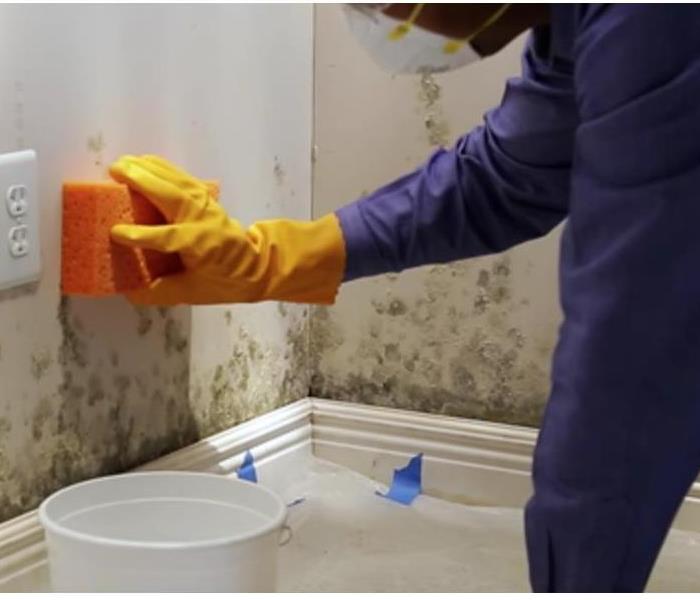
Mold and mildew grow in your duct system especially if your home or business suffered recent water damage from flooding or foundation cracks. Renovations and repair often lead to contaminants settling in your air system, and newly built homes need the air ducts cleaned before occupancy.
Call the Professional
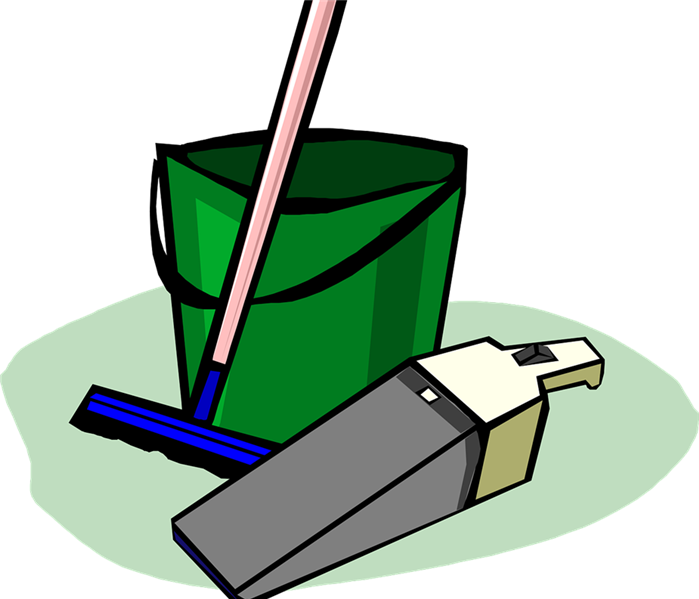
Air duct cleaning is not an easy job. It needs special vacuum hoses and tools to reach throughout the system. This is not a do-it-yourself task.
Contact your local HVAC company and schedule a professional cleaning. Have your system cleaned every three to five years and more often if your family suffers from severe allergies or asthma, includes a smoker, or you have pets that shed a lot.
Make sure you contact a certified HVAC technician for ductwork cleaning. Another helpful idea is to buy a high-quality air filter like the ones sold at home improvement stores. Look for pleated filters costing around $15. Not only do these last a little longer, these filters also catch more debris, including bacteria and viruses, before you breathe it in.
Children are precious and should be able to learn in safe, clean environments within our schools. Along with the local first responders, we stand behind and support our school systems in the event an emergency strikes.
Our local school systems can depend on us at SERVPRO® for fast, effective service in the event of a fire, water, or mold damage.
Our 24/7 emergency response services provide mitigation, cleanup, and restoration services to reduce recovery costs and to help ensure minimal interruption to curriculum and better opportunities for learning in the classroom.
Schools see other kinds of interior and exterior damage that are not necessarily caused by natural causes. Our local SERVPRO® also provides expert cleaning for emergencies or special needs exceeding routine janitorial capabilities, including stain removal, upholstery and drapery dry cleaning, indoor air quality, and vandalism cleanup.
Our Franchise Professionals are trained to clean and sanitize building materials, surfaces, and contents following restoration industry standards, using professional cleaning products and EPA registered cleaners and disinfectants.
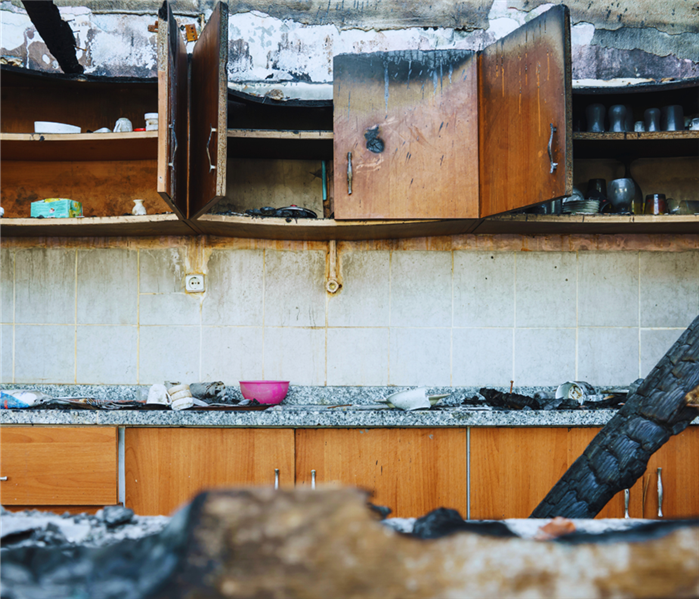
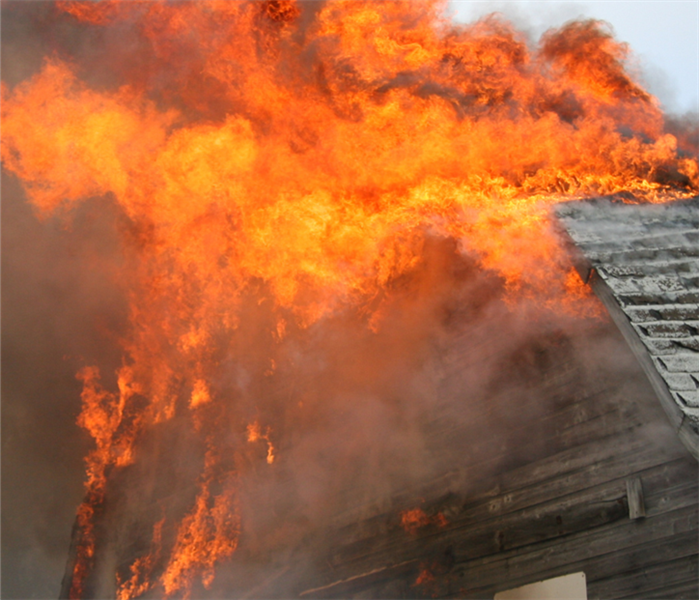
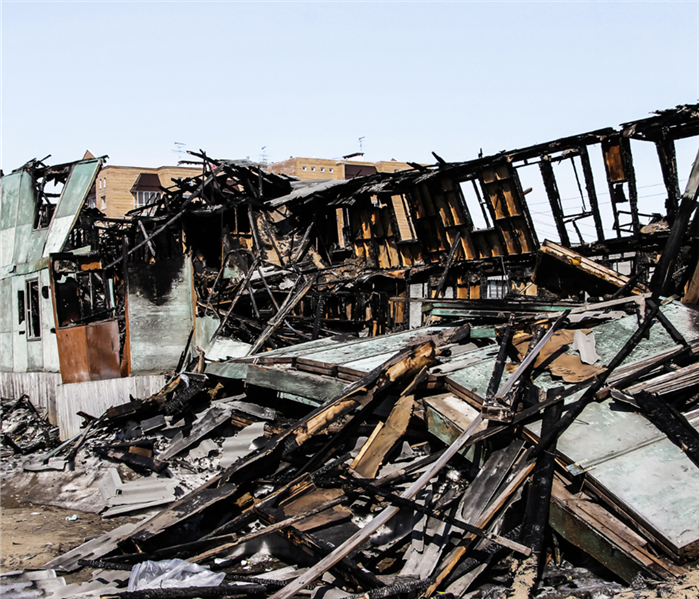
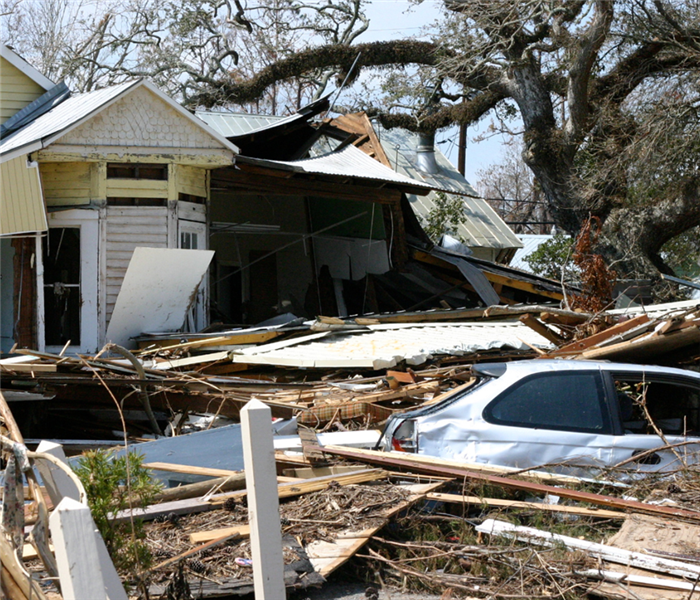
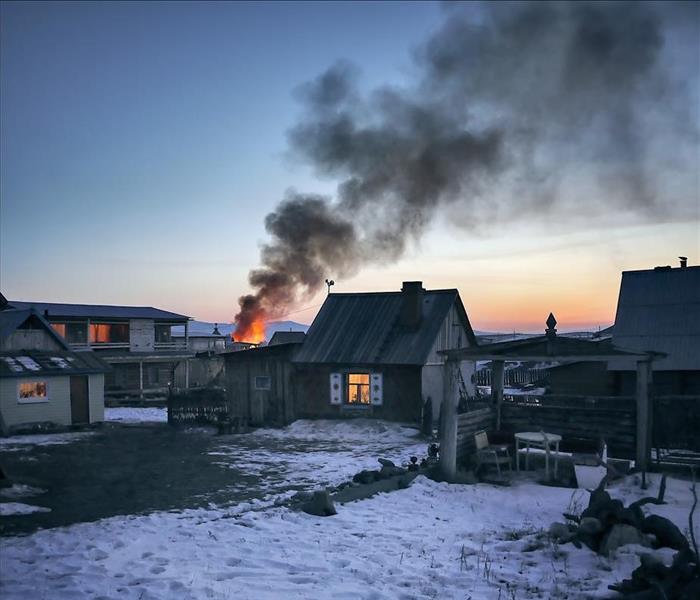
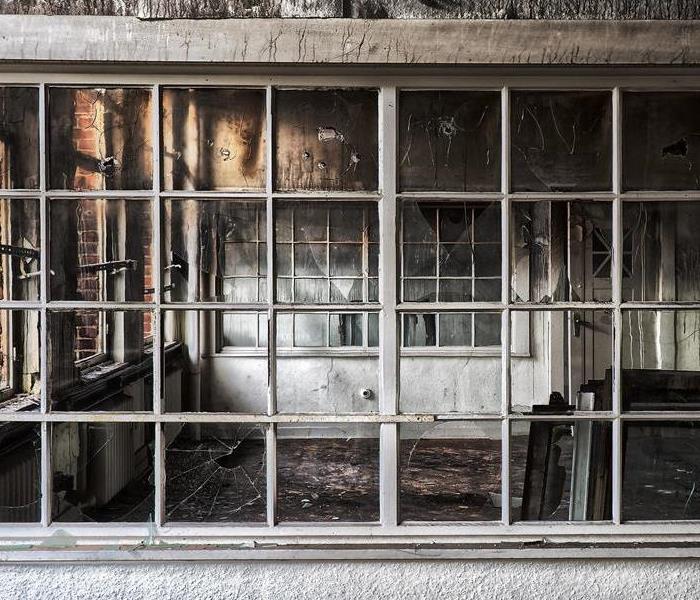
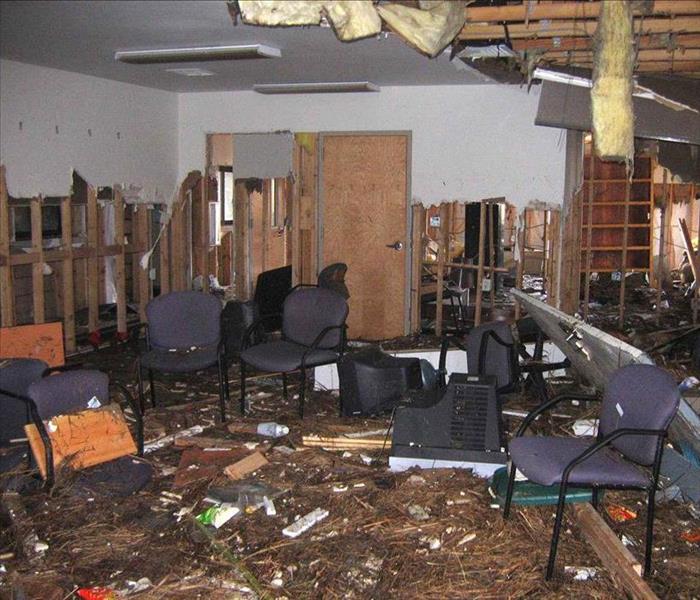
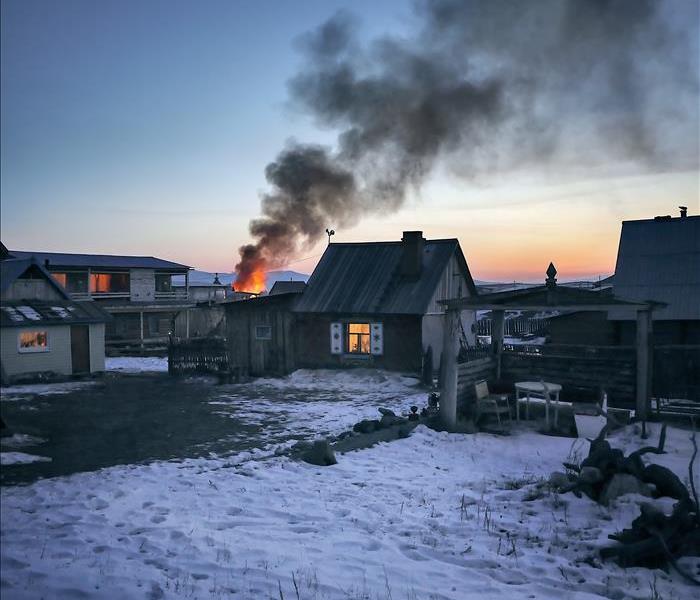
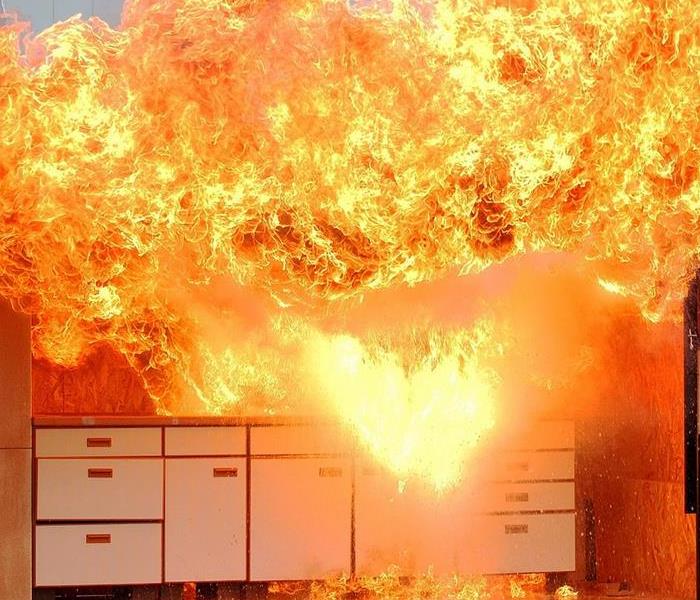
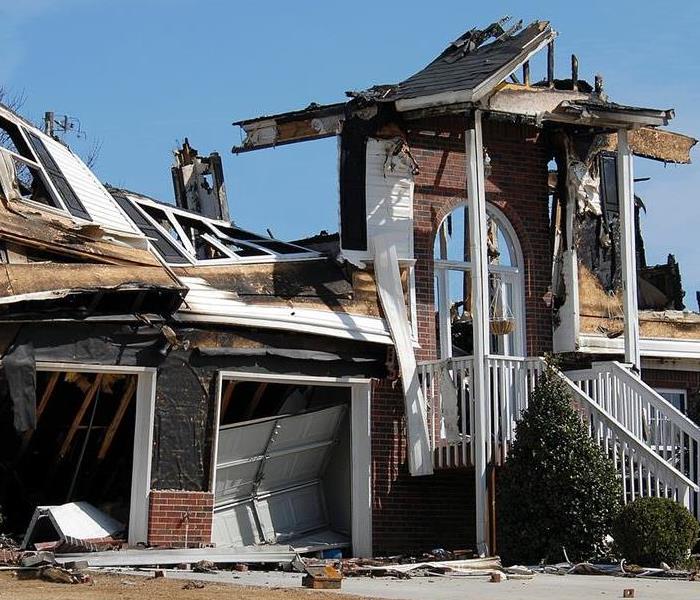
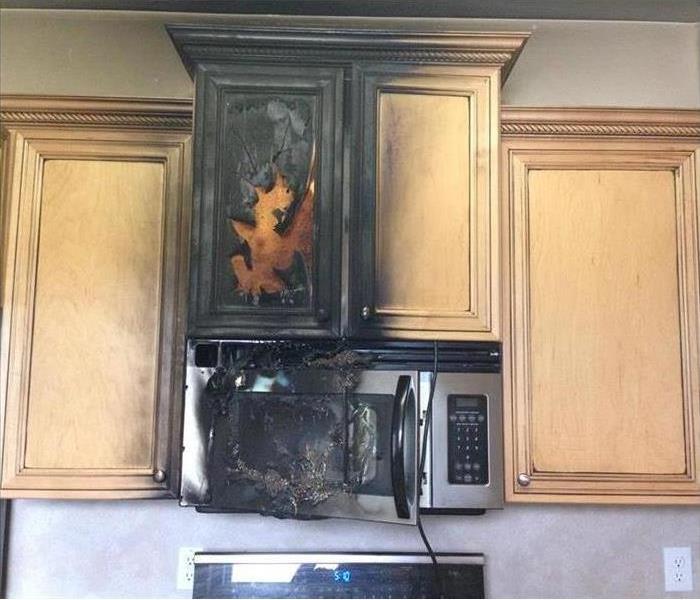
A fire in your home can cause devastating damage and require you to act quickly to save as much of your valuable property as possible. There is also the possibility that your house may go up in flames, causing the surrounding area to be filled with smoke and fumes that can eventually be toxic. This article will outline what you should know about fire and the safety precautions you should take if home fires are to occur.
Why is Fire Risk in Your Home at High?
The factors that determine whether a home will be harmed by fire are many. However, those that appear to be most important are the air and heat in the rooms and the walls, combustible material in the home, a poorly constructed home, and age or damage at the attic level. The National Fire Protection Association, or NFFP, recommends to families that they avoid using open flames in all forms at any time, particularly in any heating system.
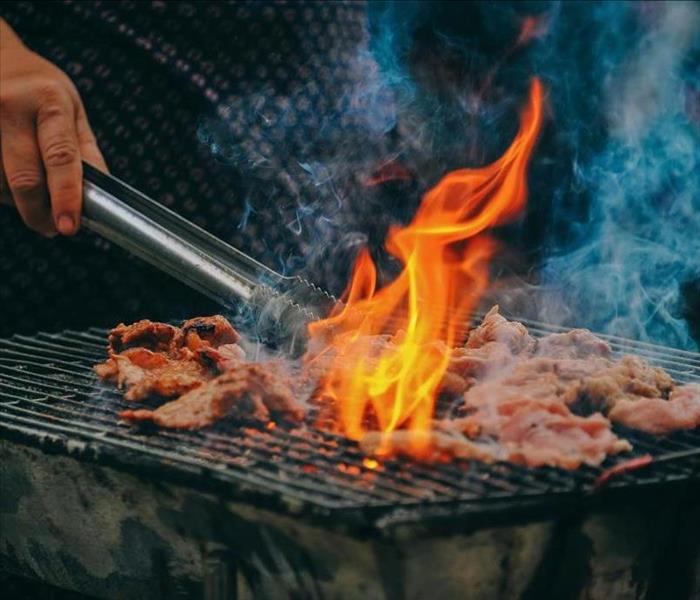
There are, however, times when open flames are needed or required for cooking and some other activities. This may come about from using open fires in the fireplace for heat or smoke, or due to open flames in a stove or a clothes washer. Also, if your kitchen is very small, then it may be worth giving consideration to using electric space heaters on the countertops rather than open flames. Another risk to consider is the use of open flames in a gas grill. While a gas grill can operate on a pilot flame and is considered safe in most instances, there is always the possibility that there may be an open flame in the grilling area of a gas grill.
The cost of fire damage.
A great number of fire incidents occur in the home. Many homeowners do not have any insurance on their home, or they have it for only a single year, but a couple of times they have insurance for the whole of their life. This is very important as you have to consider fire damage insurance in your life to save your house from financial ruin.
The most important thing is that you should not ignore fire and gas damage when they are occurring. In most cases, the insurance company will provide a minimum of coverage for fire and gas, but it does not mean it will cover fire damage completely. This is due to the fact that damage is subjective. It is not limited to how many homes a fire or gas strike has destroyed. Even if your home has been completely burnt down by fire, you still have to assess the damage. The best thing is, there are many fire damage insurance companies in the market today willing to pay for your claim, you just have to find the best deal possible.
The first thing to do is assess and inspect which areas are affected by the fire. This part is not so difficult, since you cannot see the extent of the fire damage.
Step 2: Check the property damage claim. Some insurance companies will not cover any damage to the inside of the house but do offer any property damage claims to the exterior of the house. If there is any damage to any areas that are not covered by all parties, the insurance company will be very helpful in calculating the damage and will get you the necessary compensation.
Step 3: Request a claim form from the insurance company. Many insurance companies make a claim form available to the homeowner. As you know, there will be a number of claims sent for the homeowner, there will also be a claim number corresponding to the claim number given by the insurance company
If you find yourself with fire damage. Please call SERVPRO®. We can help!
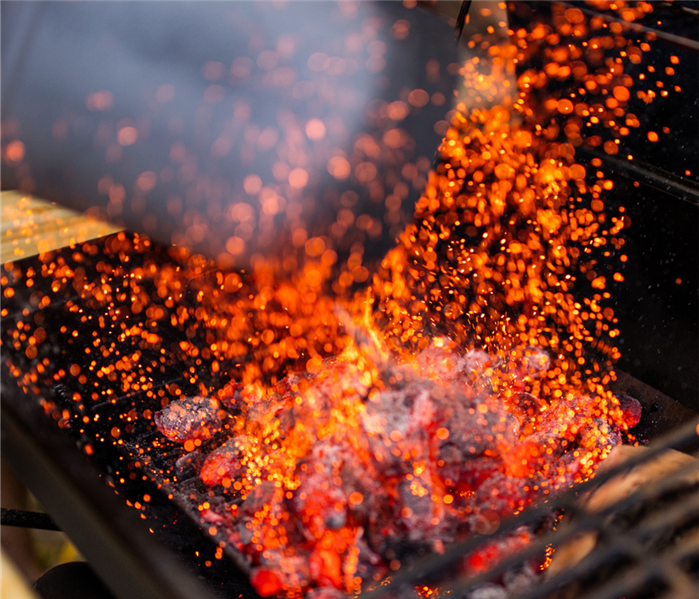
We all know that Holidays revolve around family, food, and friends. So we are sure there are going to be some grills fired up. It is good though to be safe and keep in mind that there are some best practices we want to share with you.
HOW TO PREVENT FLARE-UPS
Trim the fat.
Flare-ups usually happen because of excess fat, sauces or oily marinades. So trim as much excess fat as you can, without sacrificing flavor.
Keep the lid open.
When searing fatty foods, leave the grill lid opened.
Avoid wind.
Try to keep your grill away from windy areas. Wind forces oxygen between the grates, which can fuel a flare-up.
Move your food.
Try not to overcrowd your food on your grill. If a flare-up does happen, you want to be able to move your food away from the flame.
Burn the grease away.
During cooking, if grease pools, remove your food and turn the burners on high with the grill lid open until the grease has burned off.
Clean your grill.
Keeping your grill clean and maintained will help prevent the dreaded flare-up. Food residue and old grease are both great fuel for a fire, so removing debris after each use is important.
Turn off the burners.
If your grill flare-up is out of control, turn off the burners.
Don't use water.
You’ve heard the adage, “Oil and water don’t mix?” Well, that’s especially true for flare-ups. Spraying water on a flare-up can cause grease to explode. Don’t use it.
However, we know accidents happen. That is why SERVPRO is here. To help you if your grill or anything else was to catch your home on fire.
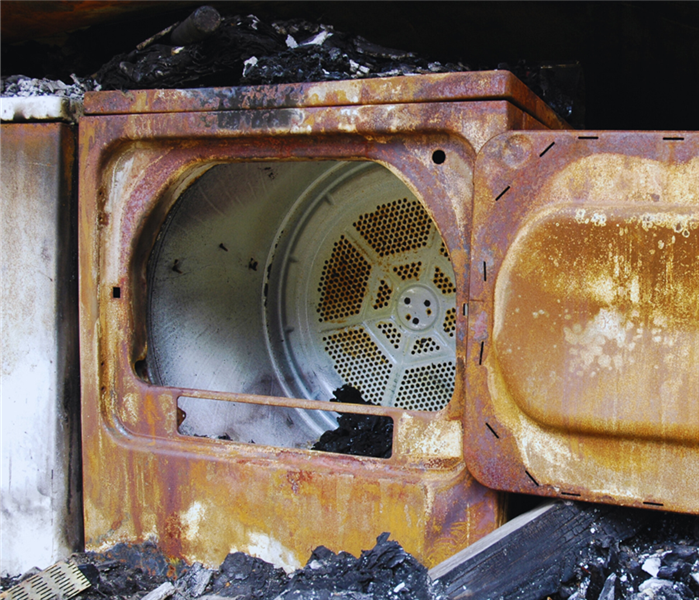
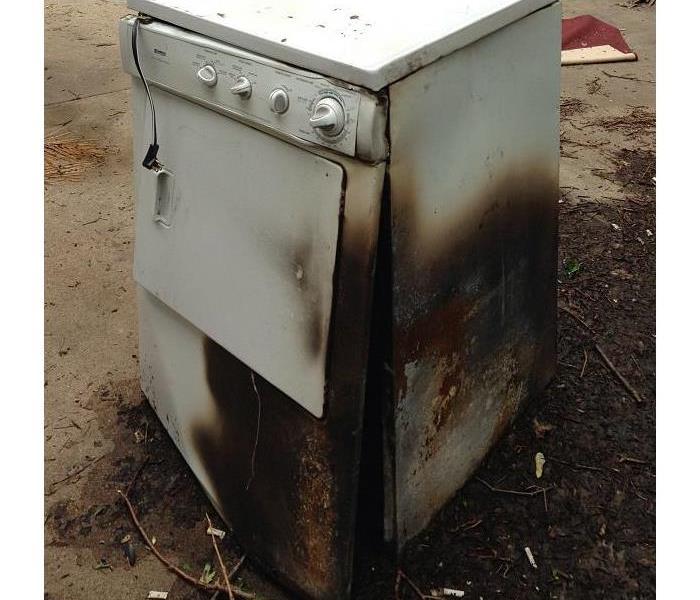
My clothes still need doing, and I still find time on even my busiest day to do so. But it is at these moments that we sometimes forget about the dryers.
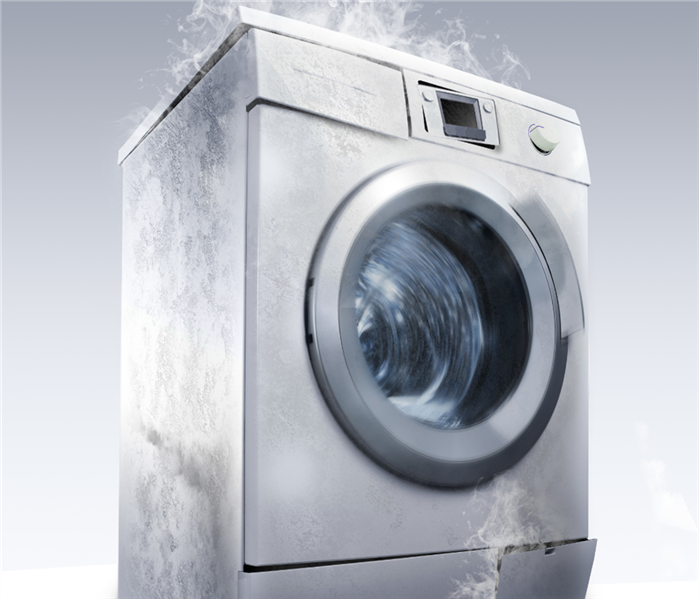
Not because it is so often at just such a time but because the dryers are so dangerous. That is why it is important to keep up with tips and strategies to prevent dryer fires. To that end, we have to remember that dryers are like appliances that are set to work as part of the daily laundry cycle and thus use a few small parts to ignite.
Here are a couple of things to remember:
Why you don't leave the dryer going when no one is home?
Why you don't leave the dryer going when no one is home.
A big reason to prevent dryer fires is that the fire often leads to a second or third fire or can be a safety hazard. It's always better to prevent a fire than to respond to a fire situation.
Before dryer fires occur, we usually have a fire hazard situation. If you have a hot water pipe in your kitchen and a fire could start there, use a fire extinguisher. A fire extinguisher can be used effectively to save your property from dryer fires. A fire extinguisher can also be used effectively to extinguish and prevent a fire from occurring at a dryer.
How to clean the dryer lint.
The heat from the dryer is always intense. The machine uses a large heat capacity to absorb the heat, leaving the dryer lint sitting on top of the inside of the machine after every cycle. You'll notice that the top of the dryer is always smeared with dryer lint and what is left over after the dryer door closes. The lint can cause a fire. How to minimize this risk?
Simply make sure you throw away the lint from the lint filter after every use.
But if this does happen and you end up with fire damage. Please call SERVPRO. We can help.
My clothes still need doing, and I still find time on even my busiest day to do so. But it is at these moments that we sometimes forget about the dryers.
Not because it is so often at just such a time but because the dryers are so dangerous. That is why it is important to keep up with tips and strategies to prevent dryer fires. To that end, we have to remember that dryers are like appliances that are set to work as part of the daily laundry cycle and thus use a few small parts to ignite.
Here are a couple of things to remember:
Why you don't leave the dryer going when no one is home?
Why you don't leave the dryer going when no one is home.
A big reason to prevent dryer fires is that the fire often leads to a second or third fire or can be a safety hazard. It's always better to prevent a fire than to respond to a fire situation.
Before dryer fires occur, we usually have a fire hazard situation. If you have a hot water pipe in your kitchen and a fire could start there, use a fire extinguisher. A fire extinguisher can be used effectively to save your property from dryer fires. A fire extinguisher can also be used effectively to extinguish and prevent a fire from occurring at a dryer.
How to clean the dryer lint.
The heat from the dryer is always intense. The machine uses a large heat capacity to absorb the heat, leaving the dryer lint sitting on top of the inside of the machine after every cycle. You'll notice that the top of the dryer is always smeared with dryer lint and what is left over after the dryer door closes. The lint can cause a fire. How to minimize this risk?
Simply make sure you throw away the lint from the lint filter after every use.
But if this does happen and you end up with fire damage. Please call SERVPRO. We can help.
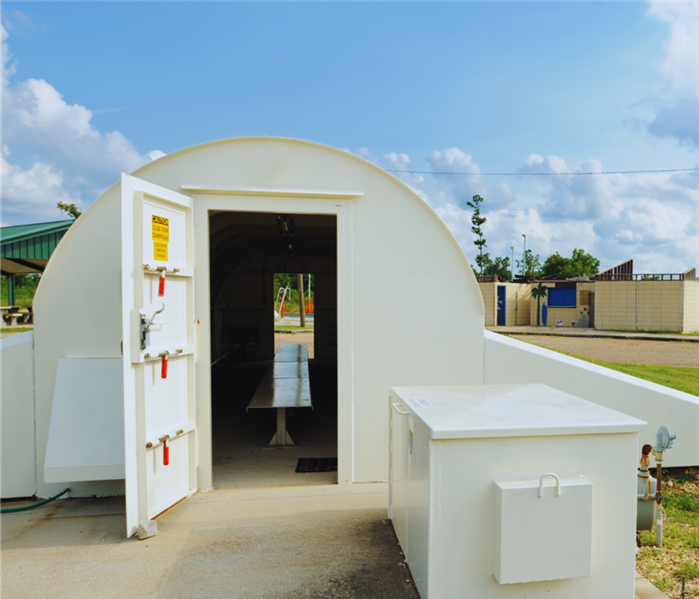
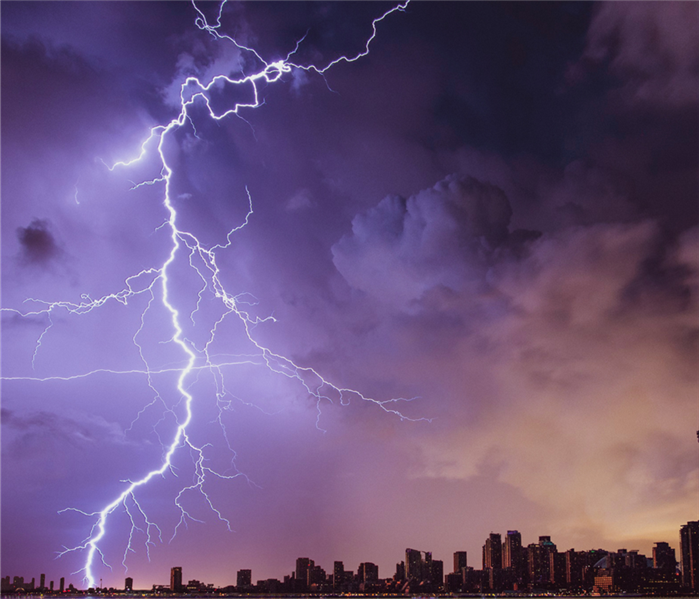
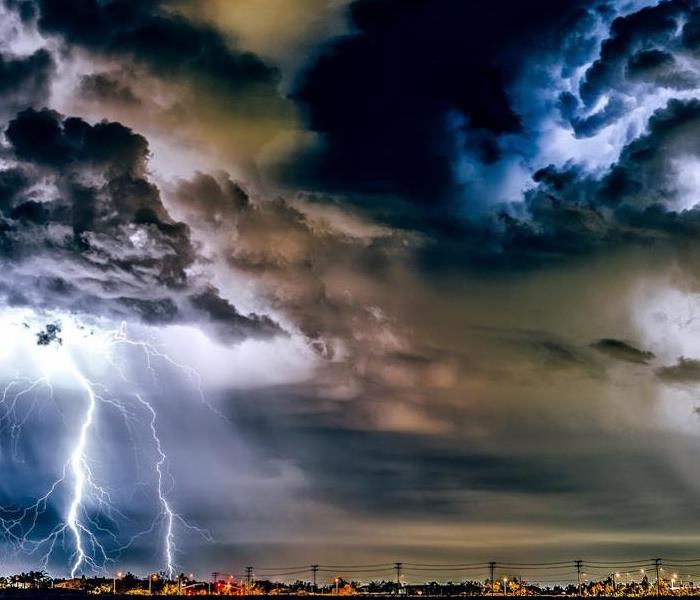
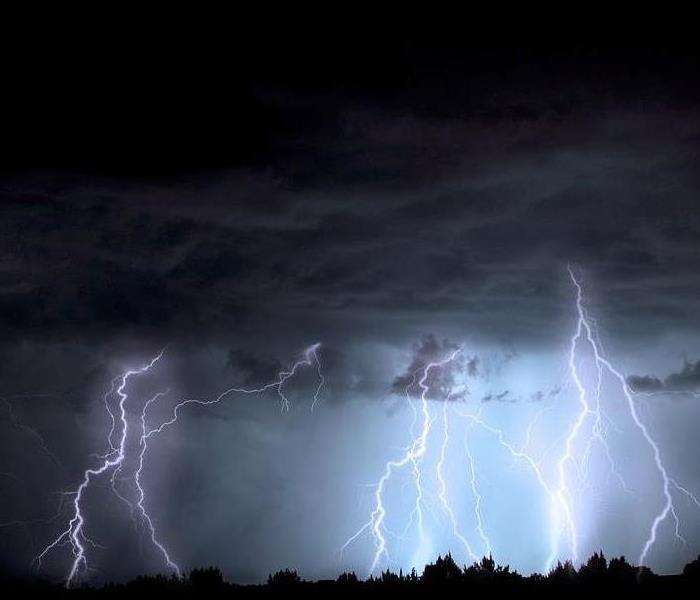
A good storm shelter is something everybody should have in their house and on their property for any time of potential or actual danger. Storm shelters for hurricanes and any other type of tropical cyclones are important, even more, when you start considering the risks of tornadoes, blizzards, fire storms, and floods, all of which are just a few of the hazards we have to worry about. These storms are all out there for us to experience at any given time, and we all have the power to prepare in a number of ways.
Why we need them.
The answer is simple. You need them in order to keep you and your family safe. Figure out what kind of shelter or disaster preparedness plan you need.
The aftermath.
In the event we have to actually use a storm shelter, then there will almost always be clean-up. Where there is clean-up, there is help needed. So when you need help, call SERVPRO.
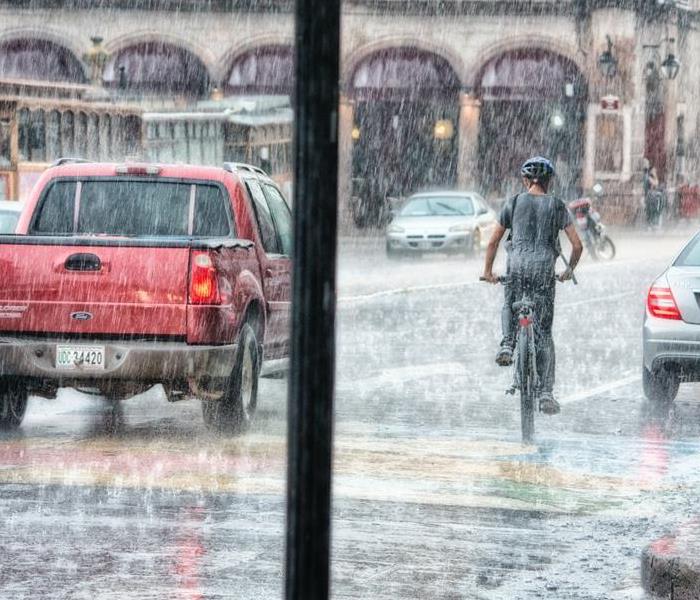
If you live in East TN, then you have heard the words "floods" and "storms", but let's take a closer look at according the ready.gov.
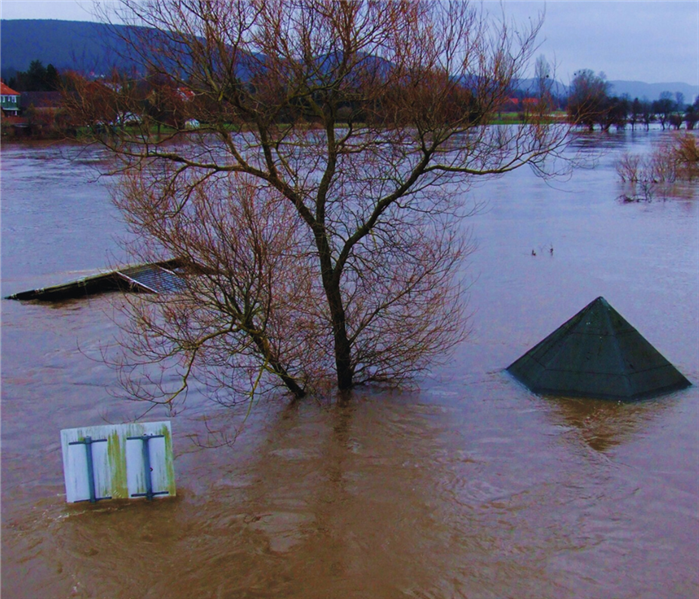
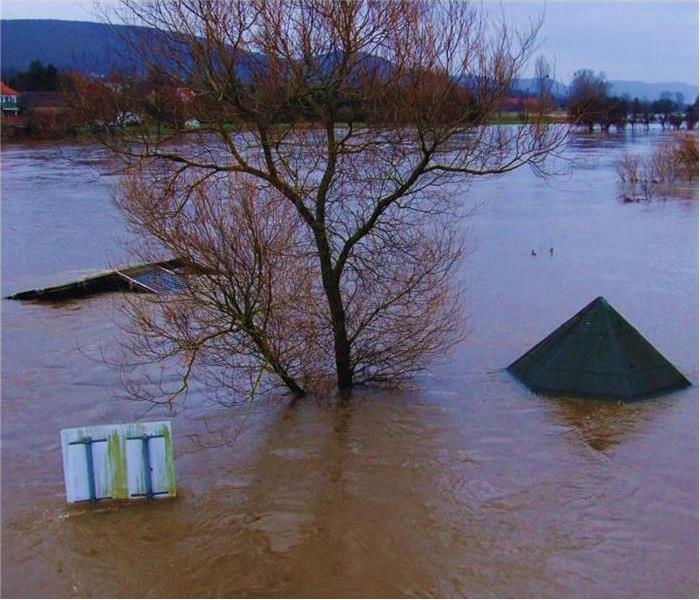
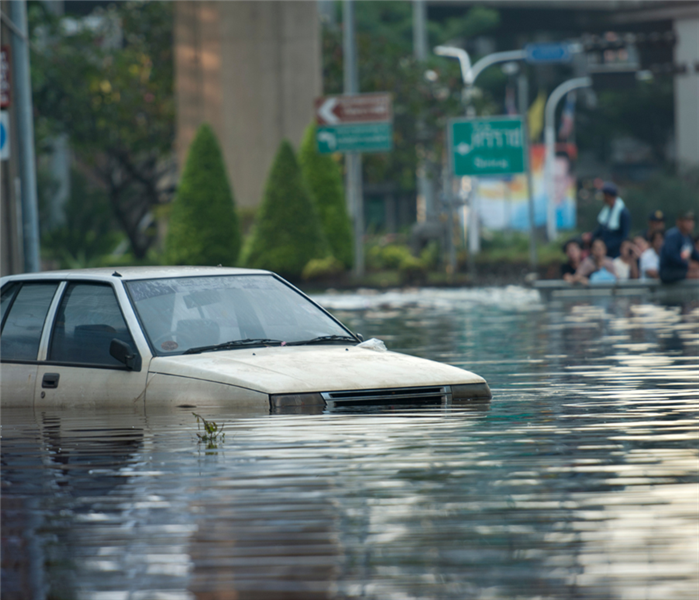
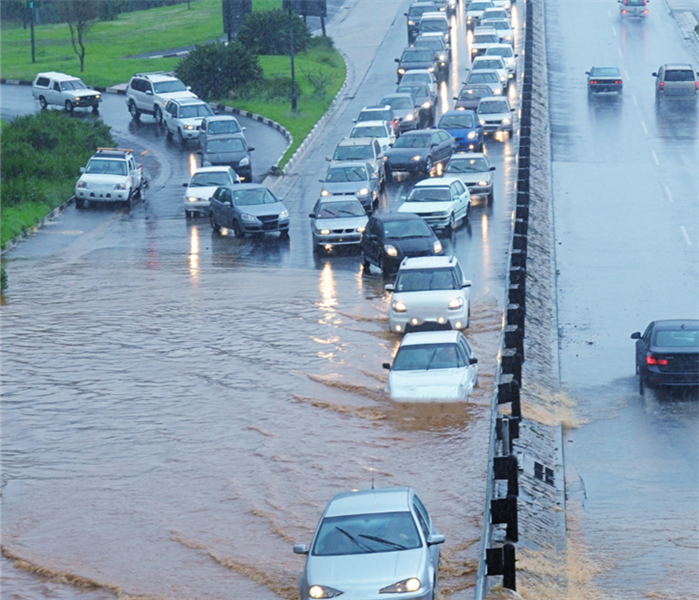
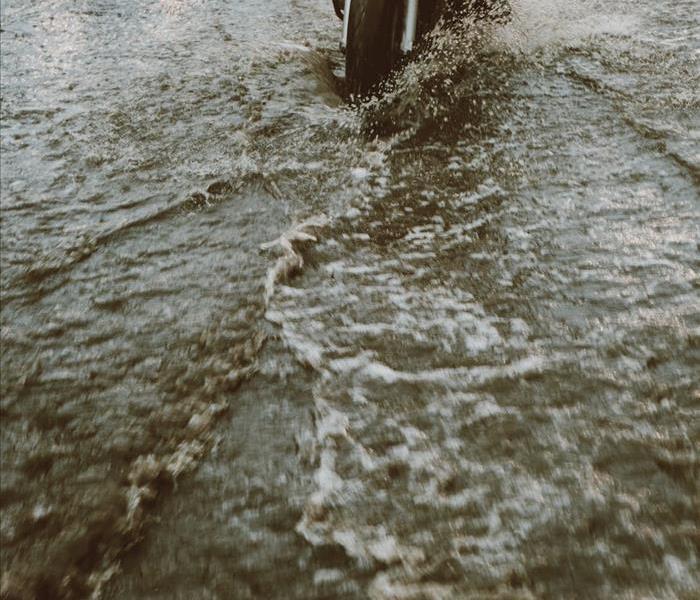
"Flooding is a temporary overflow of water onto land that is normally dry. Floods are the most common natural disaster in the United States. Failing to evacuate flooded areas or entering flood waters can lead to injury or death."
Floods may:
Result from rain, snow, coastal storms, storm surges and overflows of dams and other water systems.
Develop slowly or quickly. Flash floods can come with no warning.
Cause outages, disrupt transportation, damage buildings and create landslides.
If you are under a flood warning:
Find safe shelter right away.
Do not walk, swim or drive through flood waters. Turn Around, Don’t Drown!
Remember, just six inches of moving water can knock you down, and one foot of moving water can sweep your vehicle away.
Stay off bridges over fast-moving water.
Depending on the type of flooding:
Evacuate if told to do so.
Move to higher ground or a higher floor.
Stay where you are.
If your property is damaged by a flood give SERVPRO® a call! We can help!
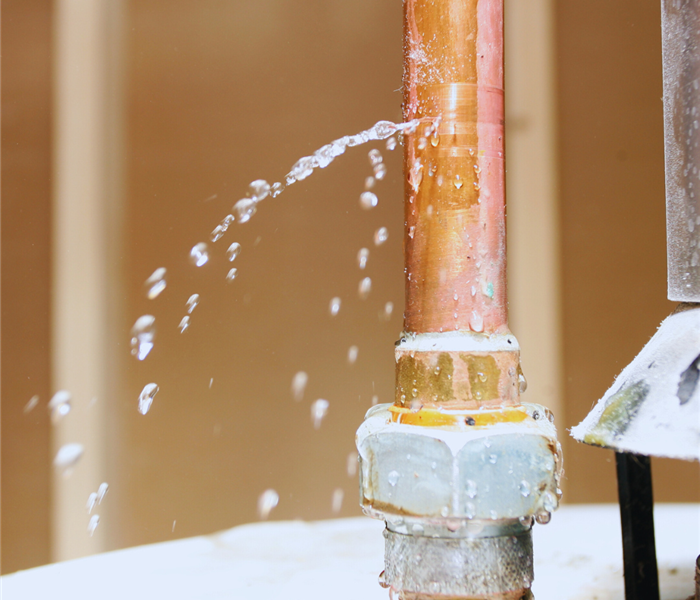
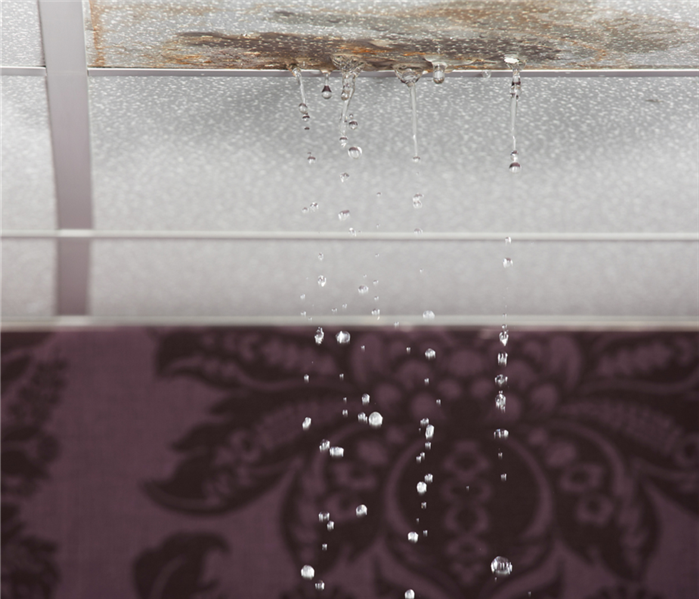
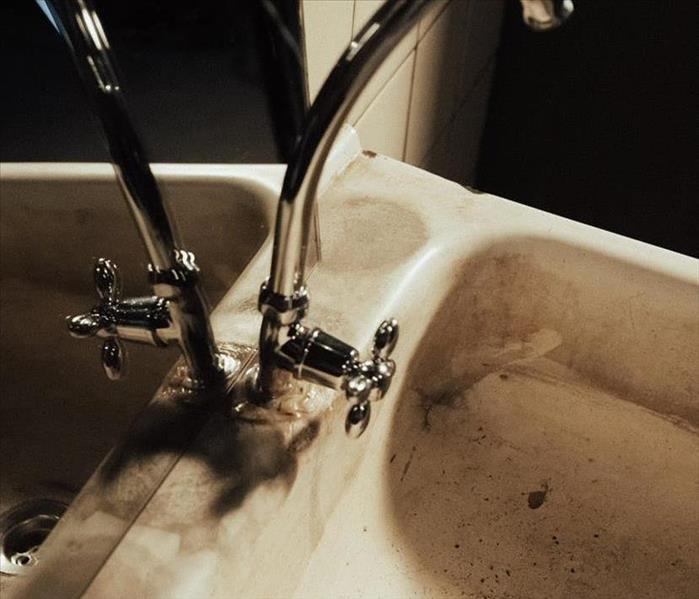
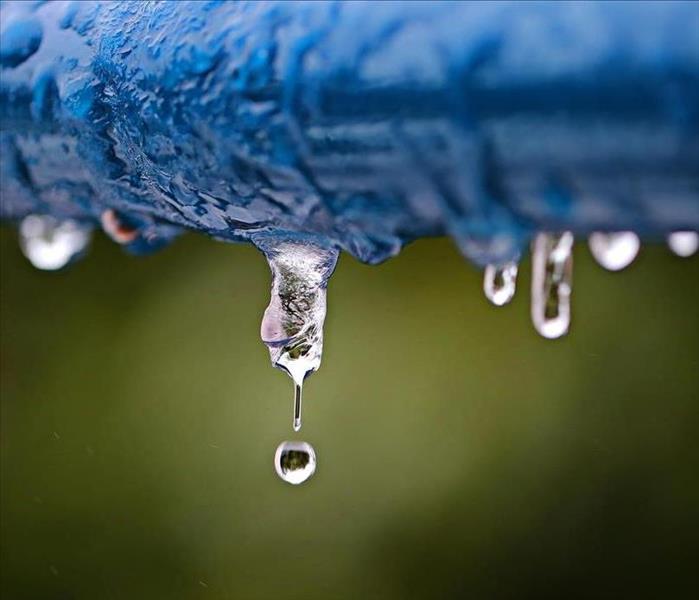
It happens to everyone. A toilet. A leaky faucet. A busted pipe. Hey, it's manmade and we know that it breaks. The question, however, is what actions do we take first.
1. Find and shut off the water source. No matter where it is, find it and stop it. Even if that means bringing in the professionals.
2. Turn off all the circuit breakers. You never know where that water has traveled or is. The last thing you want to do is electrocute yourself.
3. Now try and move as much water as possible.
4. Removed and prop up wet upholstery so it can dry.
5. Try and remove as much valuable stuff to a dry safe area.
6. Take pictures of everything.
7. Contact your insurance agent and SERVPRO.
Also, don't try and dry it with your fans or vacuum cleaners. That is only going to make things worse and cost you a new vac. Call us and our professionals can handle the hard parts.
If you have ever faced water damage in your office, you may have some bad memories that accompany that instance. For example, you may have lost copiers, files, furniture, and a manner of other items of value due to water damage. You may have even had to close the doors of your business if you're a business owner, or if you're an employee, you may have had a period where you weren't able to work.
This water damage could have been a result of a leaky window, roof, or wall, or it could have been a plumbing malfunction or problem. Regardless how it happened, it more than likely caused a pretty big headache.
After the initial water intrusion problem was resolved, you may have had to deal with mold growth and other devastating effects of water damage in your office. So, what can you do to be better prepared in the event that your office was ever hit with water damage again?
First things first. With today's technological advancements, it's a great idea to back-up files and other hard-copy paper files to more than one location. Also, it's a great idea to stay up-to-date on your equipment warranties as well as renter's or owner's insurance on the office itself. If you have the ability to, it's also a great idea to work out a "Plan B" location for your co-workers or employees to meet in the event of office damage in the future. The possibility for remote work is far more probable now than in recent years.
Next, it's important to have a professional water damage and mold remediation team on hand that you can count on. You never know when water damage might strike your office, so knowing that you have a team of professionals on-call and ready to help should give you immense peace of mind going forward. You want someone to show up when you call with full confidence that your problem will be resolved quickly and efficiently.
Our local SERVPRO team is ready to help in the event a disaster like water damage were to strike you. Our team is more than capable to take care of your problems - large or small. You can count on us!
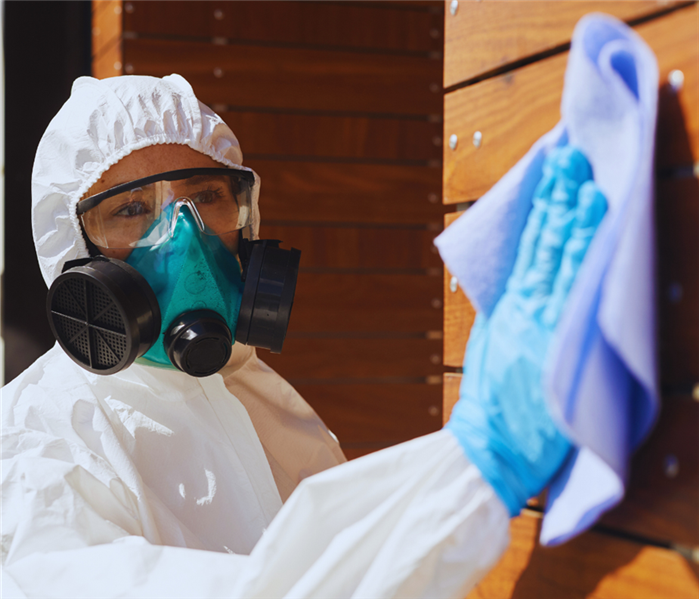
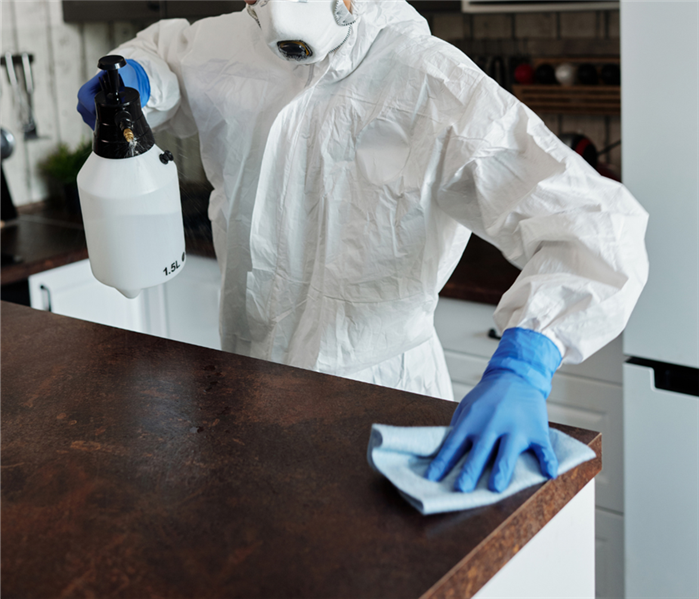
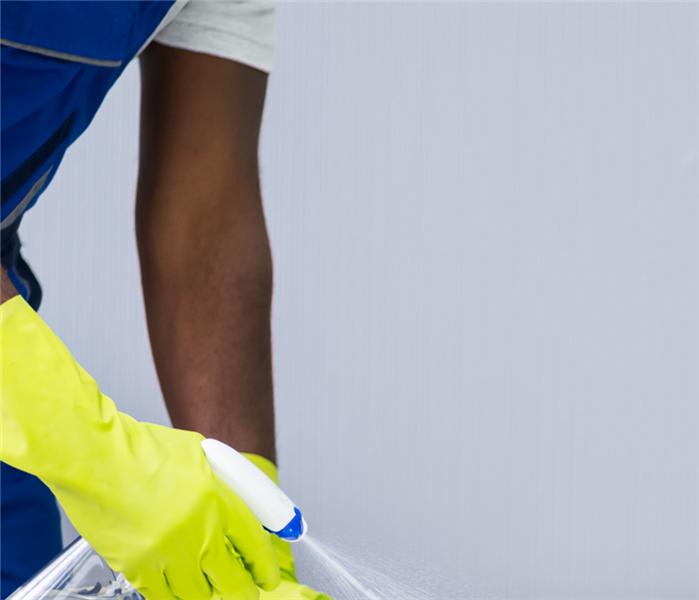
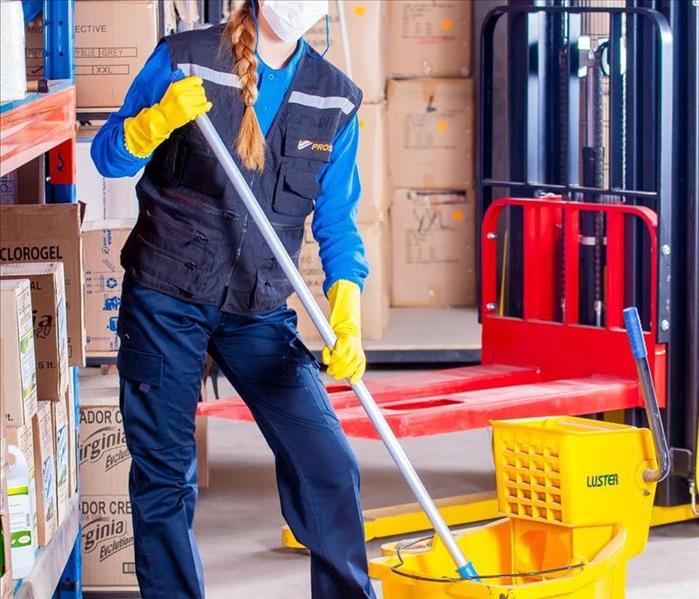
SERVPRO® franchise professionals are uniquely prepared to clean and disinfect your home or business according to the protocols set forth by the CDC. We have years of experience in dealing with biological contaminants, and we will go beyond the scope of work that regular janitorial staff perform on a daily basis. Our professionals are trained to perform a proactive cleanup that involves facility or structure cleaning and disinfection. Cleanup procedures generally include cleaning of porous and non-porous surfaces, disinfecting of non-porous surfaces, cleaning and disinfecting of equipment, tools, and/or supplies used for cleanup process, and disposal of waste.
The CDC encourages cleaning of high-touch surfaces such as counters, tabletops, doorknobs, light switches, bathroom fixtures, toilets, phones, keyboards, tablets and tables. Other spaces mentioned in the CDC’s guidance for commercial spaces include:
If you live in East TN, then you have heard the words "floods" and "storms", but let's take a closer look at according the ready.gov.
"Flooding is a temporary overflow of water onto land that is normally dry. Floods are the most common natural disaster in the United States. Failing to evacuate flooded areas or entering flood waters can lead to injury or death."
Floods may:
Result from rain, snow, coastal storms, storm surges and overflows of dams and other water systems.
Develop slowly or quickly. Flash floods can come with no warning.
Cause outages, disrupt transportation, damage buildings and create landslides.
If you are under a flood warning:
Find safe shelter right away.
Do not walk, swim or drive through flood waters. Turn Around, Don’t Drown!
Remember, just six inches of moving water can knock you down, and one foot of moving water can sweep your vehicle away.
Stay off bridges over fast-moving water.
Depending on the type of flooding:
Evacuate if told to do so.
Move to higher ground or a higher floor.
Stay where you are.
If your property is damaged by a flood give SERVPRO® a call! We can help!
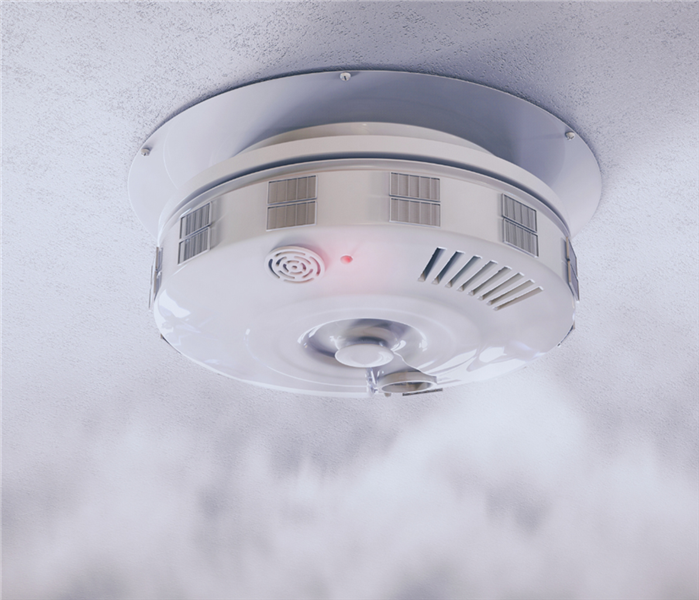
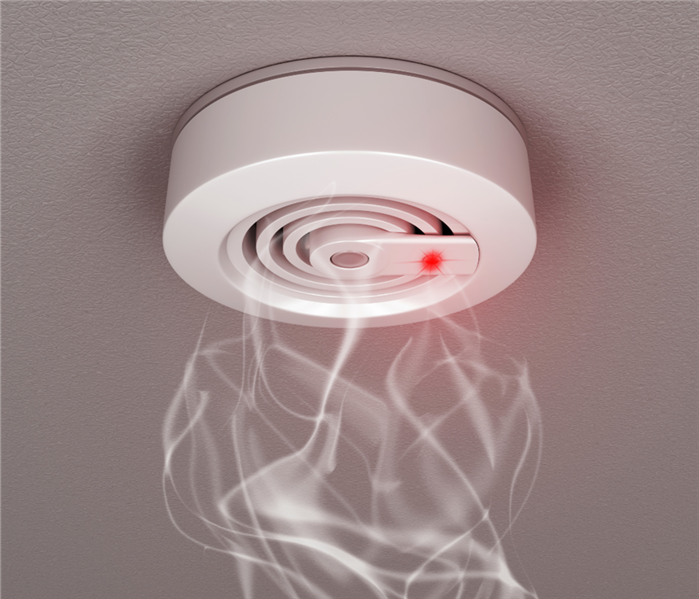
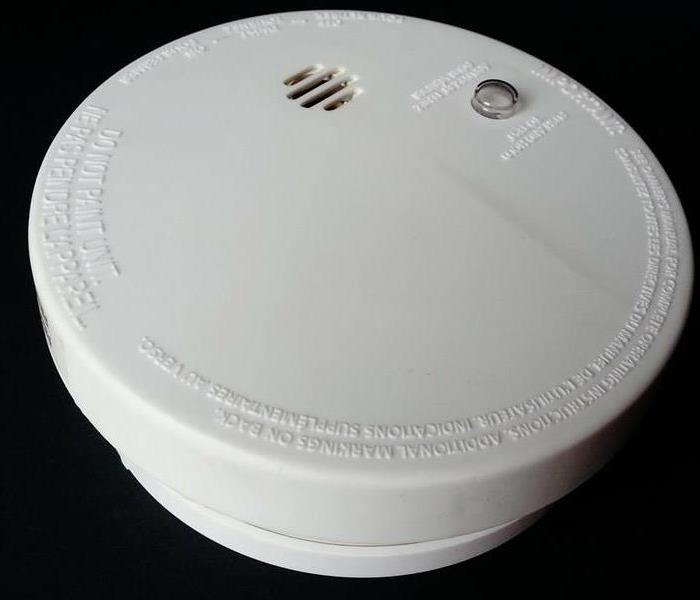
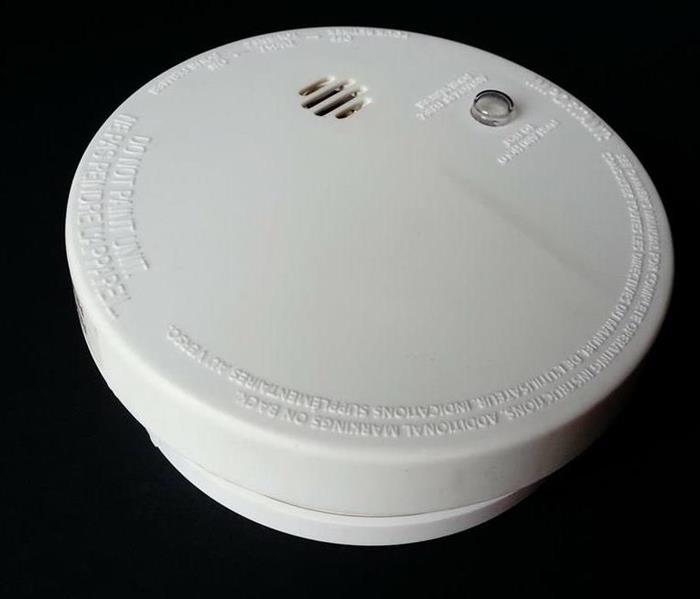
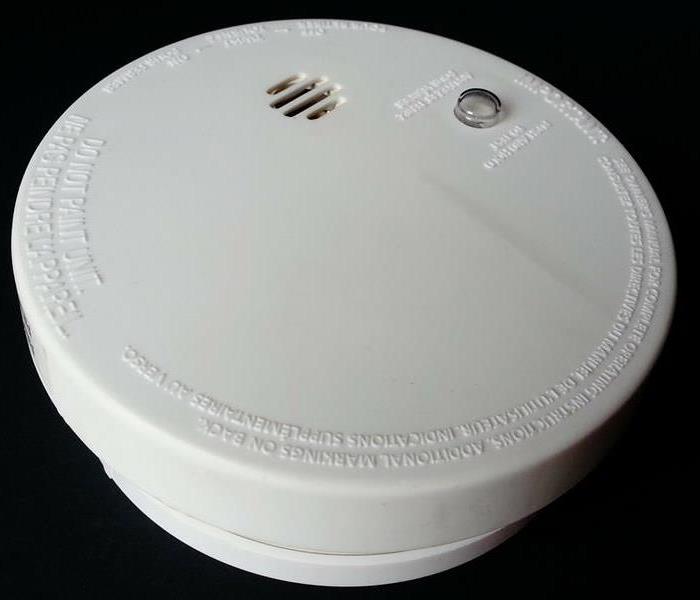
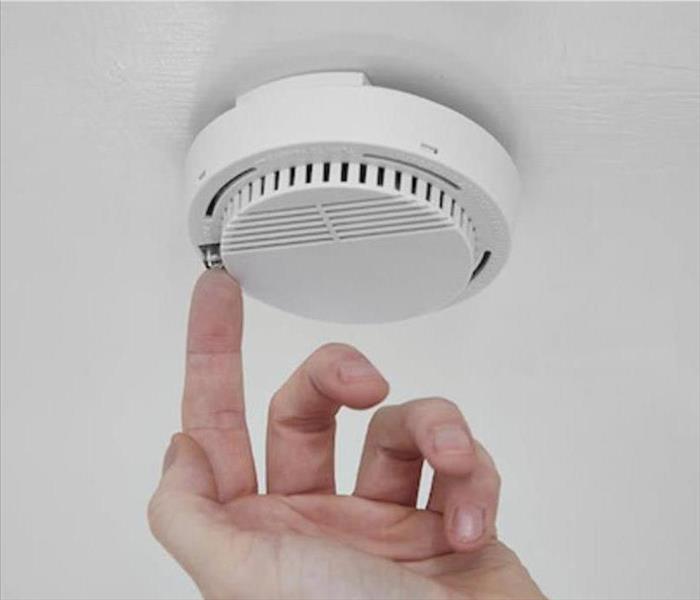
When it comes to your family's safety, smoke detectors, and fire alarms can be some of the most important items in your home. These early warning devices can alert your family to fire and hazardous smoke while there is still time to evacuate, but they should be tested periodically to ensure they are working properly.
Electronic devices are not faultless. The batteries will die and other parts of the smoke alarm can wear out over time. Regularly testing them and replacing the batteries (or the entire device) can help keep your family safe in the event of a house fire.
Be sure to read your smoke detector's owner's manual - you may need to check more often if any of the following apply: The detector often gives false alarms.
The alarm emits short beeps regularly without anyone touching it.
Frequent kitchen fumes often activate it, which can cause it to wear out faster.
For battery-operated: This type may be prone to defective or worn-out batteries. Monthly tests are very important.
Never put old batteries in your smoke detectors and fire detectors. Wired: These detectors are powered by your home's electrical system, but they usually have backup batteries so the device stays operational in the event of a power outage.
Wired smoke alarms should still be tested monthly to ensure both batteries and components are working properly.
You should always check the manufacturer's instructions for the correct test method for your smoke detector and fire alarm.
You may want to install additional detectors in areas where the alarm sound is low, muffled or weak. Press and hold the test button on the smoke detector. It may take a few seconds to go off, but a loud, deafening siren should come out of the smoke detector when the button is pressed. If not, then replace it.
If it has been more than six months since you last changed the batteries (whether your detector is battery-powered or wired), replace it now and test the new batteries one last time to ensure they are working properly, regardless of the test result.
You should also look at your smoke alarm to make sure it's not dust or any other substance blocking the grilles and causing it to not work even if the batteries are new. Note that smoke detectors typically have a 10-year lifespan.
Now that you know how to prevent your fire alarms from not working, do keep in mind that if they are not working correctly this can cause a house fire. We don't want this to happen at all, but if it does SERVPRO is here to help! We do fire damage remediation at its best.
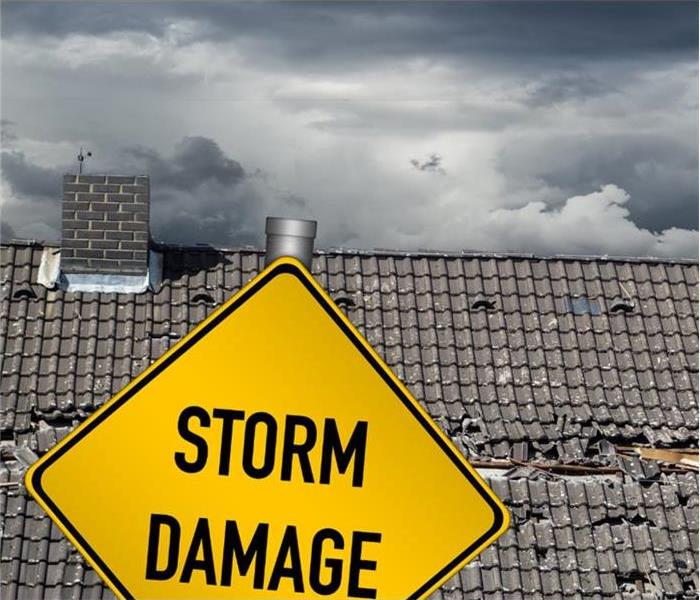
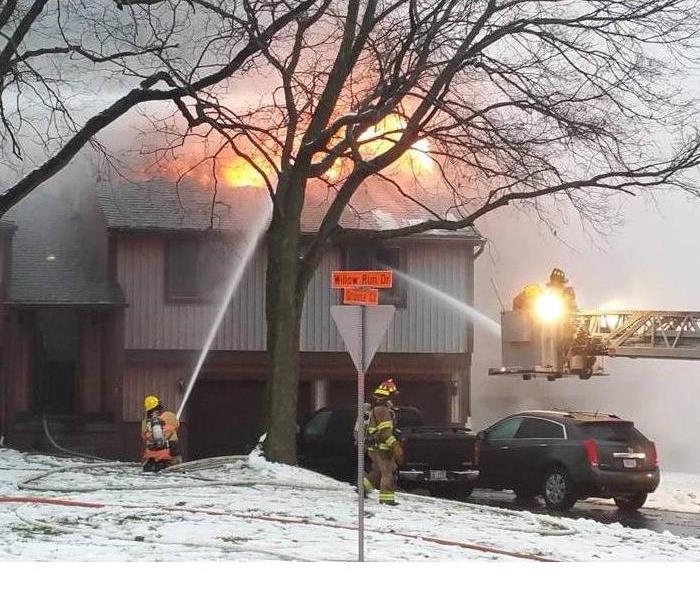
Steps to Take When Dealing with Storm-Related Damage
We have all been there. That moment we have buckled down because the weather radio and emergency broadcast system have broadcasted that a storm is on its way. The aftermath can sometimes be devastating. However, storm damage in TN doesn't seem to have any shortage of supply.
Here are steps that can help navigate you:
1. What is the damage?
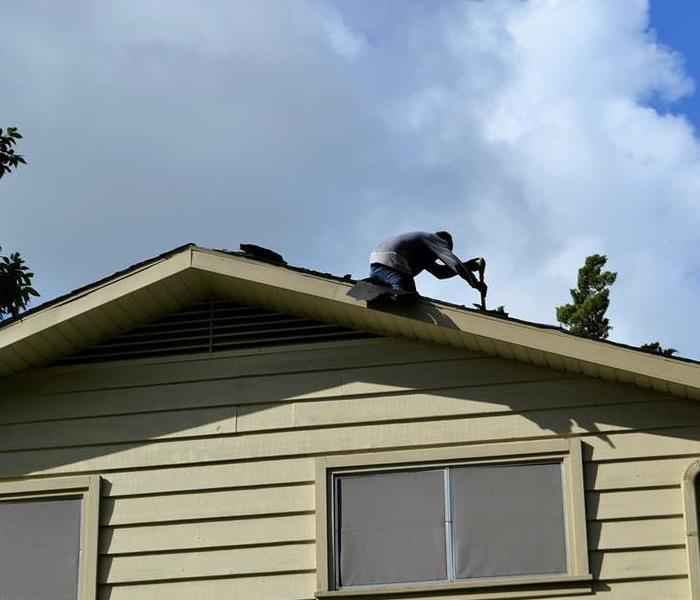
Take an evaluation of the storm damage. Check your siding, roofing, and structure of the home.
2. Find someone to help you.
You will need 3 people here: A contractor, SERVPRO, and an Insurance Agency.
3. Obtain all your reports and submit your claims.
4. Line up and schedule the work and cleanup.
Remember, SERVPRO of MMP is here to help. Thank You!
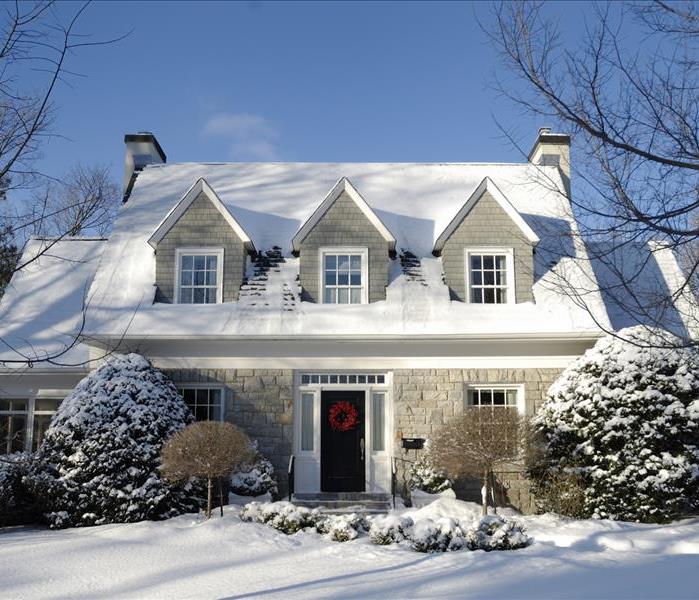
Packing up your entire home and relocating can be extremely overwhelming. In order to make the move a smooth transition, there are a few things to check up on at your new home prior to moving in. Avoid any extra stress by checking off these five tasks for your new home.
Change the Locks
Changing the locks on all your doors is an important step to feeling safe in your new home. As kind as the previous owners may have been, it’s nice knowing there isn’t anyone out there but you that has a key to your home. It’s best to schedule this task before moving all your belongings in to avoid any time period of unsecured doors during the transition.
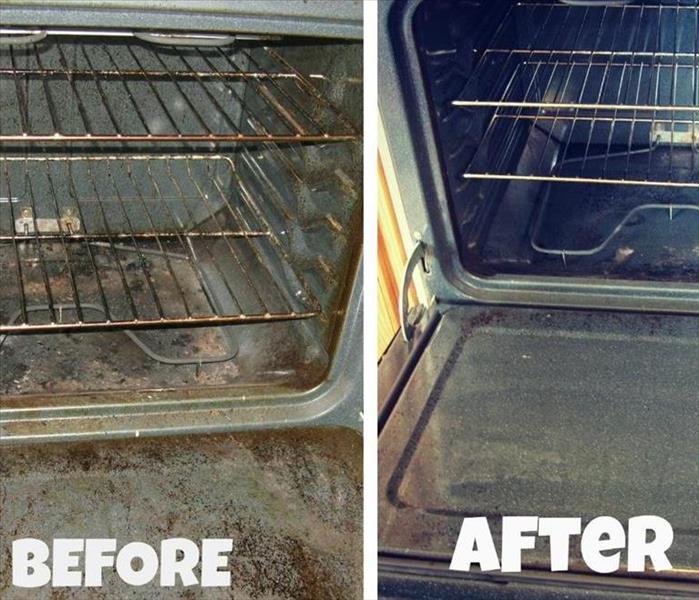
Deep Clean the House
Hopefully, the previous owners took care of cleaning and preparing the house when they first moved out, but there are some areas to check on just to be sure the place is in pristine condition. It’s easiest to clean the hard-to-reach places before you move in and there aren’t any objects in the way. Some areas to deep clean might include inside cupboards, the washer and dryer, fridge, oven, stove, and dishwasher.
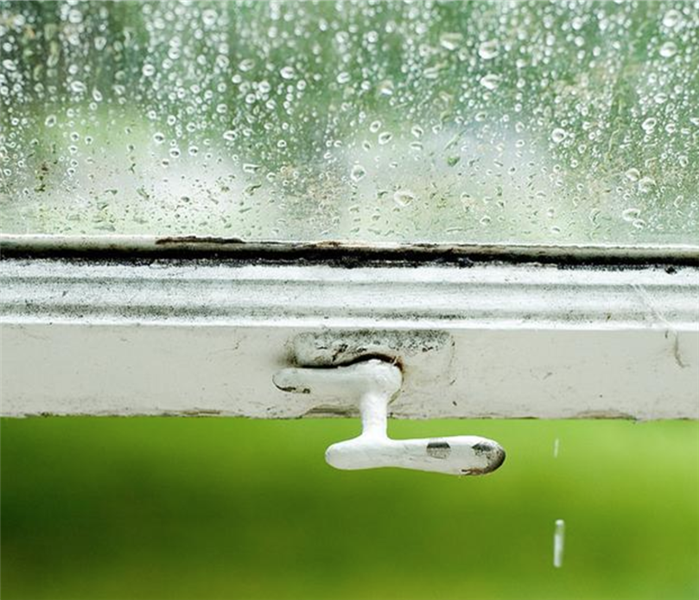
Inspect for Mold
The last thing you need is to settle into your new home only to discover it has a mold issue. The minimum you should do is at least inspect for leaks, odors, or visible signs of mold throughout the house. However, now is the prime time to schedule a mold inspection and cleanup to detect the air quality of your home and find any hidden mold.
Check Smoke and Carbon Monoxide Detectors
Speaking of air quality, make sure to check the carbon monoxide detector and smoke alarms throughout the house. It’s a relief knowing that your home is equipped with up-to-date and working monitors for you and your family’s safety. If the house doesn’t have a carbon monoxide detector yet, then now is the perfect time to purchase and install one before moving in.
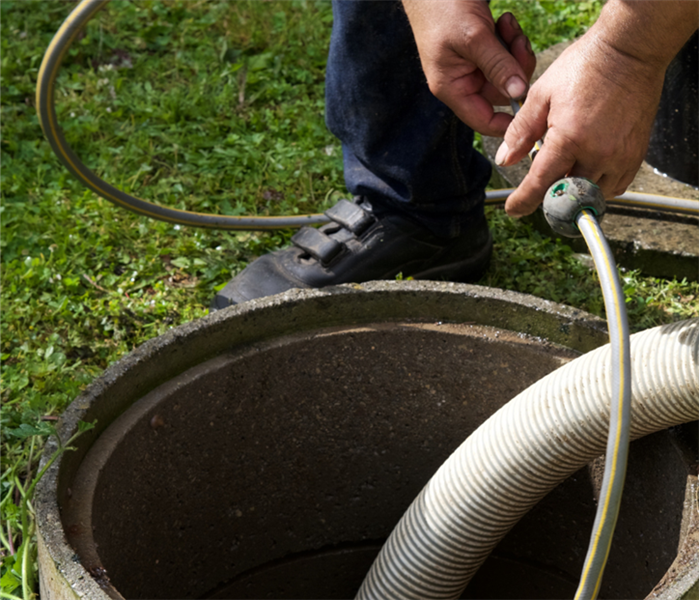
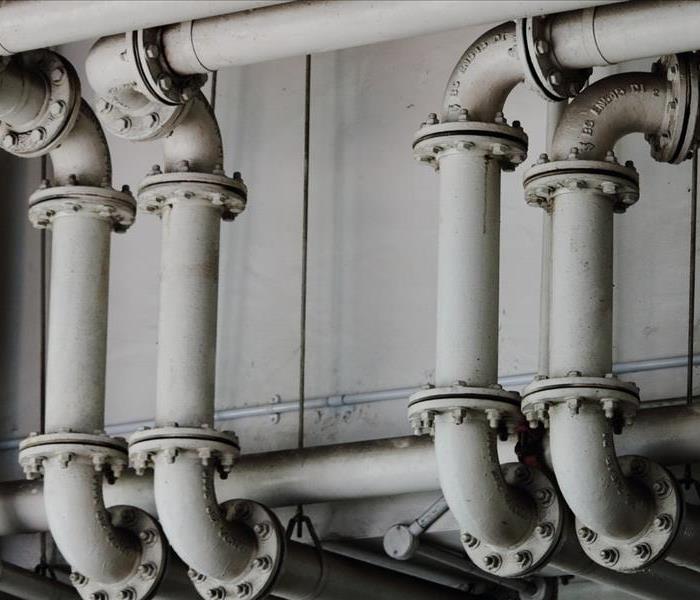
Inspect the Plumbing
Make sure that the plumbing is in mint condition before moving in rather than discovering it too late. Check for leaks and any signs of water damage, and make any appointments you need to fix leaks and issues. This will not only make things run smoother, but it will also save your water bill. While you’re at it, take a look at the water heater as well. Now is a good time to flush your water heater of sediment and check if it has a water softener as well.
There is already a long list of to-dos when it comes to moving out of your house, but many things go overlooked and forgotten when it comes to the new house. Give careful consideration to the different tasks listed to make your new major change a little easier. You will feel confident and relieved moving into your new home knowing you’ve changed the locks, deep cleaned the place, inspected for mold, checked the air and alarms, and inspected the plumbing.
Our little community may be small in size but large in impact and culture. Our small but thriving areas make living in East Tennessee possibly one of the greatest places in America to live.
One great thing about our little community is that we love big. We stand behind one another in good times and in bad. We support and encourage one another. When one part of our community is struggling or faces disaster, we come alongside them as one unit in helping restore them to their previous state.
At SERVPRO, we are proud of our community. We are privileged to come alongside it and to serve the people that live and do business inside the county lines. We are sure that there are tons of other small towns and communities like ours, but we wouldn't trade ours for the world.
We hope that our community knows that if they face fire, water, mold, or storm damage, that we will be there fast to get them back on their feet in no time. But, the best part is, we are better together!
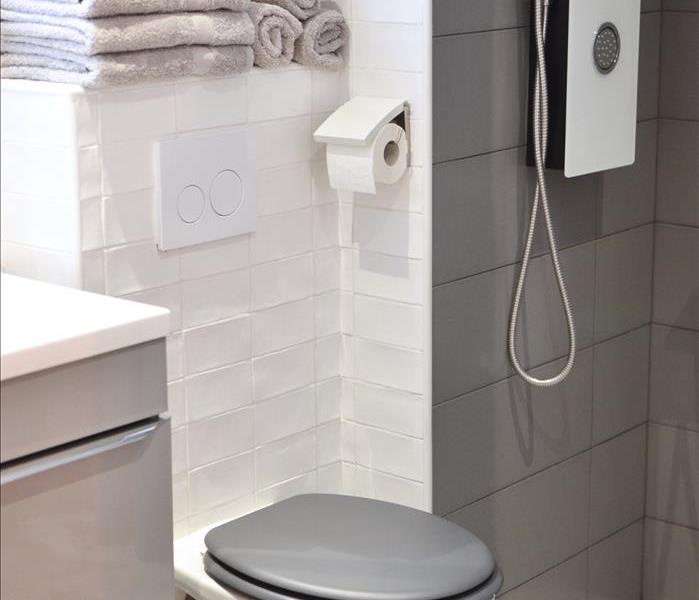
Got a leaky toilet? Believe it or not, it’s a common problem. Continue reading to find out the likeliest causes and the easiest ways to remedy the situation.
First, some of the washers between the bowl and tank may have failed. Shut off the supply valve, empty the tank with a flush, then remove the nuts, bolts, and washers from the underside of the tank. Lift the tank, position it on its side, and see if the washers need replacing.
Another culprit may be faulty fasteners securing the fill valve and ballcock to the bottom of the tank. Before you replace those parts, however, first try simply tightening the nuts and bolts holding them in place—that often solves the problem.
On the other hand, if the leak seems to be coming from the base of the tank, chances are the wax ring that seals the toilet to the floor has failed. Replacing the wax ring is a much bigger job, since it involves removing the entire toilet from its base. If you decide to replace the wax ring yourself—preferably with a friend to help with the lifting—take the extra step of also replacing any bolts that show signs of corrosion. And, once you have the toilet back in place, don’t forget to add a bead of caulk around the base.
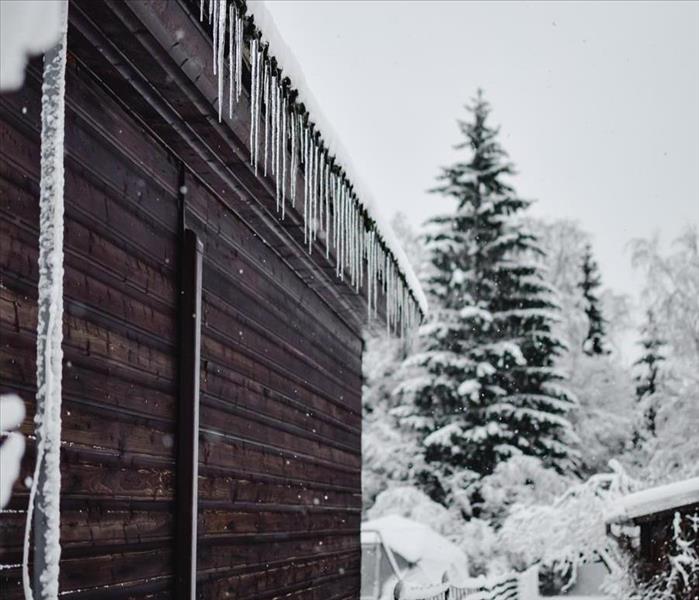
Have you prepared your plumbing for winter? Damage caused from burst pipes can cost you thousands, of dollars. Not all damage is covered by homeowner’s insurance. We want to make sure you know some simple steps to get you prepared. Follow these 7 simple steps to get off to a great start. Find yourself in a bind? Brogdon Plumbing is here to help! Give us a call.
Prepare your outdoor faucets. Remove and drain your water hoses and store them indoors before the first freeze.
Fix leaks now. Inspect your pipes and have any/all leaks repaired.
Wrap any pipes in unheated areas of the home. This is crucial, for mobile homes. Visit the hardware store and grab some heat tape and/or pipe insulation. There are also easy to install kits, that include a thermostat. These kits can help you in the event of frigid temps for long periods. Don’t hesitate to ask an employee for recommendations. Protecting the pipes in your home, from low temperatures is THE single most important thing that you can do.
Tune up your water heater. You will want to drain and maintain your water heater at this time every year. It’s a little harder to do yourself but we are glad to help! Just give us a call.
Service your furnace. Make sure you have clean filters and call a professional to help with major repairs. Heat means pipes could freeze. If they do, call us!
Selling your home or heading south for winter? Shut off the water, in your home, completely and consider contacting us to drain your pipes. Any water left in your pipes is at risk of freezing and causing pipes to bust. If nobody is home, the damage can be widespread and severe. Don’t take chances.
Call Brogdon plumbing! If you have questions or concerns, contact us for help. We will gladly help with your winter pipe preparations!
What else can you do to prepare your plumbing for winter? Share your personal tips/tricks with us.
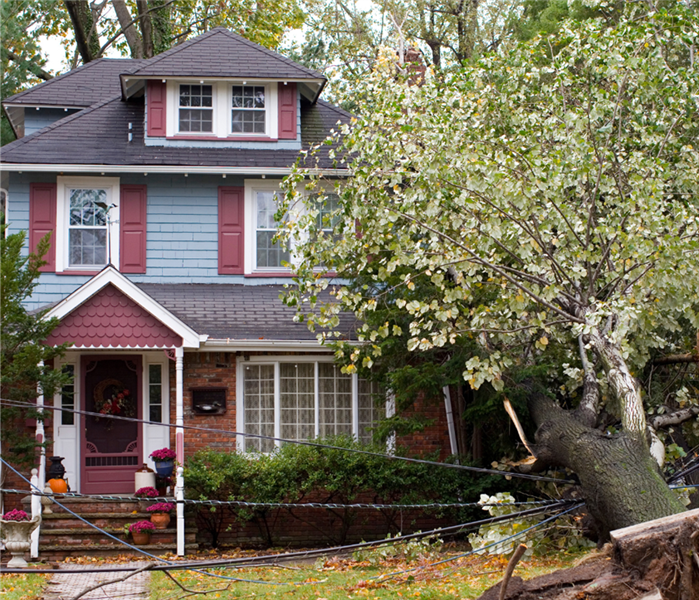
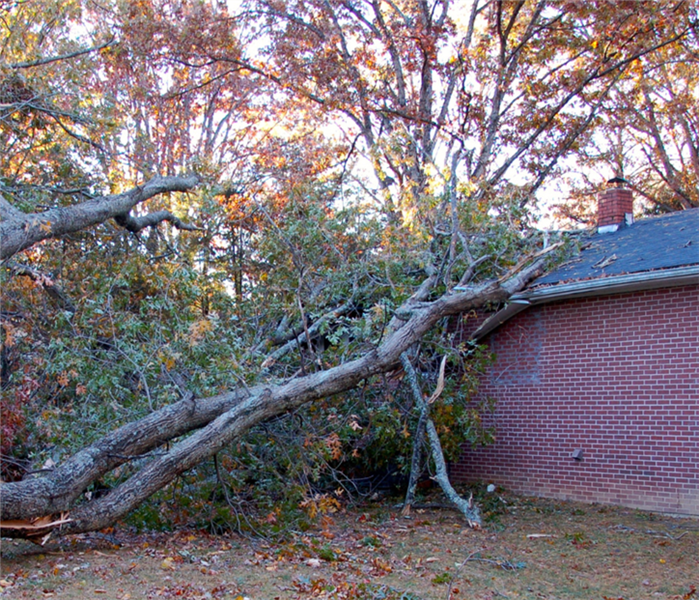
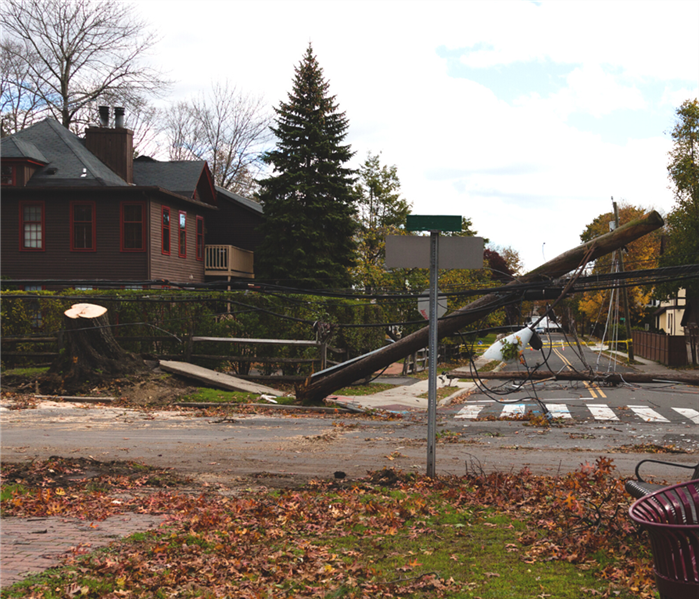
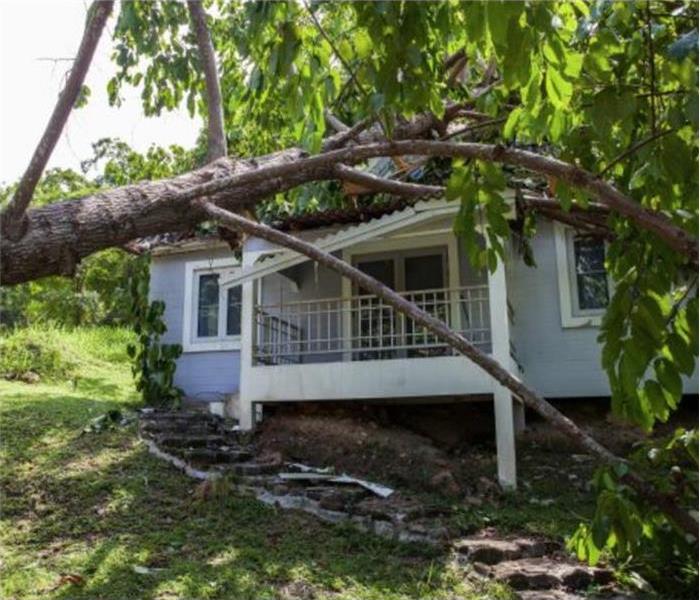
According to OSHA (the Occupational Safety and Health Administration), more people are killed by falling trees every year (100+) than are killed by sharks (about 4-7 per year).
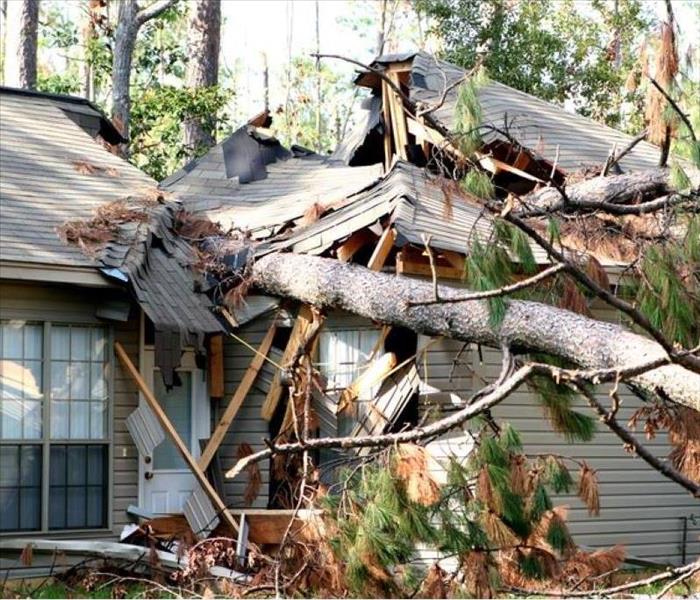
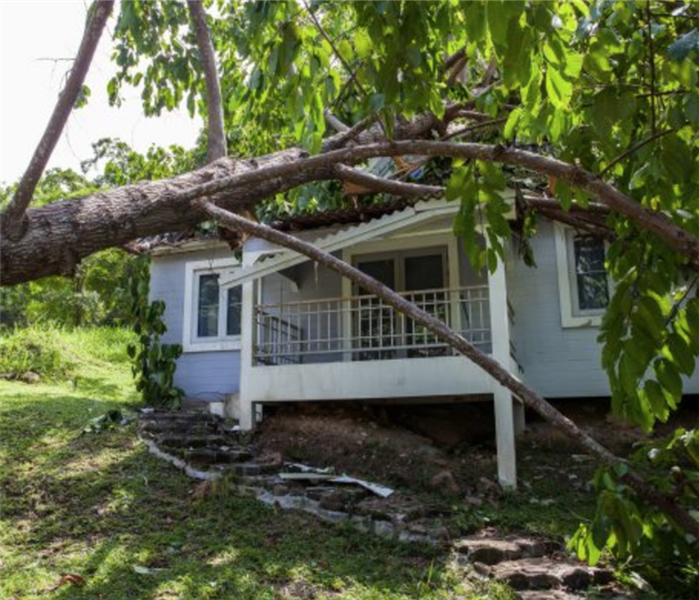
Falling trees kill or injure more people than lightning. Although the numbers of tree fall fatalities are relatively low compared with other fatalities, the numbers for property damage from falling trees is much higher, ranging in the hundreds of thousands. According to the National Storm Damage Center, falling trees are the main causes of roof damage, costing more than $1 billion in property damage each year. So, chances are if you are a homeowner with lots of trees in your yard, you may encounter tree damage of some kind in your lifetime and in that situation, you will need to know what to do if a tree falls on your home:
If you’re in the house when a tree falls, leave the house and the property as soon as possible. Beware of downed electrical lines, and if you have gas lines, do not use your cell phone to call for help until you are away from the house. Use the safest route possible to get away from the house.
Call 911 or emergency services. They will send fire or appropriate responders to ensure the house is safe. If anyone has been injured or killed, let the dispatcher know this when you call. Remain at the scene unless you are injured. Seek medical care or wait for an ambulance if you have been injured.
Call your insurance company as soon as possible so they can agree to cover any emergency costs, removal or other details covered in your homeowner’s policy. If your tree has fallen on your neighbor’s property, your neighbor will need to make a claim on their insurance policy, but your insurance company should be aware of the damage as well.
Contact a roofing contractor, tree surgeon, tree removal company, builder or any other home professional to examine any damage, to remove the tree and secure the home so there is no additional damage to your property or possessions. Even if the tree misses the house, tree roots can extend under a property, causing damage to the foundation. So, have your builder or contractor check inside the house for cracks in the drywall, or the outside for cracks in the brickwork. Lowes’ experts say, “Don’t attempt to deal with the tree removal or roof repair yourself. Even if the fallen branches or tree seems small, you never know the extent of the storm damage or if the framework or structural integrity if your home has been compromised.”
If you are unable to live in the house during repairs, make sure any damaged areas are secured to prevent looting and theft. Put valuables in temporary storage, and board up broken windows, holes in the wall etc.
Once the tree has been dealt with, what steps can you take to ensure it doesn’t happen again?
Make sure your trees are healthy
Other than raking leaves, building treehouses, or picking up fallen branches, twigs and debris, most homeowners don’t think about their trees very often. Even fewer know the signs of an unhealthy, dying, or dead branch or tree. Here a few signs from RTEC Treecare, one of the companies that take care of the trees at the mall in Washington, DC to pay attention to:
Large branches attached with tight, V-shaped forks. These branches are prone to failure and may need to be lightened or removed.
Cracks in the trunk of the tree or in major limbs
Fungi growing from the base of your tree or under its canopy. This could be a sign of root decay.
Branches that are pointing/hanging downwards these damaged branches can easily fall during storms.
Partially attached limbs hung up in the high branches that could fall.
Large cavities in the tree trunk.
Wires in contact with tree branches.
Other things you can do to ensure you and your family are safe from tree falls:
Have an arborist inspect your trees every year, or whenever there’s been an injury or damage to a tree – such as a lightning strike, hit by a motor vehicle, or a pest infestation.
Do preventative pruning, and ask your neighbors to do the same. Preventative pruning reduces wind resistance and removes dead branches. This reduces the risk of the tree or the tree’s limbs snapping under the force of wind gusts.
Make sure your trees are mulched correctly if you mulch them. Mulch protects the root system of the tree and allows water and nutrients to drain down through the soil to the roots. This keeps the root system healthy which helps the tree stay strong during storms. Unhealthy root systems can lead to trees uprooting and snapping in heavy winds.
Wrap your young trees to prevent sunscald. Sunscald is winter damage that is commonly seen on young trees, newly planted trees, and thin-barked trees (cherry, crabapple, honey locust, linden, maple, mountain ash, plum). Sunscald causes the tree bark to dry and crack.
Legal issues regarding who pays for damages or home repairs etc. to your house from a falling tree in your yard, or from a neighbor’s yard, vary greatly from state-to-state, county to county and insurer to insurer. It’s best to talk to your insurance agent before anything happens to determine if you are covered in the event of a tree fall.
According to OSHA (the Occupational Safety and Health Administration), more people are killed by falling trees every year (100+) than are killed by sharks (about 4-7 per year).
Falling trees kill or injure more people than lightning. Although the numbers of tree fall fatalities are relatively low compared with other fatalities, the numbers for property damage from falling trees is much higher, ranging in the hundreds of thousands. According to the National Storm Damage Center, falling trees are the main causes of roof damage, costing more than $1 billion in property damage each year. So, chances are if you are a homeowner with lots of trees in your yard, you may encounter tree damage of some kind in your lifetime and in that situation, you will need to know what to do if a tree falls on your home:
If you’re in the house when a tree falls, leave the house and the property as soon as possible. Beware of downed electrical lines, and if you have gas lines, do not use your cell phone to call for help until you are away from the house. Use the safest route possible to get away from the house.
Call 911 or emergency services. They will send fire or appropriate responders to ensure the house is safe. If anyone has been injured or killed, let the dispatcher know this when you call. Remain at the scene unless you are injured. Seek medical care or wait for an ambulance if you have been injured.
Call your insurance company as soon as possible so they can agree to cover any emergency costs, removal or other details covered in your homeowner’s policy. If your tree has fallen on your neighbor’s property, your neighbor will need to make a claim on their insurance policy, but your insurance company should be aware of the damage as well.
Contact a roofing contractor, tree surgeon, tree removal company, builder or any other home professional to examine any damage, to remove the tree and secure the home so there is no additional damage to your property or possessions. Even if the tree misses the house, tree roots can extend under a property, causing damage to the foundation. So, have your builder or contractor check inside the house for cracks in the drywall, or the outside for cracks in the brickwork. Lowes’ experts say, “Don’t attempt to deal with the tree removal or roof repair yourself. Even if the fallen branches or tree seems small, you never know the extent of the storm damage or if the framework or structural integrity if your home has been compromised.”
If you are unable to live in the house during repairs, make sure any damaged areas are secured to prevent looting and theft. Put valuables in temporary storage, and board up broken windows, holes in the wall etc.
Once the tree has been dealt with, what steps can you take to ensure it doesn’t happen again?
Make sure your trees are healthy
Other than raking leaves, building treehouses, or picking up fallen branches, twigs and debris, most homeowners don’t think about their trees very often. Even fewer know the signs of an unhealthy, dying, or dead branch or tree. Here a few signs from RTEC Treecare, one of the companies that take care of the trees at the mall in Washington, DC to pay attention to:
Large branches attached with tight, V-shaped forks. These branches are prone to failure and may need to be lightened or removed.
Cracks in the trunk of the tree or in major limbs
Fungi growing from the base of your tree or under its canopy. This could be a sign of root decay.
Branches that are pointing/hanging downwards these damaged branches can easily fall during storms.
Partially attached limbs hung up in the high branches that could fall.
Large cavities in the tree trunk.
Wires in contact with tree branches.
Other things you can do to ensure you and your family are safe from tree falls:
Have an arborist inspect your trees every year, or whenever there’s been an injury or damage to a tree – such as a lightning strike, hit by a motor vehicle, or a pest infestation.
Do preventative pruning, and ask your neighbors to do the same. Preventative pruning reduces wind resistance and removes dead branches. This reduces the risk of the tree or the tree’s limbs snapping under the force of wind gusts.
Make sure your trees are mulched correctly if you mulch them. Mulch protects the root system of the tree and allows water and nutrients to drain down through the soil to the roots. This keeps the root system healthy which helps the tree stay strong during storms. Unhealthy root systems can lead to trees uprooting and snapping in heavy winds.
Wrap your young trees to prevent sunscald. Sunscald is winter damage that is commonly seen on young trees, newly planted trees, and thin-barked trees (cherry, crabapple, honey locust, linden, maple, mountain ash, plum). Sunscald causes the tree bark to dry and crack.
Legal issues regarding who pays for damages or home repairs etc. to your house from a falling tree in your yard, or from a neighbor’s yard, vary greatly from state-to-state, county to county and insurer to insurer. It’s best to talk to your insurance agent before anything happens to determine if you are covered in the event of a tree fall.
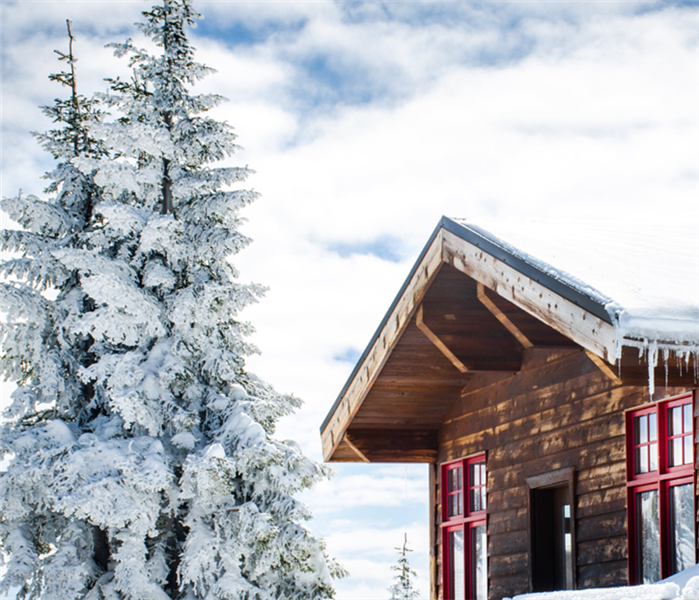
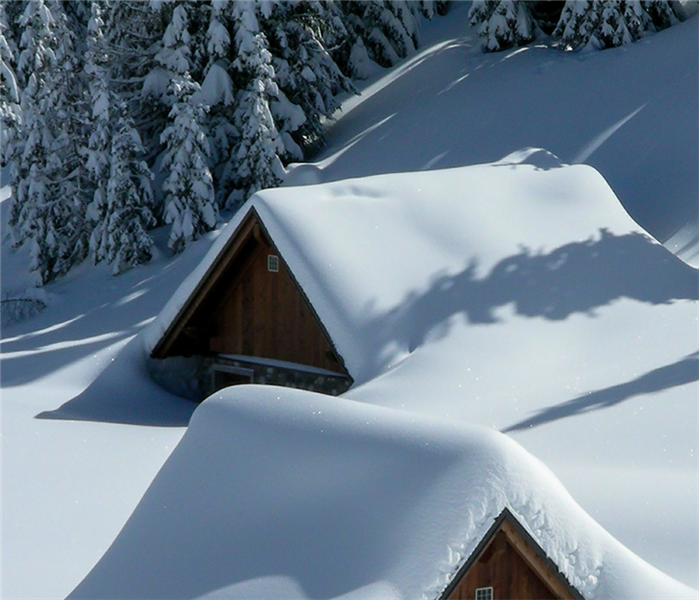
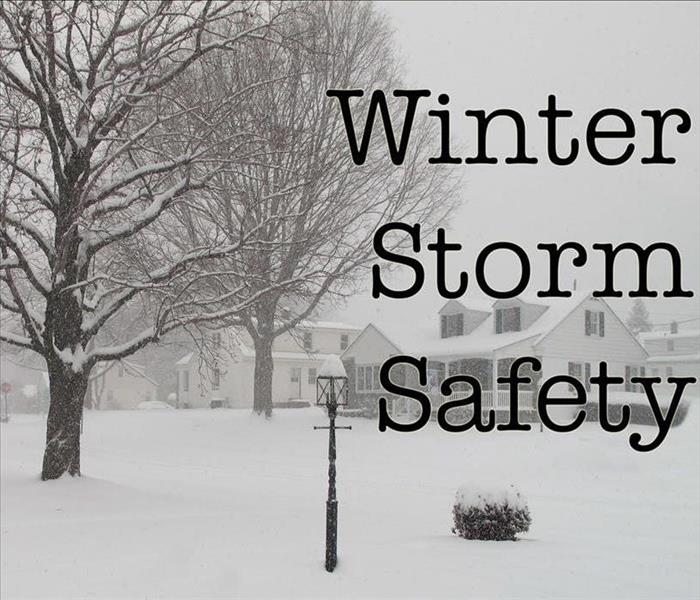
Each year, hundreds of Americans are injured or killed by exposure to cold, vehicle accidents on wintry roads, and fires caused by the improper use of heaters. Learn what to do to keep your loved ones safe during blizzards and other winter storms!
Take immediate precautions if you hear these words on the news:
Winter Storm WARNING: Life-threatening, severe winter conditions have begun or will begin within 24 hours.
Blizzard WARNING: Sustained winds or frequent gusts of 35 miles per hour or greater, plus considerable falling or blowing snow reducing visibility to less than a quarter mile, expected to prevail for three hours or longer.
More winter storm words to listen for:
WIND CHILL Temperature: How cold people and animals feel when outside. As wind increases, heat is carried away from your body at a faster rate, driving down your body temperature and making you feel much colder. The wind chill temperature is not the actual temperature but rather how wind and cold feel on exposed skin.
Winter Storm OUTLOOK: Winter storm conditions possible in the next two to five days. Stay tuned to local media for updates.
Winter Storm WATCH: Winter storm conditions possible within the next 36 to 48 hours. Review your winter storm plans and stay informed about weather conditions.
Winter Weather ADVISORY: Winter weather conditions expected to cause significant inconveniences and may be hazardous but not life-threatening if you are cautious.
Talk with your family about what to do if a winter storm watch or warning is issued. Discussing winter storms ahead of time helps reduce fear, particularly for young children.
Have your vehicle winterized before the winter storm season to decrease your chance of being stranded in cold weather.
Have a mechanic check your battery, antifreeze, wipers and windshield washer fluid, ignition system, thermostat, lights, flashing hazard lights, exhaust system, heater, brakes, defroster, and oil.
Install good winter tires with adequate tread. All-weather radials are usually adequate but some jurisdictions require vehicles to be equipped with chains or snow tires with studs.
Keep in your vehicle:
- A windshield scraper and small broom
- A small sack of sand for generating traction under wheels and a set of tire chains or traction mats
- Matches in a waterproof container
- A brightly colored (preferably red) cloth to tie to the antenna
- An emergency supply kit, including warm clothing.
Keep your vehicle’s gas tank full so you can leave right away in an emergency and to keep the fuel line from freezing.
Keep a supply of non-clumping kitty litter to make walkways and steps less slippery.
Service snow removal equipment before the winter storm season and maintain it in good working order.
Keep handy a warm coat, gloves or mittens, hat, water-resistant boots, and extra blankets and warm clothing for each member of the household.
Protecting your pets & animals
Bring your companion animals indoors.
- Ensure that you have supplies for clean up for your companion animals, particularly if they are used to eliminating outdoors (large plastic bags, paper towels, and extra cat litter).
Create a place where your other animals can be comfortable in severe winter weather:
- Horses and livestock should have a shelter where they can be protected from wind, snow, ice, and rain.
- Grazing animals should have access to a protected supply of food and non-frozen water.
Be aware of the potential for flooding when snow and ice melt and be sure that your animals have access to high ground that is not impeded by fencing or other barriers. You may not be able to get to them in time to relocate them in the event of flooding.
- Ensure that any outbuildings that house or shelter animals can withstand wind and heavy snow and ice.
- Install snow fences in rural areas to reduce drifting snow on roads and paths, which could block access to homes, barns, and animals' feed and water.
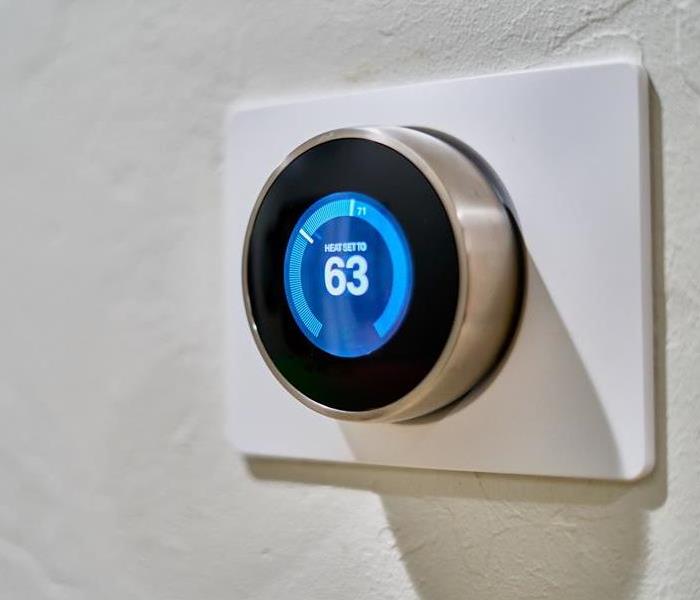
Make sure your home heating sources are installed according to local codes and permit requirements and are clean and in working order.
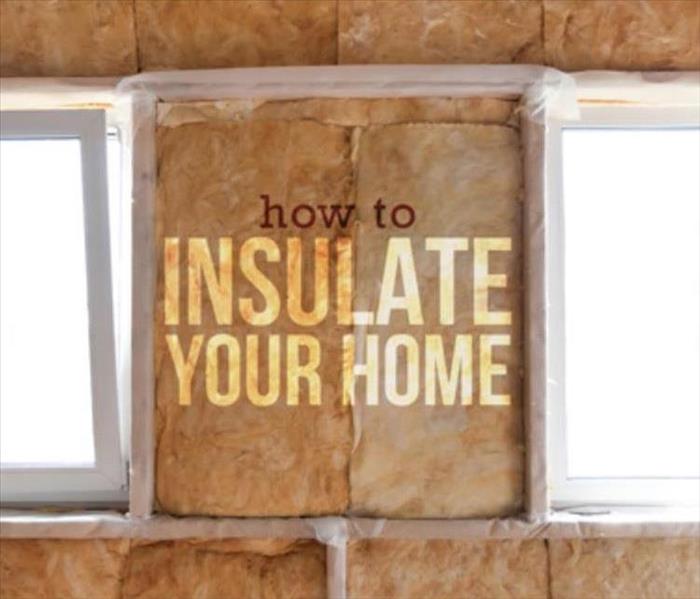
Make sure your home is properly insulated. Caulk and weather-strip doors and windowsills to keep cold air out.
Install storm windows or cover windows with plastic from the inside to provide an extra layer of insulation to keep cold air out.
Consider buying emergency heating equipment, such as a wood- or coal-burning stove or an electric or kerosene heater.
- Stoves must be properly vented and in good working order. Dispose of ashes safely. Keep a supply of wood or coal on hand.
- Electric space heaters, either portable or fixed, must be certified by an independent testing laboratory. Plug a heater directly into the wall socket rather than using an extension cord and unplug it when it is not in use.
- Use a kerosene heater only if permitted by law in your area; check with your local fire department. Use only the correct fuel for your unit. Properly ventilate the area. Refuel the unit outdoors only, and only when the unit is cool. Follow all of the manufacturer's instructions.
Consider storing sufficient heating fuel. Regular fuel sources may be cut off. Be cautious of fire hazards when storing any type of fuel.
If you have a fireplace, consider keeping a supply of firewood or coal. Be sure the fireplace is properly vented and in good working order and that you dispose of ashes safely.
Consider installing a portable generator, following our safety tips to avoid home fires and carbon monoxide poisoning
Consider purchasing flood insurance, if you live in a flood-prone area, to cover possible flood damage that may occur during the spring thaw. Homeowners' policies do not cover damage from floods. Ask your insurance agent about the National Flood Insurance Program (NFIP) if you are at risk. More information on NFIP is available at www.fema.gov/nfip.
Right before a blizzard / winter stormIf you do nothing else:
Listen to local area radio, NOAA radio or TV stations for the latest information and updates.
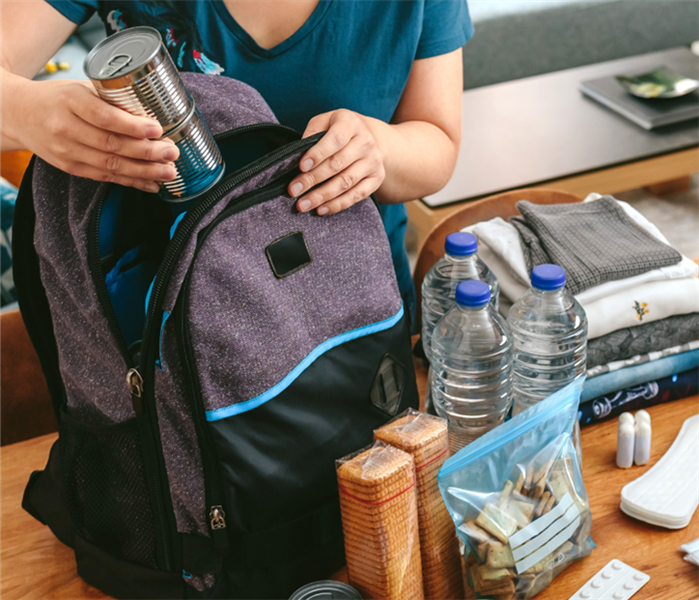
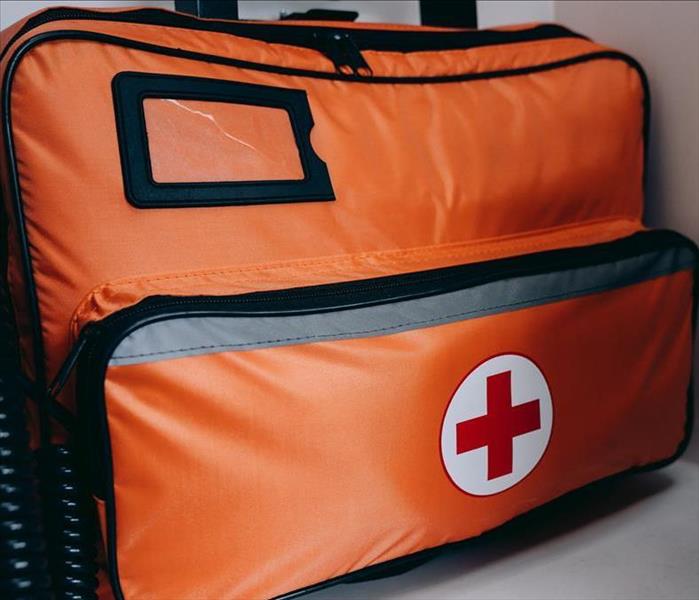
Check emergency kit and replenish any items missing or in short supply, especially medications and medical supplies. Keep it nearby.
Be sure you have ample heating fuel.
If you have alternative heating sources, such as fireplaces, wood- or coal-burning stoves, or space heaters, be sure they are clean and in working order.
Check that your fire extinguisher(s) is in good working order, and replace it if necessary.
Bring your companion animals inside and ensure that your horses and livestock have blankets if appropriate and unimpeded access to shelter, food, and non-frozen water.
During
Stay Safe During a Winter Storm
Staying Safe During a Winter Storm or Blizzard
Stay indoors and wear warm clothes. Layers of loose-fitting, lightweight, warm clothing will keep you warmer than a bulky sweater. If you feel too warm, remove layers to avoid sweating; if you feel chilled, add layers.
Listen to a local station on battery-powered radio or television or to NOAA Weather Radio for updated emergency information.
Bring your companion animals inside before the storm begins.
Move other animals to sheltered areas with a supply of non-frozen water. Most animal deaths in winter storms are caused by dehydration.
Eat regularly. Food provides the body with energy for producing its own heat.
Keep the body replenished with fluids to prevent dehydration. Drink liquids such as warm broth or juice. Avoid caffeine and alcohol. Caffeine, a stimulant, accelerates the symptoms of hypothermia. Alcohol, such as brandy, is a depressant and hastens the effects of cold on the body. Alcohol also slows circulation and can make you less aware of the effects of cold. Both caffeine and alcohol can cause dehydration.
Conserve fuel. Winter storms can last for several days, placing great demand on electric, gas, and other fuel distribution systems (fuel oil, propane, etc.). Lower the thermostat to 65° F (18° C) during the day and to 55° F (13° C) at night. Close off unused rooms, and stuff towels or rags in cracks under the doors. Cover the windows at night.
Check on relatives, neighbors, and friends, particularly if they are elderly or if they live alone.
Staying Safe OutsideIf you must go outside, protect yourself from winter storm hazards:
Wear layered clothing, mittens or gloves, and a hat. Outer garments should be tightly woven and water repellent. Mittens or gloves and a hat will prevent the loss of body heat.
Cover your mouth to protect your lungs from severely cold air. Avoid taking deep breaths; minimize talking.
Watch for signs of hypothermia and frostbite.
Keep dry. Change wet clothing frequently to prevent a loss of body heat. Wet clothing loses much of its insulating value and transmits heat rapidly away from the body.
Stretch before you go out. If you go out to shovel snow, do a few stretching exercises to warm up your body. This will reduce your chances of muscle injury.
Avoid overexertion, such as shoveling heavy snow, pushing a vehicle, or walking in deep snow. The strain from the cold and the hard labor may cause a heart attack. Sweating could lead to a chill and hypothermia.
Walk carefully on snowy, icy sidewalks. Slips and falls occur frequently in winter weather, resulting in painful and sometimes disabling injuries.
If you must go out during a winter storm, use public transportation if possible. About 70 percent of winter deaths related to ice and snow occur in automobiles.
Driving in Winter Conditions
Check your vehicle emergency supplies kit and replenish it if necessary.
Bring enough of the following for each person:
- Blankets or sleeping bags
- Rain gear, extra sets of dry clothing, mittens, socks, and wool hats
- Newspapers for insulation
- Plastic bags for sanitation
- Canned fruit, nuts, and high energy snacks (Include a non-electric can opener if necessary)
- Warm broth in a thermos and several bottles of water
- Keep a cell phone or two-way radio with you. Make sure the battery is charged.
- Plan to travel during daylight and, if possible, take at least one other person with you.
Let someone know your destination, your route, and when you expect to arrive. If your vehicle gets stuck along the way, help can be sent along your predetermined route.
Before leaving, listen to weather reports for your area and the areas you will be passing through, or call the state highway patrol for the latest road conditions.
Be on the lookout for sleet, freezing rain, freezing drizzle, and dense fog, which can make driving very hazardous
If You Become Stranded
Stay in the vehicle and wait for help. Do not leave the vehicle to search for assistance unless help is visible within 100 yards (91 meters). You can quickly become disoriented and confused in blowing snow.
Display a trouble sign to indicate you need help. Hang a brightly colored cloth (preferably red) on the radio antenna and raise the hood after snow stops falling.
Run the engine occasionally to keep warm. Turn on the engine for about 10 minutes each hour (or five minutes every half hour). Running the engine for only short periods reduces the risk of carbon monoxide poisoning and conserves fuel. Use the heater while the engine is running. Keep the exhaust pipe clear of snow, and slightly open a downwind window for ventilation.
Leave the overhead light on when the engine is running so that you can be seen.
Do light exercises to keep up circulation. Clap your hands and move your arms and legs occasionally. Try not to stay in one position for too long.
If more than one person is in the vehicle, take turns sleeping. If you are not awakened periodically to increase body temperature and circulation, you can freeze to death.
Huddle together for warmth. Use newspapers, maps, and even the removable floor mats for added insulation. Layering items will help trap more body heat.
Watch for signs of frostbite and hypothermia. Severe cold can cause numbness, making you unaware of possible danger.
Drink fluids to avoid dehydration, which can make you more susceptible to the ill effects of cold and to heart attacks.
Avoid overexertion. Cold weather puts an added strain on the heart. Shoveling snow or pushing a vehicle can bring on a heart attack or make other medical conditions worse.
After
After a Winter Storm
Continue listening to local news or a NOAA Weather Radio for updated information and instructions. Access to some parts of the community may be limited or roads may be blocked.
Help people who require special assistance—infants, elderly people, those without transportation, large families who may need additional help in an emergency situation, people with disabilities, and the people who care for them.
Avoid driving and other travel until conditions have improved.
Avoid overexertion. Heart attacks from shoveling heavy snow are a leading cause of death during the winter.
Check on your animals and ensure that their access to food and water is unimpeded by drifted snow, ice, or other obstacles.
If you are using a portable generator, take precautions against carbon monoxide poisoning, electrocution and fire.
Identifying & Treating Frostbite and Hypothermia
Frostbite and hypothermia are cold-related emergencies that may quickly become life or limb threatening.
Take these steps to avoid frostbite and hypothermia:
Be aware of the wind chill. Dress appropriately and avoid staying in the cold too long. Wear a hat and gloves when appropriate with layers of clothing. Avoid unnecessary exposure of any part of the body to the cold.
Drink plenty of warm fluids or warm water but avoid caffeine and alcohol. Stay active to maintain body heat.
Take frequent breaks from the cold.
Get out of the cold immediately if the signals of hypothermia or frostbite appear.
Frostbite
Frostbite is the freezing of a specific body part such as fingers, toes, the nose or earlobes.
Signs of frostbite:
Lack of feeling in the affected area
Skin that appears waxy, is cold to the touch, or is discolored (flushed, white or gray, yellow or blue)
What to do for frostbite:
Move the person to a warm place
Handle the area gently; never rub the affected area
Warm gently by soaking the affected area in warm water (100–105 degrees F) until it appears red and feels warm
Loosely bandage the area with dry, sterile dressings
If the person’s fingers or toes are frostbitten, place dry, sterile gauze between them to keep them separated
Avoid breaking any blisters
Do not allow the affected area to refreeze
Seek professional medical care as soon as possible
Hypothermia
Hypothermia is the cooling of the body caused by the failure of the body’s warming system. The goals of first aid are to restore normal body temperature and to care for any conditions while waiting for EMS personnel.
Signs of hypothermia:
Shivering
Numbness or weakness
Glassy stare
Apathy or impaired judgment
Loss of consciousness
What to do for hypothermia:
CALL 9-1-1 or the local emergency number
Gently move the person to a warm place
Monitor breathing and circulation
Give rescue breathing and CPR if needed
Remove any wet clothing and dry the person
Warm the person slowly by wrapping in blankets or by putting dry clothing on the person.
Hot water bottles and chemical hot packs may be used when first wrapped in a towel or blanket before applying. Do not warm the person too quickly, such as by immersing him or her in warm water.
Warm the core first (trunk, abdomen), not the extremities (hands, feet).
Recovering After a Winter Storm
Once you are physically safe, take time to ensure your family’s emotional and financial well-being.
A house can easily catch fire from the misuse of appliances and heating equipment to smoking in bedrooms. In Australia’s hot summer months, temperatures can soar past 40°C and teamed with a dry climate, conditions are ideal for fires to break out.
However you can take measures to avoid fire in home and ensure the safety of your family. Below are some of the most common causes of house fires, and some tips to take precautions.
1. Cooking Equipment
Pots and pans can overheat and cause a fire very easily if the person cooking gets distracted and leaves cooking unattended. Always stay in the room, or ask someone to watch your food, when cooking on hotplates.
2. Heating
Keep portable heaters at least one metre away from anything that could easily catch fire such as furniture, curtains, laundry, clothes and even yourself. If you have a furnace, get it inspected once a year to make sure it is working to safety standards.
3. Smoking in bedrooms
Bedrooms are best to be kept off limits for smoking. A cigarette that is not put out properly can cause a flame, as the butt may stay alit for a few hours. It could burst into flames if it came into contact with flammable materials, such as furniture. Did you know that fires started in the bedroom or lounge make up 73% of all house fire fatalities?¹
4. Electrical Equipment
An electrical appliance, such as a toaster can start a fire if it is faulty or has a frayed cord. A power point that is overloaded with double adapter plugs can cause a fire from an overuse of electricity. A power point extension cord can also be a fire hazard if not used appropriately. Double check the appliances and power points in your home.
5. Candles
Candles look and smell pretty, but if left unattended they can cause a room to easily burst into flames. Keep candles away from any obviously flammable items such as books and tissue boxes. Always blow a candle out before leaving a room. Did you know that in Perth last year 34 house fires started as a result of candles?²
6. Curious Children
Kids can cause a fire out of curiosity, to see what would happen if they set fire to an object. Keep any matches or lighters out of reach of children, to avoid any curiosity turned disaster. Install a smoke alarm in your child’s room and practice a home escape plan with your children and family in case there was a fire. Teach kids understand the “stop, drop, cover and roll” drill as well as knowing their address if they needed to call 000.
7. Faulty Wiring
Homes with inadequate wiring can cause fires from electrical hazards. Some signs to see if you’ve bad wiring are: 1) Lights dim if you use another appliance; 2) For an appliance to work, you have to disconnect another; 3) Fuses blow or trip the circuit frequently. Have a licenced electrician come and inspect you house, or contact your landlord if you have any of the above occurrences.
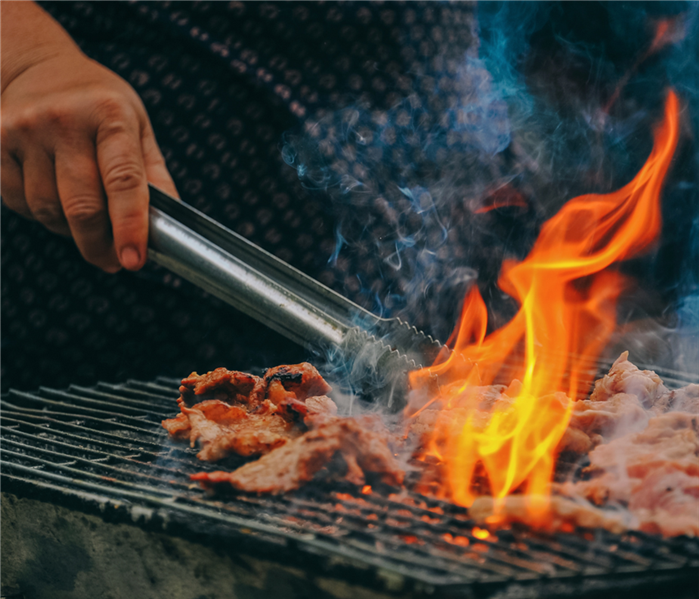
8. Barbeques
Barbeques are great for an outdoor meal, but should always be used away from the home, tablecloths or any plants and tree branches. Keep BBQs regularly maintained and cleaned with soapy water and clean any removable parts. Check the gas bottle for any leaks before you use it each time.
9. Flammable Liquids
If you have any flammable liquids in the home or garage such as petrol, kerosene or methylated spirits, keep them away from heat sources and check the label before storing. Be careful when pouring these liquids.
10. Lighting
Lamp shades and light fittings can build up heat if they are very close to light globes. Check around the house to make sure. Lamp bases can become a hazard if they are able to be knocked over easily, and so should be removed if they are. Check that down lights are insulated from wood panelling or ceiling timbers.
The above tips are a good guide to avoiding a fire in your home. However it’s a good idea to protect yourself with adequate home and content insurance, cover to ensure you are covered in the unlikely event a fire were to happen.
Heating, holiday decorations, winter storms and candles all contribute to an increased risk of fire during the winter months.
NFPA and the United States Fire Administration (USFA) are teaming up to help reduce your risk to winter fires and other hazards, including carbon monoxide and electrical fires. Learn more about these specific elements of winter fire safety to help keep you safe this winter.
Heating
Heating is the second leading cause of U.S. home fires, deaths and injuries. December, January and February are the peak months for heating fires. Space heaters are the type of equipment most often involved in home heating equipment fires, figuring in two of every five fires (40%).
Get additional information and resources on heating safety.
Often called the invisible killer, carbon monoxide (CO) is an odorless, colorless gas created when fuels such as gasoline, wood, coal, propane, etc. do not burn. In the home, heating and cooking equipment that burn fuel are potential sources of CO. Carbon Monoxide incidents are more common during the winter months, and in residential properties.
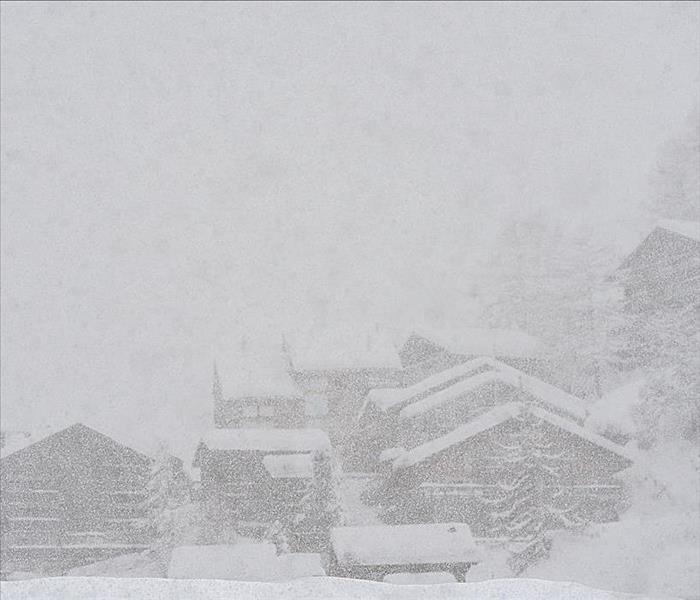
Most of the U.S. is at risk for winter storms, which can cause dangerous and sometimes life-threatening conditions. Blinding wind-driven snow, extreme cold, icy road conditions, downed trees and power lines can all wreak havoc on our daily schedules. Home fires occur more in the winter than in any other season, and heating equipment is involved in one of every six reported home fires, and one in every five home fire deaths.
Get additional information and resources on severe storms.
Generators
Portable generators are useful during power outages, however, many homeowners are unaware that the improper use of portable generators can be risky. The most common dangers associated with portable generators are carbon monoxide (CO) poisoning, electrical shock or electrocution, and fire hazards.
According to a 2013 Consumer Product Safety Commission (CPSC) report, half of the generator-related deaths happened in the four coldest months of the year, November through February, and portable generators were involved in the majority of carbon monoxide deaths involving engine-driven tools.
December is the peak time of year for home candle fires; the top four days for home candle fires are New Year’s Day, Christmas, New Year’s Eve and Christmas Eve. Each year between 2009 and 2013, an average of 25 home candle fires were reported each day.
Get additional information and resources on candle safety.
Electrical home fires are a leading cause of home fires in the U.S. Roughly half of all home electrical fires involved electrical distribution or lighting equipment, while nearly another half involved other known types of equipment like washer or dryer fans, and portable or stationary space heaters.
Christmas trees are combustible items that become increasingly flammable as they continue to dry out in your home. Nearly 40 percent of home fires that begin with Christmas trees occur in January. Although Christmas tree fires are not common, when they do occur they’re much more likely to be serious.
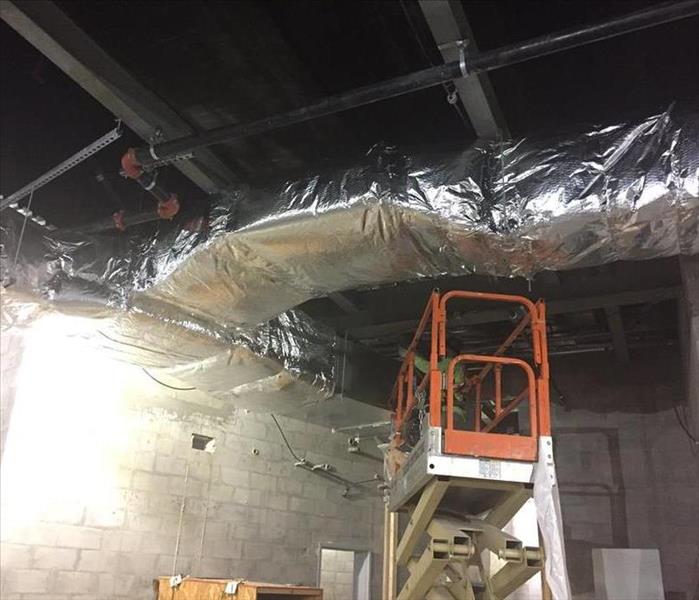
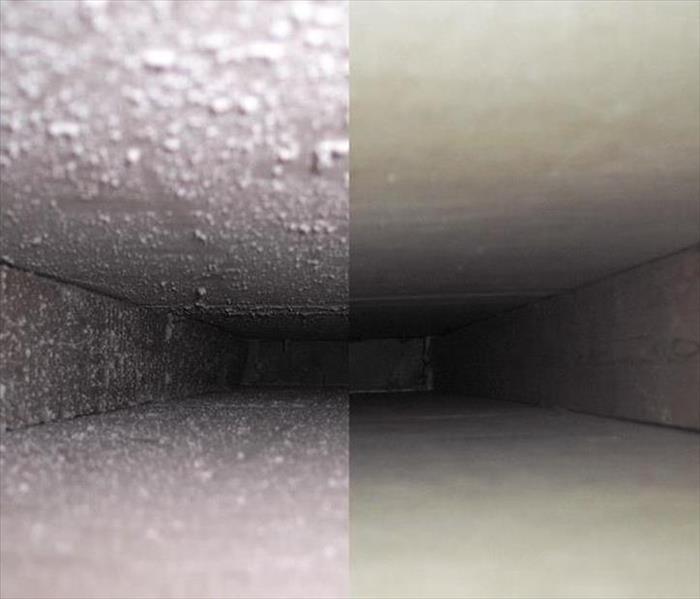
It is important to clean your air ducts regularly.
The air quality in your home or business is important. Keeping dust, pollen, pet dander, and other irritants out of the air you or your customers breathe involves more than changing the air filter(s). What about your air ducts? Contaminants collect in the duct system too, and regular cleaning of the air channel is important.
Energy Consumption
Dirty HVAC systems consume more energy than clean ones. Older ductwork starts leaking and not only do irritants enter through cracks, but air escapes too. Dirty ductwork also impedes airflow that drives up energy bills as much as 20 percent. Plus, dirt stresses your system causing frequent breakdowns. Clean ductwork helps lower your utility bill and helps your HVAC unit last longer.
Smelly Air
If someone in your home or business smokes, an odor hangs not only in the air but in the ductwork. Likewise, if you burned something on the stove, the smoke must go somewhere. These smells and other household odors collect in the ductwork and get circulated five to seven times per day, on average. Odors continue to plague your home or business long after you remove the offensive item(s).
More Reasons
Mold and mildew grow in your duct system especially if your home or business suffered recent water damage from flooding or foundation cracks. Renovations and repair often lead to contaminants settling in your air system, and newly built homes need the air ducts cleaned before occupancy.
Call the Professional
Air duct cleaning is not an easy job. It needs special vacuum hoses and tools to reach throughout the system. This is not a do-it-yourself task.
Contact your local HVAC company and schedule a professional cleaning. Have your system cleaned every three to five years and more often if your family suffers from severe allergies or asthma, includes a smoker, or you have pets that shed a lot.
Make sure you contact a certified HVAC technician for ductwork cleaning. Another helpful idea is to buy a high-quality air filter like the ones sold at home improvement stores. Look for pleated filters costing around $15. Not only do these last a little longer, these filters also catch
more debris, including bacteria and viruses, before you breathe it in.
Rows of empty school desks sitting in an empty classroom.
Children are precious and should be able to learn in safe, clean environments within our schools. Along with the local first responders, we stand behind and support our school systems in the event an emergency strikes.
Our local school systems can depend on us at SERVPRO for fast, effective service in the event of a fire, water, or mold damage.
Our 24/7 emergency response services provide mitigation, cleanup, and restoration services to reduce recovery costs and to help ensure minimal interruption to curriculum and better opportunities for learning in the classroom.
Schools see other kinds of interior and exterior damage that are not necessarily caused by natural causes. Our local SERVPRO also provides expert cleaning for emergencies or special needs exceeding routine janitorial capabilities, including stain removal, upholstery and drapery dry cleaning, indoor air quality, and vandalism cleanup.
Our Franchise Professionals are trained to clean and sanitize building materials, surfaces, and contents following restoration industry standards, using professional cleaning products and EPA registered cleaners and disinfectants.
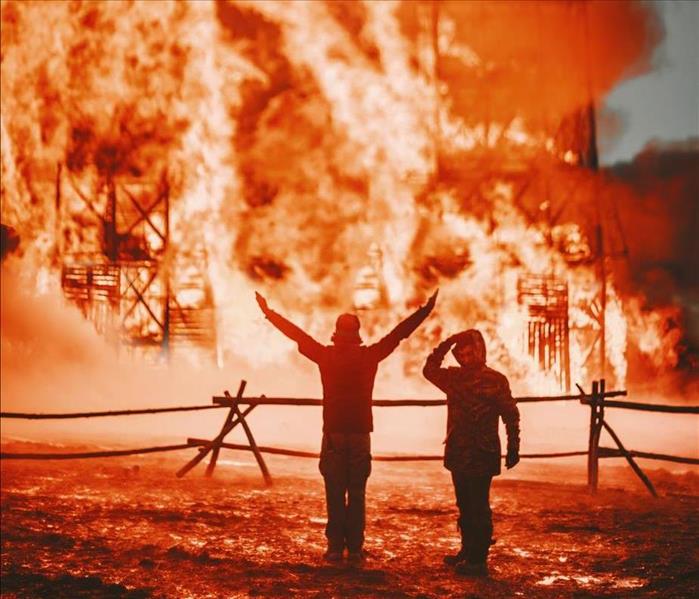
A fire in your home can cause devastating damage and require you to act quickly to save as much of your valuable property as possible. There is also the possibility that your house may go up in flames, causing the surrounding area to be filled with smoke and fumes that can eventually be toxic. This article will outline what you should know about fire and the safety precautions you should take if home fires are to occur.
Why is Fire Risk in Your Home at High?
The factors that determine whether a home will be harmed by fire are many. However, those that appear to be most important are the air and heat in the rooms and the walls, combustible material in the home, a poorly constructed home, and age or damage at the attic level. The National Fire Protection Association, or NFFP, recommends to families that they avoid using open flames in all forms at any time, particularly in any heating system.
There are, however, times when open flames are needed or required for cooking and some other activities. This may come about from using open fires in the fireplace for heat or smoke, or due to open flames in a stove or a clothes washer. Also, if your kitchen is very small, then it may be worth giving consideration to using electric space heaters on the countertops rather than open flames. Another risk to consider is the use of open flames in a gas grill. While a gas grill can operate on a pilot flame and is considered safe in most instances, there is always the possibility that there may be an open flame in the grilling area of a gas grill.
The cost of fire damage.
A great number of fire incidents occur in the home. Many homeowners do not have any insurance on their home, or they have it for only a single year, but a couple of times they have insurance for the whole of their life. This is very important as you have to consider fire damage insurance in your life to save your house from financial ruin.
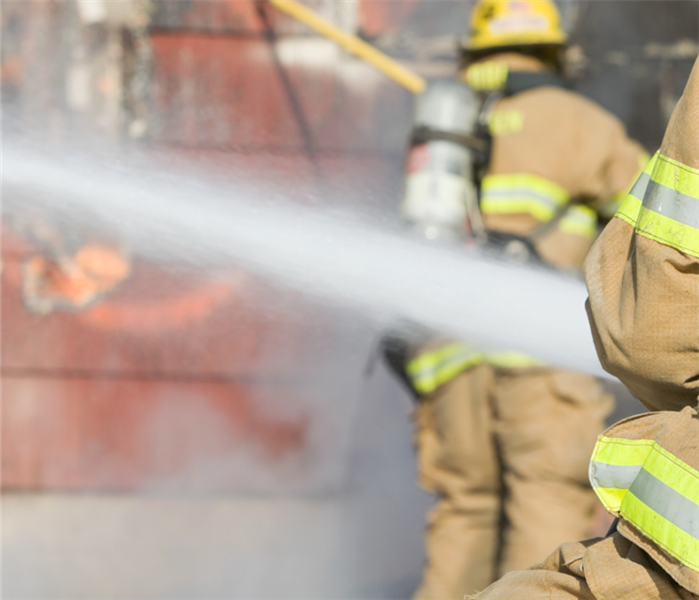
The most important thing is that you should not ignore fire and gas damage when they are occurring. In most cases, the insurance company will provide a minimum of coverage for fire and gas, but it does not mean it will cover fire damage completely. This is due to the fact that damage is subjective. It is not limited to how many homes a fire or gas strike has destroyed. Even if your home has been completely burnt down by fire, you still have to assess the damage. The best thing is, there are many fire damage insurance companies in the market today willing to pay for your claim, you just have to find the best deal possible.
The first thing to do is assess and inspect which areas are affected by the fire. This part is not so difficult, since you cannot see the extent of the fire damage.
Step 2: Check the property damage claim. Some insurance companies will not cover any damage to the inside of the house but do offer any property damage claims to the exterior of the house. If there is any damage to any areas that are not covered by all parties, the insurance company will be very helpful in calculating the damage and will get you the necessary compensation.
Step 3: Request a claim form from the insurance company. Many insurance companies make a claim form available to the homeowner. As you know, there will be a number of claims sent for the homeowner, there will also be a claim number corresponding to the claim number given by the insurance company
If you find yourself with fire damage. Please call SERVPRO. We can help!
SERVPRO® franchise professionals are uniquely prepared to clean and disinfect your home or business according to the protocols set forth by the CDC. We have years of experience in dealing with biological contaminants, and we will go beyond the scope of work that regular janitorial staff perform on a daily basis. Our professionals are trained to perform a proactive cleanup that involves facility or structure cleaning and disinfection. Cleanup procedures generally include cleaning of porous and non-porous surfaces, disinfecting of non-porous surfaces, cleaning and disinfecting of equipment, tools, and/or supplies used for cleanup process, and disposal of waste.
The CDC encourages cleaning of high-touch surfaces such as counters, tabletops, doorknobs, light switches, bathroom fixtures, toilets, phones, keyboards, tablets and tables. Other spaces mentioned in the CDC’s guidance for commercial spaces include:
Kitchen/Food Areas
Bathrooms
Schools/Classrooms
Offices
Retail Spaces
Water Fountains
Shelving/Racks
Sales Counters
Carpets and Rugs
Stair Handrails
Elevator Cars
Playground Equipment
Fitness Equipment
Specialized Products
The CDC recommends usage of a labeled hospital-grade disinfectant with claims against similar pathogens to the coronavirus. Multiple products in the SERVPRO product line carry the EPA-approved emerging pathogens claims.
Minimize Your Risk
Tips and Best Practices to Reduce Your Risk
Cities and states took drastic measures to curb the severity of the pandemic, including the closing of bars, restaurants, and public venues. In some areas, officials issued “shelter in place” orders in order to compel residents to stay in their homes and limit movement. To protect yourself, minimize your exposure with the following tips:
Practice Good Hygiene
Clean hands with sanitizer and wash your hands frequently
Avoid touching your face and cover coughs and sneezes
Disinfect “high touch” surfaces like doorknobs, light switches, tables, doorknobs, and handrails regularly
Increase ventilation by opening windows or adjusting air conditioning
At The Office
Stop shaking hands – use other noncontact methods of greeting
Use videoconferencing for meetings when possible
When not possible, hold meetings in open, well-ventilated spaces
Disinfect “high touch” surfaces like desks, keyboards, light switches, doorknobs, and telephones
If you have ever faced water damage in your office, you may have some bad memories that accompany that instance. For example, you may have lost copiers, files, furniture, and a manner of other items of value due to water damage. You may have even had to close the doors of your business if you're a business owner, or if you're an employee, you may have had a period where you weren't able to work.
This water damage could have been a result of a leaky window, roof, or wall, or it could have been a plumbing malfunction or problem. Regardless how it happened, it more than likely caused a pretty big headache.
After the initial water intrusion problem was resolved, you may have had to deal with mold growth and other devastating effects of water damage in your office. So, what can you do to be better prepared in the event that your office was ever hit with water damage again?
First things first. With today's technological advancements, it's a great idea to back-up files and other hard-copy paper files to more than one location. Also, it's a great idea to stay up-to-date on your equipment warranties as well as renter's or owner's insurance on the office itself. If you have the ability to, it's also a great idea to work out a "Plan B" location for your co-workers or employees to meet in the event of office damage in the future. The possibility for remote work is far more probable now than in recent years.
Next, it's important to have a professional water damage and mold remediation team on hand that you can count on. You never know when water damage might strike your office, so knowing that you have a team of professionals on-call and ready to help should give you immense peace of mind going forward. You want someone to show up when you call with full confidence that your problem will be resolved quickly and efficiently.
Our local SERVPRO team is ready to help in the event a disaster like water damage were to strike you. Our team is more than capable to take care of your problems - large or small. You can count on us!
It happens to everyone. A toilet. A leaky faucet. A busted pipe. Hey, it's manmade and we know that it breaks. The question, however, is what actions do we take first.
1. Find and shut off the water source. No matter where it is, find it and stop it. Even if that means bringing in the professionals.
2. Turn off all the circuit breakers. You never know where that water has traveled or is. The last thing you want to do is electrocute yourself.
3. Now try and move as much water as possible.
4. Removed and prop up wet upholstery so it can dry.
5. Try and remove as much valuable stuff to a dry safe area.
6. Take pictures of everything.
7. Contact your insurance agent and SERVPRO.
Also, don't try and dry it with your fans or vacuum cleaners. That is only going to make things worse and cost you a new vac. Call us and our professionals can handle the hard parts.
If you live in East TN, then you have heard the words "floods" and "storms", but let's take a closer look at according the ready.gov.
"Flooding is a temporary overflow of water onto land that is normally dry. Floods are the most common natural disaster in the United States. Failing to evacuate flooded areas or entering flood waters can lead to injury or death."
Floods may:
Result from rain, snow, coastal storms, storm surges and overflows of dams and other water systems.
Develop slowly or quickly. Flash floods can come with no warning.
Cause outages, disrupt transportation, damage buildings and create landslides.
If you are under a flood warning:
Find safe shelter right away.
Do not walk, swim or drive through flood waters. Turn Around, Don’t Drown!
Remember, just six inches of moving water can knock you down, and one foot of moving water can sweep your vehicle away.
Stay off bridges over fast-moving water.
Depending on the type of flooding:
Evacuate if told to do so.
Move to higher ground or a higher floor.
Stay where you are.
If your property is damaged by a flood give SERVPRO a call! We can help!
A good storm shelter is something everybody should have in their house and on their property for any time of potential or actual danger. Storm shelters for hurricanes and any other type of tropical cyclones are important, even more, when you start considering the risks of tornadoes, blizzards, fire storms, and floods, all of which are just a few of the hazards we have to worry about. These storms are all out there for us to experience at any given time, and we all have the power to prepare in a number of ways.
Why we need them.
The answer is simple. You need them in order to keep you and your family safe. Figure out what kind of shelter or disaster preparedness plan you need.
The aftermath.
In the event we have to actually use a storm shelter, then there will almost always be clean-up. Where there is clean-up, there is help needed. So when you need help, call SERVPRO.
When it comes to your family's safety, smoke detectors, and fire alarms can be some of the most important items in your home. These early warning devices can alert your family to fire and hazardous smoke while there is still time to evacuate, but they should be tested periodically to ensure they are working properly.
Electronic devices are not faultless. The batteries will die and other parts of the smoke alarm can wear out over time. Regularly testing them and replacing the batteries (or the entire device) can help keep your family safe in the event of a house fire.
Be sure to read your smoke detector's owner's manual - you may need to check more often if any of the following apply: The detector often gives false alarms.
The alarm emits short beeps regularly without anyone touching it.
Frequent kitchen fumes often activate it, which can cause it to wear out faster.
For battery-operated: This type may be prone to defective or worn-out batteries. Monthly tests are very important.
Never put old batteries in your smoke detectors and fire detectors. Wired: These detectors are powered by your home's electrical system, but they usually have backup batteries so the device stays operational in the event of a power outage.
Wired smoke alarms should still be tested monthly to ensure both batteries and components are working properly.
You should always check the manufacturer's instructions for the correct test method for your smoke detector and fire alarm.
You may want to install additional detectors in areas where the alarm sound is low, muffled or weak. Press and hold the test button on the smoke detector. It may take a few seconds to go off, but a loud, deafening siren should come out of the smoke detector when the button is pressed. If not, then replace it.
If it has been more than six months since you last changed the batteries (whether your detector is battery-powered or wired), replace it now and test the new batteries one last time to ensure they are working properly, regardless of the test result.
You should also look at your smoke alarm to make sure it's not dust or any other substance blocking the grilles and causing it to not work even if the batteries are new. Note that smoke detectors typically have a 10-year lifespan.
Now that you know how to prevent your fire alarms from not working, do keep in mind that if they are not working correctly this can cause a house fire. We don't want this to happen at all, but if it does SERVPRO is here to help! We do fire damage remediation at its best.
My clothes still need doing, and I still find time on even my busiest day to do so. But it is at these moments that we sometimes forget about the dryers.
Not because it is so often at just such a time but because the dryers are so dangerous. That is why it is important to keep up with tips and strategies to prevent dryer fires. To that end, we have to remember that dryers are like appliances that are set to work as part of the daily laundry cycle and thus use a few small parts to ignite.
Here are a couple of things to remember:
Why you don't leave the dryer going when no one is home?
Why you don't leave the dryer going when no one is home.
A big reason to prevent dryer fires is that the fire often leads to a second or third fire or can be a safety hazard. It's always better to prevent a fire than to respond to a fire situation.
Before dryer fires occur, we usually have a fire hazard situation. If you have a hot water pipe in your kitchen and a fire could start there, use a fire extinguisher. A fire extinguisher can be used effectively to save your property from dryer fires. A fire extinguisher can also be used effectively to extinguish and prevent a fire from occurring at a dryer.
How to clean the dryer lint.
The heat from the dryer is always intense. The machine uses a large heat capacity to absorb the heat, leaving the dryer lint sitting on top of the inside of the machine after every cycle. You'll notice that the top of the dryer is always smeared with dryer lint and what is left over after the dryer door closes. The lint can cause a fire. How to minimize this risk?
Simply make sure you throw away the lint from the lint filter after every use.
But if this does happen and you end up with fire damage. Please call SERVPRO. We can help.
A man grilling out with a fire flare-up happening.
We all know that Holidays revolve around family, food, and friends. So we are sure there are going to be some grills fired up. It is good though to be safe and keep in mind that there are some best practices we want to share with you.
HOW TO PREVENT FLARE-UPS
Trim the fat.
Flare-ups usually happen because of excess fat, sauces or oily marinades. So trim as much excess fat as you can, without sacrificing flavor.
Keep the lid open.
When searing fatty foods, leave the grill lid opened.
Avoid wind.
Try to keep your grill away from windy areas. Wind forces oxygen between the grates, which can fuel a flare-up.
Move your food.
Try not to overcrowd your food on your grill. If a flare-up does happen, you want to be able to move your food away from the flame.
Burn the grease away.
During cooking, if grease pools, remove your food and turn the burners on high with the grill lid open until the grease has burned off.
Clean your grill.
Keeping your grill clean and maintained will help prevent the dreaded flare-up. Food residue and old grease are both great fuel for a fire, so removing debris after each use is important.
Turn off the burners.
If your grill flare-up is out of control, turn off the burners.
Don't use water.
You’ve heard the adage, “Oil and water don’t mix?” Well, that’s especially true for flare-ups. Spraying water on a flare-up can cause grease to explode. Don’t use it.
However, we know accidents happen. That is why SERVPRO is here. To help you if your grill or anything else was to catch your home on fire.
We have all been there. That moment we have buckled down because the weather radio and emergency broadcast system have broadcasted that a storm is on its way. The aftermath can sometimes be devastating. However, storm damage in TN doesn't seem to have any shortage of supply.
Here are steps that can help navigate you:
1. What is the damage?
Take an evaluation of the storm damage. Check your siding, roofing, and structure of the home.
2. Find someone to help you.
You will need 3 people here: A contractor, SERVPRO, and an Insurance Agency.
3. Obtain all your reports and submit your claims.
4. Line up and schedule the work and cleanup.
Remember, SERVPRO of MMP is here to help. Thank You!
We have all been there. That moment we have buckled down because the weather radio and emergency broadcast system have broadcasted that a storm is on its way. The aftermath can sometimes be devastating. However, storm damage in TN doesn't seem to have any shortage of supply.
Here are steps that can help navigate you:
1. What is the damage?
Take an evaluation of the storm damage. Check your siding, roofing, and structure of the home.
2. Find someone to help you.
You will need 3 people here: A contractor, SERVPRO, and an Insurance Agency.
3. Obtain all your reports and submit your claims.
4. Line up and schedule the work and cleanup.
Remember, SERVPRO is here to help for all your storm damage needs. Thank You!
It happens to everyone. A toilet. A leaky faucet. A busted pipe. Hey, it's manmade and we know that it breaks. The question, however, is what actions do we take first.
Find and shut off the water source. No matter where it is, find it and stop it even if that means bringing in professionals.
Turn off all the circuit breakers. You never know where that water has traveled or is. The last thing you want to do is electrocute yourself.
Now try and move as much water as possible.
Remove and prop up wet upholstery so it can dry.
Try and remove as much valuable stuff to a dry safe area.
Take pictures of everything.
Contact your insurance agent and SERVPRO.
Also, don't try and dry it with your fans or vacuum cleaners. That is only going to make things worse and cost you a new vac. Call us, and our professionals can handle the hard parts.
Evacuate immediately, if told to evacuate. Never drive around barricades. Local responders use them to safely direct traffic out of flooded areas.
Contact your healthcare provider If you are sick and need medical attention. Wait for further care instructions and shelter in place, if possible. If you are experiencing a medical emergency, call 9-1-1.
Listen to EAS, NOAA Weather Radio or local alerting systems for current emergency information and instructions regarding flooding.
Do not walk, swim or drive through flood waters. Turn Around. Don’t Drown!
Stay off bridges over fast-moving water. Fast-moving water can wash bridges away without warning.
Stay inside your car if it is trapped in rapidly moving water. Get on the roof if water is rising inside the car.
Get to the highest level if trapped in a building. Only get on the roof if necessary and once there signal for help. Do not climb into a closed attic to avoid getting trapped by rising floodwater.
Close-up of crime scene tape with a cleanup crew in the background.
After the police have finished processing a crime or accident scene, the cleaning and restoration process can begin. Many times, crime and accident scenes have blood and other biohazard contaminants. SERVPRO can respond immediately and has the specialized training, protective equipment, and experience to safely clean trauma and crime scenes.
SERVPRO technicians follow OSHA and EPA protocols to help transform an unsafe environment back into a clean, safe home or business.
Crime Scene and Trauma Cleaning Services
Fingerprint powder and evidence-gathering chemicals
Tear gas and pepper spray residues
Fire extinguisher residue
Blood, bodily fluids, and tissue remnants
Crime Scene Residues
From fingerprint powder and evidence-gathering chemicals to tear gas and pepper spray residues, SERVPRO can clean and restore your property after a crime scene investigation.
Bloodborne Pathogens
SERVPRO can remove and dispose of bodily fluids, tissue and other potentially pathogenic substances resulting from accident, trauma, crime or death. Trained SERVPRO team members clean, disinfect and deodorize the structure.
Methamphetamine Labs: We do that too!
SERVPRO realizes many of the chemicals used in the production of illegal drugs such as methamphetamine are volatile and can leave harmful residues throughout a structure. SERVPRO franchise professionals follow federal and state guidelines to properly clean all surfaces.
Many germs and virus are found on the surfaces in your workplace and home. It is important to keep all your work surfaces clean, especially during a pandemic or emerging disease event. Work surfaces that should be cleaned and disinfected regularly include telephones, computer equipment, and other frequently touched surfaces. Be sure that any cleaner you use is safe to use and will not damage office equipment. Use only disinfectants registered by the U.S. Environmental Protection Agency (EPA), and follow all directions and safety precautions indicated on the label.
How long can viruses and germs live on surfaces in the workplace?
Influenza virus can survive on surfaces and still infect a person for up to 2-8 hours after being deposited on the surface.
What kills viruses and germs that live on surfaces in the workplace?
Most viruses are destroyed by heat (167-212°F). Several chemical germicides, including chlorine, hydrogen peroxide, detergents (soap), iodine-based antiseptics, and alcohols are effective against human viruses if used in proper concentration for a sufficient length of time.
If a disinfectant product is not available, you can clean surfaces with a chlorine bleach solution made by adding 1 tablespoon of bleach to a quart (4 cups) of water; use a cloth to apply this to surfaces and let stand for 3 – 5 minutes before rinsing with clean water. (For a larger supply of disinfectant, add ¼ cup of bleach to a gallon [16 cups] of water.)
Wear gloves to protect your hands when working with strong bleach solutions or strong disinfectants.
What surfaces are most likely to be sources of contamination?
Germs and viruses spread when someone touches something that is contaminated and then touches his or her eyes, nose, or mouth. Droplets from a cough or sneeze of an infected person move through the air and carry viruses with them. A person can become infected by touching a surface where these droplets land before touching their eyes, mouth, or nose. Frequent hand washing prevents virus transmission from infected surfaces.
In East TN you find yourself knowing everyone. Especially if you are a teacher. So we wanted to give all you educators out there some tips on keeping that classroom save and sanitized.
Cleaning, Sanitizing, and Disinfecting Know the difference between cleaning, sanitizing, and disinfecting.
Use the right product for the task:
CLEANING removes dirt and most germs. Use soap and water. Choose green cleaners certified by a third party such as Green Seal or EPA’s Safer Choice. In the classroom, cleaning is the focus.
SANITIZING reduces germs to safe levels, for example in food service environments. Food code regulations have specific requirements for sanitizers in the cafeteria and kitchen.
DISINFECTING kills most germs, depending on the type of chemical, and only when used as directed on the label. In schools, custodial staff use disinfectants and sanitizers regularly only in high-risk areas – nurse’s office, bathrooms, cafeterias, kitchens, drinking fountains, sink and door handles, and athletic facilities, preferably when students are not present. Overuse does not provide any additional protection and can expose students and staff to harmful chemicals. Students should never use disinfectants. Disinfectant wipes shouldn't be used to clean hands. This includes Clorox wipes. If students are helping to clean:
They should only use soap and water.
Fragrance-free baby wipes could be used for quick cleaning.
Most store-bought cleaning products are not safe for children to use.
Mold primarily grows because of indoor moisture and spreads on your walls, furniture, floor, carpet, etc. It can cause significant damage. The reason is that wherever mold grows, it weakens that structure, and eventually, it rots. As a result, it can cause heavy structural damage. So, below we will discuss some of the dangerous aspects of mold and how it damages buildings.
Building material and structural components
Wherever mold grows, it causes irreversible damage. It’s because when mold grows, it feeds on organic matter by breaking it down. As it spreads, it creeps its way toward the pipes, insulation, carpets, etc. Therefore, whichever office item gets plagued by mold, you need to discard it immediately.
Groundwater or standing water can be a significant cause of mold in crawl spaces or in the basement. As seasons change, you will have air coming in your vents into your crawl space. In the summer, hot, humid air will raise the humidity level in your crawl space, leading to issues like moisture in the wall. Crawl space encapsulation is one of the most effective ways of preventing mold damage caused by indoor humidity.
Damages property
A mold is like a parasite you can never really get rid of properly. Unfortunately, the cases of mold are worse in states that experience heavy rain.
Sometimes mold seeps into the object so deeply that it is impossible to remove its spores entirely. As a result, even if you clean it on the surface, the mold will grow and spread again in a matter of days.
Spreads in the heating and vent system
Mold contamination is not limited to walls and carpets. It can grow and spread into your ventilation and heating systems as well. Consequently, it becomes tough to clean the mold in such small and cramped systems thoroughly. As a result, the air ventilation or heating system carries the mold towards other parts of the building, where it can spread.
Cause rotting and decay
There are various types of molds, some more dangerous to the health and structure than others. The worst part is that molds can grow on any surface. Whether beams, sill, windows, etc., they are all susceptible to developing mold due to excess moisture.
If you do not take appropriate action promptly, it can cause your wood to decay and rot. It will eventually ruin your structure, and its strength and integrity will become questionable.
Conclusion
Taking preventive measures will help prevent the growth. In case you still find mold growing in a neglected corner, hire professionals immediately. A professional can adequately assess the situation and use bio-friendly chemicals to remove your property’s mold and excess moisture. Call SERVPRO.
Person in a biohazard suit holding a cleaning spray device in their hands.
Biohazard contaminants should be considered very dangerous. Sewer backups and flood water are two common biohazard scenarios that can affect homes and businesses. SERVPRO has the training, protective gear, and specialized equipment necessary to safely clean and restores this type of contamination.
What To Do After a Contamination
Stay out of affected areas.
Call emergency service personnel if the situation is life-threatening.
Treat all bodily fluids as if they are contaminated.
Turn off the HVAC system if there is sewage damage.
What Not To Do After a Contamination
Don’t leave wet fabrics in place. Hang furs and leather goods.
Don’t leave books, magazines, or other colored items on wet carpet or floors.
Don’t use your household vacuum to remove water.
Don’t use television or other household appliances.
Don’t turn on ceiling fixtures if the ceiling is wet, and keep out of rooms where ceilings are sagging.
24-Hour Emergency Service
Biohazards like flood water or sewer backups should be considered an emergency and dealt with as quickly as possible. SERVPRO professionals are water damage restoration specialists and have specific training and expertise to safely remediate biohazard contaminants.
Sewer backups should be considered an emergency since the water may contain viruses, bacteria, and other microbes that cause serious illnesses. SERVPRO has the specialized training and equipment to quickly and safely clean contaminants like sewage.
Toilet Overflow or Sewer Backup?
Water damage can be classified by the three types of contaminated water. SERVPRO will inspect your home or business to determine the appropriate plan of action for the type of water encountered.
The three types of contaminated water:
1: Category 1 water is from a clean source like a broken water supply line or leaking faucet. If not treated quickly, this water can turn into category 2 or 3, depending on length of time, temperature, and contact with surrounding contaminants.
Water from a clean source like a broken water line
If left untreated, can degrade into category 2 or 3
2: Category 2 water is contaminated and could cause discomfort or illness. Examples include washing machine overflow; toilet overflow with some urine, but no feces; or dishwasher overflow.
May contain bacteria and viruses
Can quickly degrade into category 3 if left untreated
3: Category 3 water is grossly contaminated and could cause severe illness or death if ingested and any contact should be avoided. Examples include flooding from rivers or streams, water from beyond the toilet trap, water from the toilet bowl with feces, or standing water that has begun to support microbial growth.
May contain untreated sewage, harsh chemicals, and microbes
Water from flooding rivers or sewer backup
We offer 24-Hour Emergency Service
Water contaminated with sewage backup should be considered an emergency situation and dealt with as quickly as possible. A SERVPRO team near you is available 24 hours a day, 365 days a year. They are water damage restoration specialists with specialized training, equipment and protective gear to safely restore your home or business.
Beginning in 2020, The Centers for Disease Control and Prevention responded to an outbreak of a respiratory disease caused by a new coronavirus that was first detected in China and spread internationally. While the virus is termed coronavirus, the sickness that results after infection is termed COVID-19.
COVID-19 was declared a pandemic, which is a global outbreak of a disease.
Expert Level Cleaning Services
SERVPRO® franchise professionals are uniquely prepared to clean and disinfect your home or business according to the protocols set forth by the CDC. We have years of experience in dealing with biological contaminants, and we will go beyond the scope of work that regular janitorial staff perform on a daily basis. Our professionals are trained to perform a proactive cleanup that involves facility or structure cleaning and disinfection. Cleanup procedures generally include cleaning of porous and non-porous surfaces, disinfecting of non-porous surfaces, cleaning and disinfecting of equipment, tools, and/or supplies used for cleanup process, and disposal of waste.
The CDC encourages cleaning of high-touch surfaces such as counters, tabletops, doorknobs, light switches, bathroom fixtures, toilets, phones, keyboards, tablets and tables. Other spaces mentioned in the CDC’s guidance for commercial spaces include:
Kitchen/Food Areas
Bathrooms
Schools/Classrooms
Offices
Retail Spaces
Water Fountains
Shelving/Racks
Sales Counters
Carpets and Rugs
Stair Handrails
Elevator Cars
Playground Equipment
Fitness Equipment
Specialized Products
The CDC recommends the usage of a labeled hospital-grade disinfectant with claims against similar pathogens to the coronavirus. Multiple products in the SERVPRO product line carry the EPA-approved emerging pathogens claims.
Minimize Your Risk
Tips and Best Practices to Reduce Your Risk
Cities and states took drastic measures to curb the severity of the pandemic, including the closing of bars, restaurants, and public venues. In some areas, officials issued “shelter in place” orders in order to compel residents to stay in their homes and limit movement. To protect yourself, minimize your exposure with the following tips:
Practice Good Hygiene
Clean your hands with sanitizer and wash your hands frequently
Avoid touching your face and cover coughs and sneezes
Disinfect “high touch” surfaces like doorknobs, light switches, tables, doorknobs, and handrails regularly
Increase ventilation by opening windows or adjusting air conditioning
At The Office
Stop shaking hands – use other noncontact methods of greeting
Use videoconferencing for meetings when possible
When not possible, hold meetings in open, well-ventilated spaces
Disinfect “high touch” surfaces like desks, keyboards, light switches, doorknobs, and telephones
All of us have been there. That moment we have buckled down because the weather radio and emergency broadcast system have broadcasted that a storm is on its way. It can sometimes be devastating to deal with the aftermath. However, storm damage in TN doesn't seem to have any shortage of supply.
Here are steps that can help navigate you:
What is the damage?
Take an evaluation of the storm damage. Check your siding, roofing, and structure of the home.
Find someone to help you.
There are three people you will need here: a contractor, a SERVPRO franchise, and an insurance agency.
Obtain all your reports and submit your claims.
Lineup and schedule the work and cleanup.
Remember, SERVPRO of MMP is here to help. Thank You!
An emergency preparedness kit with shelter and food.
If you live in East Tennessee, then you are familiar with our crazy weather. From one hour to the next, you never know what may come. Hail or Rain. Lightning or Winds. As I said, we never know. However, according to weather.gov, there are some things we can do.
Be on top of it. Know your weather and what is coming. Keep up today with the forecasts for your area. You can listen to the news or the weather radio.
Opt-in for updates and notifications. You can do this with many apps on android or apple. Also, most cities have a text line that will send you notifications.
Make sure you have a plan that will allow you to communicate with everyone. Have a meeting spot. Make sure it's free of things that can hurt you, like windows.
Practice makes perfect. Run through it. Do the drills. Make sure everyone knows it!
Prepare for it. Get yourself some kits that have emergency supplies in them. You never know.
Call us @ SERVPRO to go ahead and make a plan for the aftermath.
Rows of empty school desks sitting in an empty classroom.
Children are precious and should be able to learn in safe, clean environments within our schools. Along with the local first responders, we stand behind and support our school systems in the event an emergency strikes.
Our local school systems can depend on us at SERVPRO for fast, effective service in the event of a fire, water, or mold damage.
Our 24/7 emergency response services provide mitigation, cleanup, and restoration services to reduce recovery costs and to help ensure minimal interruption to curriculum and better opportunities for learning in the classroom.
Schools see other kinds of interior and exterior damage that are not necessarily caused by natural causes. Our local SERVPRO also provides expert cleaning for emergencies or special needs exceeding routine janitorial capabilities, including stain removal, upholstery and drapery dry cleaning, indoor air quality, and vandalism cleanup.
Our Franchise Professionals are trained to clean and sanitize building materials, surfaces, and contents following restoration industry standards, using professional cleaning products and EPA registered cleaners and disinfectants.
Business' Silver Air Ducts With Forklift Where A Person Was Evaluating Them. It is important to clean your air ducts regularly.
The air quality in your home or business is important. Keeping dust, pollen, pet dander, and other irritants out of the air you or your customers breathe involves more than changing the air filter(s). What about your air ducts? Contaminants collect in the duct system too, and regular cleaning of the air channel is important.
Energy Consumption
Dirty HVAC systems consume more energy than clean ones. Older ductwork starts leaking and not only do irritants enter through cracks, but air escapes too. Dirty ductwork also impedes airflow that drives up energy bills as much as 20 percent. Plus, dirt stresses your system causing frequent breakdowns. Clean ductwork helps lower your utility bill and helps your HVAC unit last longer.
Smelly Air
If someone in your home or business smokes, an odor hangs not only in the air but in the ductwork. Likewise, if you burned something on the stove, the smoke must go somewhere. These smells and other household odors collect in the ductwork and get circulated five to seven times per day, on average. Odors continue to plague your home or business long after you remove the offensive item(s).
More Reasons
Mold and mildew grow in your duct system especially if your home or business suffered recent water damage from flooding or foundation cracks. Renovations and repair often lead to contaminants settling in your air system, and newly built homes need the air ducts cleaned before occupancy.
Call the Professional
Air duct cleaning is not an easy job. It needs special vacuum hoses and tools to reach throughout the system. This is not a do-it-yourself task.
Contact your local HVAC company and schedule a professional cleaning. Have your system cleaned every three to five years and more often if your family suffers from severe allergies or asthma, includes a smoker, or you have pets that shed a lot.
Make sure you contact a certified HVAC technician for ductwork cleaning. Another helpful idea is to buy a high-quality air filter like the ones sold at home improvement stores. Look for pleated filters costing around $15. Not only do these last a little longer, these filters also catch more debris, including bacteria and viruses, before you breathe it in.
Heating, holiday decorations, winter storms and candles all contribute to an increased risk of fire during the winter months.
NFPA and the United States Fire Administration (USFA) are teaming up to help reduce your risk to winter fires and other hazards, including carbon monoxide and electrical fires. Learn more about these specific elements of winter fire safety to help keep you safe this winter.
Heating
Heating is the second leading cause of U.S. home fires, deaths and injuries. December, January and February are the peak months for heating fires. Space heaters are the type of equipment most often involved in home heating equipment fires, figuring in two of every five fires (40%).
Get additional information and resources on heating safety.
Often called the invisible killer, carbon monoxide (CO) is an odorless, colorless gas created when fuels such as gasoline, wood, coal, propane, etc. do not burn. In the home, heating and cooking equipment that burn fuel are potential sources of CO. Carbon Monoxide incidents are more common during the winter months, and in residential properties.
Most of the U.S. is at risk for winter storms, which can cause dangerous and sometimes life-threatening conditions. Blinding wind-driven snow, extreme cold, icy road conditions, downed trees and power lines can all wreak havoc on our daily schedules. Home fires occur more in the winter than in any other season, and heating equipment is involved in one of every six reported home fires, and one in every five home fire deaths.
Get additional information and resources on severe storms.
Generators
Portable generators are useful during power outages, however, many homeowners are unaware that the improper use of portable generators can be risky. The most common dangers associated with portable generators are carbon monoxide (CO) poisoning, electrical shock or electrocution, and fire hazards.
According to a 2013 Consumer Product Safety Commission (CPSC) report, half of the generator-related deaths happened in the four coldest months of the year, November through February, and portable generators were involved in the majority of carbon monoxide deaths involving engine-driven tools.
December is the peak time of year for home candle fires; the top four days for home candle fires are New Year’s Day, Christmas, New Year’s Eve and Christmas Eve. Each year between 2009 and 2013, an average of 25 home candle fires were reported each day.
Get additional information and resources on candle safety.
Electrical home fires are a leading cause of home fires in the U.S. Roughly half of all home electrical fires involved electrical distribution or lighting equipment, while nearly another half involved other known types of equipment like washer or dryer fans, and portable or stationary space heaters.
Christmas trees are combustible items that become increasing flammable as they continue to dry out in your home. Nearly 40 percent of home fires that begin with Christmas trees occur in January. Although Christmas tree fires are not common, when they do occur they’re much more likely to be serious.
A house can easily catch fire from the misuse of appliances and heating equipment to smoking in bedrooms. In Australia’s hot summer months, temperatures can soar past 40°C and teamed with a dry climate, conditions are ideal for fires to break out.
However you can take measures to avoid fire in home and ensure the safety of your family. Below are some of the most common causes of house fires, and some tips to take precautions.
1. Cooking Equipment
Pots and pans can overheat and cause a fire very easily if the person cooking gets distracted and leaves cooking unattended. Always stay in the room, or ask someone to watch your food, when cooking on hotplates.
2. Heating
Keep portable heaters at least one metre away from anything that could easily catch fire such as furniture, curtains, laundry, clothes and even yourself. If you have a furnace, get it inspected once a year to make sure it is working to safety standards.
3. Smoking in bedrooms
Bedrooms are best to be kept off limits for smoking. A cigarette that is not put out properly can cause a flame, as the butt may stay alit for a few hours. It could burst into flames if it came into contact with flammable materials, such as furniture. Did you know that fires started in the bedroom or lounge make up 73% of all house fire fatalities?¹
4. Electrical Equipment
An electrical appliance, such as a toaster can start a fire if it is faulty or has a frayed cord. A power point that is overloaded with double adapter plugs can cause a fire from an overuse of electricity. A power point extension cord can also be a fire hazard if not used appropriately. Double check the appliances and power points in your home.
5. Candles
Candles look and smell pretty, but if left unattended they can cause a room to easily burst into flames. Keep candles away from any obviously flammable items such as books and tissue boxes. Always blow a candle out before leaving a room. Did you know that in Perth last year 34 house fires started as a result of candles?²
6. Curious Children
Kids can cause a fire out of curiosity, to see what would happen if they set fire to an object. Keep any matches or lighters out of reach of children, to avoid any curiosity turned disaster. Install a smoke alarm in your child’s room and practice a home escape plan with your children and family in case there was a fire. Teach kids understand the “stop, drop, cover and roll” drill as well as knowing their address if they needed to call 000.
7. Faulty Wiring
Homes with inadequate wiring can cause fires from electrical hazards. Some signs to see if you’ve bad wiring are: 1) Lights dim if you use another appliance; 2) For an appliance to work, you have to disconnect another; 3) Fuses blow or trip the circuit frequently. Have a licenced electrician come and inspect you house, or contact your landlord if you have any of the above occurrences.
8. Barbeques
Barbeques are great for an outdoor meal, but should always be used away from the home, tablecloths or any plants and tree branches. Keep BBQs regularly maintained and cleaned with soapy water and clean any removable parts. Check the gas bottle for any leaks before you use it each time.
9. Flammable Liquids
If you have any flammable liquids in the home or garage such as petrol, kerosene or methylated spirits, keep them away from heat sources and check the label before storing. Be careful when pouring these liquids.
10. Lighting
Lamp shades and light fittings can build up heat if they are very close to light globes. Check around the house to make sure. Lamp bases can become a hazard if they are able to be knocked over easily, and so should be removed if they are. Check that down lights are insulated from wood panelling or ceiling timbers.
The above tips are a good guide to avoiding a fire in your home. However it’s a good idea to protect yourself with adequate home and content insurance, cover to ensure you are covered in the unlikely event a fire were to happen.
Each year, hundreds of Americans are injured or killed by exposure to cold, vehicle accidents on wintry roads, and fires caused by the improper use of heaters. Learn what to do to keep your loved ones safe during blizzards and other winter storms!
Take immediate precautions if you hear these words on the news:
Winter Storm WARNING: Life-threatening, severe winter conditions have begun or will begin within 24 hours.
Blizzard WARNING: Sustained winds or frequent gusts of 35 miles per hour or greater, plus considerable falling or blowing snow reducing visibility to less than a quarter mile, expected to prevail for three hours or longer.
More winter storm words to listen for:
WIND CHILL Temperature: How cold people and animals feel when outside. As wind increases, heat is carried away from your body at a faster rate, driving down your body temperature and making you feel much colder. The wind chill temperature is not the actual temperature but rather how wind and cold feel on exposed skin.
Winter Storm OUTLOOK: Winter storm conditions possible in the next two to five days. Stay tuned to local media for updates.
Winter Storm WATCH: Winter storm conditions possible within the next 36 to 48 hours. Review your winter storm plans and stay informed about weather conditions.
Winter Weather ADVISORY: Winter weather conditions expected to cause significant inconveniences and may be hazardous but not life-threatening if you are cautious.
Talk with your family about what to do if a winter storm watch or warning is issued. Discussing winter storms ahead of time helps reduce fear, particularly for young children.
Have your vehicle winterized before the winter storm season to decrease your chance of being stranded in cold weather.
Have a mechanic check your battery, antifreeze, wipers and windshield washer fluid, ignition system, thermostat, lights, flashing hazard lights, exhaust system, heater, brakes, defroster, and oil.
Install good winter tires with adequate tread. All-weather radials are usually adequate but some jurisdictions require vehicles to be equipped with chains or snow tires with studs.
Keep in your vehicle:
- A windshield scraper and small broom
- A small sack of sand for generating traction under wheels and a set of tire chains or traction mats
- Matches in a waterproof container
- A brightly colored (preferably red) cloth to tie to the antenna
- An emergency supply kit, including warm clothing.
Keep your vehicle’s gas tank full so you can leave right away in an emergency and to keep the fuel line from freezing.
Keep a supply of non-clumping kitty litter to make walkways and steps less slippery.
Service snow removal equipment before the winter storm season and maintain it in good working order.
Keep handy a warm coat, gloves or mittens, hat, water-resistant boots, and extra blankets and warm clothing for each member of the household.
Protecting your pets & animals
Bring your companion animals indoors.
- Ensure that you have supplies for clean up for your companion animals, particularly if they are used to eliminating outdoors (large plastic bags, paper towels, and extra cat litter).
Create a place where your other animals can be comfortable in severe winter weather:
- Horses and livestock should have a shelter where they can be protected from wind, snow, ice, and rain.
- Grazing animals should have access to a protected supply of food and non-frozen water.
Be aware of the potential for flooding when snow and ice melt and be sure that your animals have access to high ground that is not impeded by fencing or other barriers. You may not be able to get to them in time to relocate them in the event of flooding.
- Ensure that any outbuildings that house or shelter animals can withstand wind and heavy snow and ice.
- Install snow fences in rural areas to reduce drifting snow on roads and paths, which could block access to homes, barns, and animals' feed and water.
Make sure your home heating sources are installed according to local codes and permit requirements and are clean and in working order.
Make sure your home is properly insulated. Caulk and weather-strip doors and windowsills to keep cold air out.
Install storm windows or cover windows with plastic from the inside to provide an extra layer of insulation to keep cold air out.
Consider buying emergency heating equipment, such as a wood- or coal-burning stove or an electric or kerosene heater.
- Stoves must be properly vented and in good working order. Dispose of ashes safely. Keep a supply of wood or coal on hand.
- Electric space heaters, either portable or fixed, must be certified by an independent testing laboratory. Plug a heater directly into the wall socket rather than using an extension cord and unplug it when it is not in use.
- Use a kerosene heater only if permitted by law in your area; check with your local fire department. Use only the correct fuel for your unit. Properly ventilate the area. Refuel the unit outdoors only, and only when the unit is cool. Follow all of the manufacturer's instructions.
Consider storing sufficient heating fuel. Regular fuel sources may be cut off. Be cautious of fire hazards when storing any type of fuel.
If you have a fireplace, consider keeping a supply of firewood or coal. Be sure the fireplace is properly vented and in good working order and that you dispose of ashes safely.
Consider installing a portable generator, following our safety tips to avoid home fires and carbon monoxide poisoning
Consider purchasing flood insurance, if you live in a flood-prone area, to cover possible flood damage that may occur during the spring thaw. Homeowners' policies do not cover damage from floods. Ask your insurance agent about the National Flood Insurance Program (NFIP) if you are at risk. More information on NFIP is available atwww.fema.gov/nfip.
Right before a blizzard / winter stormIf you do nothing else:
Listen to local area radio, NOAA radio or TV stations for the latest information and updates.
Check emergency kit and replenish any items missing or in short supply, especially medications and medical supplies. Keep it nearby.
Be sure you have ample heating fuel.
If you have alternative heating sources, such as fireplaces, wood- or coal-burning stoves, or space heaters, be sure they are clean and in working order.
Check that your fire extinguisher(s) is in good working order, and replace it if necessary.
Bring your companion animals inside and ensure that your horses and livestock have blankets if appropriate and unimpeded access to shelter, food, and non-frozen water.
During
Stay Safe During a Winter Storm
Staying Safe During a Winter Storm or Blizzard
Stay indoors and wear warm clothes. Layers of loose-fitting, lightweight, warm clothing will keep you warmer than a bulky sweater. If you feel too warm, remove layers to avoid sweating; if you feel chilled, add layers.
Listen to a local station on battery-powered radio or television or to NOAA Weather Radio for updated emergency information.
Bring your companion animals inside before the storm begins.
Move other animals to sheltered areas with a supply of non-frozen water. Most animal deaths in winter storms are caused by dehydration.
Eat regularly. Food provides the body with energy for producing its own heat.
Keep the body replenished with fluids to prevent dehydration. Drink liquids such as warm broth or juice. Avoid caffeine and alcohol. Caffeine, a stimulant, accelerates the symptoms of hypothermia. Alcohol, such as brandy, is a depressant and hastens the effects of cold on the body. Alcohol also slows circulation and can make you less aware of the effects of cold. Both caffeine and alcohol can cause dehydration.
Conserve fuel. Winter storms can last for several days, placing great demand on electric, gas, and other fuel distribution systems (fuel oil, propane, etc.). Lower the thermostat to 65° F (18° C) during the day and to 55° F (13° C) at night. Close off unused rooms, and stuff towels or rags in cracks under the doors. Cover the windows at night.
Check on relatives, neighbors, and friends, particularly if they are elderly or if they live alone.
Staying Safe OutsideIf you must go outside, protect yourself from winter storm hazards:
Wear layered clothing, mittens or gloves, and a hat. Outer garments should be tightly woven and water repellent. Mittens or gloves and a hat will prevent the loss of body heat.
Cover your mouth to protect your lungs from severely cold air. Avoid taking deep breaths; minimize talking.
Watch for signs of hypothermia and frostbite.
Keep dry. Change wet clothing frequently to prevent a loss of body heat. Wet clothing loses much of its insulating value and transmits heat rapidly away from the body.
Stretch before you go out. If you go out to shovel snow, do a few stretching exercises to warm up your body. This will reduce your chances of muscle injury.
Avoid overexertion, such as shoveling heavy snow, pushing a vehicle, or walking in deep snow. The strain from the cold and the hard labor may cause a heart attack. Sweating could lead to a chill and hypothermia.
Walk carefully on snowy, icy sidewalks. Slips and falls occur frequently in winter weather, resulting in painful and sometimes disabling injuries.
If you must go out during a winter storm, use public transportation if possible. About 70 percent of winter deaths related to ice and snow occur in automobiles.
Driving in Winter Conditions
Check your vehicle emergency supplies kit and replenish it if necessary.
Bring enough of the following for each person:
- Blankets or sleeping bags
- Rain gear, extra sets of dry clothing, mittens, socks, and wool hats
- Newspapers for insulation
- Plastic bags for sanitation
- Canned fruit, nuts, and high energy snacks (Include a non-electric can opener if necessary)
- Warm broth in a thermos and several bottles of water
- Keep a cell phone or two-way radio with you. Make sure the battery is charged.
- Plan to travel during daylight and, if possible, take at least one other person with you.
Let someone know your destination, your route, and when you expect to arrive. If your vehicle gets stuck along the way, help can be sent along your predetermined route.
Before leaving, listen to weather reports for your area and the areas you will be passing through, or call the state highway patrol for the latest road conditions.
Be on the lookout for sleet, freezing rain, freezing drizzle, and dense fog, which can make driving very hazardous
If You Become Stranded
Stay in the vehicle and wait for help. Do not leave the vehicle to search for assistance unless help is visible within 100 yards (91 meters). You can quickly become disoriented and confused in blowing snow.
Display a trouble sign to indicate you need help. Hang a brightly colored cloth (preferably red) on the radio antenna and raise the hood after snow stops falling.
Run the engine occasionally to keep warm. Turn on the engine for about 10 minutes each hour (or five minutes every half hour). Running the engine for only short periods reduces the risk of carbon monoxide poisoning and conserves fuel. Use the heater while the engine is running. Keep the exhaust pipe clear of snow, and slightly open a downwind window for ventilation.
Leave the overhead light on when the engine is running so that you can be seen.
Do light exercises to keep up circulation. Clap your hands and move your arms and legs occasionally. Try not to stay in one position for too long.
If more than one person is in the vehicle, take turns sleeping. If you are not awakened periodically to increase body temperature and circulation, you can freeze to death.
Huddle together for warmth. Use newspapers, maps, and even the removable floor mats for added insulation. Layering items will help trap more body heat.
Watch for signs of frostbite and hypothermia. Severe cold can cause numbness, making you unaware of possible danger.
Drink fluids to avoid dehydration, which can make you more susceptible to the ill effects of cold and to heart attacks.
Avoid overexertion. Cold weather puts an added strain on the heart. Shoveling snow or pushing a vehicle can bring on a heart attack or make other medical conditions worse.
After
After a Winter Storm
Continue listening to local news or a NOAA Weather Radio for updated information and instructions. Access to some parts of the community may be limited or roads may be blocked.
Help people who require special assistance—infants, elderly people, those without transportation, large families who may need additional help in an emergency situation, people with disabilities, and the people who care for them.
Avoid driving and other travel until conditions have improved.
Avoid overexertion. Heart attacks from shoveling heavy snow are a leading cause of death during the winter.
Check on your animals and ensure that their access to food and water is unimpeded by drifted snow, ice, or other obstacles.
If you are using a portable generator, take precautions against carbon monoxide poisoning, electrocution and fire.
Identifying & Treating Frostbite and Hypothermia
Frostbite and hypothermia are cold-related emergencies that may quickly become life or limb threatening.
Take these steps to avoid frostbite and hypothermia:
Be aware of the wind chill. Dress appropriately and avoid staying in the cold too long. Wear a hat and gloves when appropriate with layers of clothing. Avoid unnecessary exposure of any part of the body to the cold.
Drink plenty of warm fluids or warm water but avoid caffeine and alcohol. Stay active to maintain body heat.
Take frequent breaks from the cold.
Get out of the cold immediately if the signals of hypothermia or frostbite appear.
Frostbite
Frostbite is the freezing of a specific body part such as fingers, toes, the nose or earlobes.
Signs of frostbite:
Lack of feeling in the affected area
Skin that appears waxy, is cold to the touch, or is discolored (flushed, white or gray, yellow or blue)
What to do for frostbite:
1. Move the person to a warm place
2. Handle the area gently; never rub the affected area
3. Warm gently by soaking the affected area in warm water (100–105 degrees F) until it appears red and feels warm
4. Loosely bandage the area with dry, sterile dressings
5. If the person’s fingers or toes are frostbitten, place dry, sterile gauze between them to keep them separated
6. Avoid breaking any blisters
7. Do not allow the affected area to refreeze
8. Seek professional medical care as soon as possible
Hypothermia
Hypothermia is the cooling of the body caused by the failure of the body’s warming system. The goals of first aid are to restore normal body temperature and to care for any conditions while waiting for EMS personnel.
Signs of hypothermia:
Shivering
Numbness or weakness
Glassy stare
Apathy or impaired judgment
Loss of consciousness
What to do for hypothermia:
1. CALL 9-1-1 or the local emergency number
2. Gently move the person to a warm place
3. Monitor breathing and circulation
4. Give rescue breathing and CPR if needed
5. Remove any wet clothing and dry the person
6. Warm the person slowly by wrapping in blankets or by putting dry clothing on the person.
Hot water bottles and chemical hot packs may be used when first wrapped in a towel or blanket before applying. Do not warm the person too quickly, such as by immersing him or her in warm water.
Warm the core first (trunk, abdomen), not the extremities (hands, feet).
Recovering After a Winter Storm
Once you are physically safe, take time to ensure your family’s emotional and financial well-being.
According to OSHA (the Occupational Safety and Health Administration), more people are killed by falling trees every year (100+) than are killed by sharks (about 4-7 per year).
Falling trees kill or injure more people than lightning. Although the numbers of tree fall fatalities are relatively low compared with other fatalities, the numbers for property damage from falling trees is much higher, ranging in the hundreds of thousands. According to the National Storm Damage Center, falling trees are the main causes of roof damage, costing more than $1 billion in property damage each year. So, chances are if you are a homeowner with lots of trees in your yard, you may encounter tree damage of some kind in your lifetime and in that situation, you will need to know what to do if a tree falls on your home:
If you’re in the house when a tree falls, leave the house and the property as soon as possible. Beware of downed electrical lines, and if you have gas lines, do not use your cell phone to call for help until you are away from the house. Use the safest route possible to get away from the house.
Call 911 or emergency services. They will send fire or appropriate responders to ensure the house is safe. If anyone has been injured or killed, let the dispatcher know this when you call. Remain at the scene unless you are injured. Seek medical care or wait for an ambulance if you have been injured.
Call your insurance company as soon as possible so they can agree to cover any emergency costs, removal or other details covered in your homeowner’s policy. If your tree has fallen on your neighbor’s property, your neighbor will need to make a claim on their insurance policy, but your insurance company should be aware of the damage as well.
Contact a roofing contractor, tree surgeon, tree removal company, builder or any other home professional to examine any damage, to remove the tree and secure the home so there is no additional damage to your property or possessions. Even if the tree misses the house, tree roots can extend under a property, causing damage to the foundation. So, have your builder or contractor check inside the house for cracks in the drywall, or the outside for cracks in the brickwork. Lowes’ experts say, “Don’t attempt to deal with the tree removal or roof repair yourself. Even if the fallen branches or tree seems small, you never know the extent of the storm damage or if the framework or structural integrity if your home has been compromised.”
If you are unable to live in the house during repairs, make sure any damaged areas are secured to prevent looting and theft. Put valuables in temporary storage, and board up broken windows, holes in the wall etc.
Once the tree has been dealt with, what steps can you take to ensure it doesn’t happen again?
Make sure your trees are healthy
Other than raking leaves, building treehouses, or picking up fallen branches, twigs and debris, most homeowners don’t think about their trees very often. Even fewer know the signs of an unhealthy, dying, or dead branch or tree. Here a few signs from RTEC Treecare, one of the companies that take care of the trees at the mall in Washington, DC to pay attention to:
Large branches attached with tight, V-shaped forks. These branches are prone to failure and may need to be lightened or removed.
Cracks in the trunk of the tree or in major limbs
Fungi growing from the base of your tree or under its canopy. This could be a sign of root decay.
Branches that are pointing/hanging downwards these damaged branches can easily fall during storms.
Partially attached limbs hung up in the high branches that could fall.
Large cavities in the tree trunk.
Wires in contact with tree branches.
Other things you can do to ensure you and your family are safe from tree falls:
Have an arborist inspect your trees every year, or whenever there’s been an injury or damage to a tree – such as a lightning strike, hit by a motor vehicle, or a pest infestation.
Do preventative pruning, and ask your neighbors to do the same. Preventative pruning reduces wind resistance and removes dead branches. This reduces the risk of the tree or the tree’s limbs snapping under the force of wind gusts.
Make sure your trees are mulched correctly if you mulch them. Mulch protects the root system of the tree and allows water and nutrients to drain down through the soil to the roots. This keeps the root system healthy which helps the tree stay strong during storms. Unhealthy root systems can lead to trees uprooting and snapping in heavy winds.
Wrap your young trees to prevent sunscald. Sunscald is winter damage that is commonly seen on young trees, newly planted trees, and thin-barked trees (cherry, crabapple, honey locust, linden, maple, mountain ash, plum). Sunscald causes the tree bark to dry and crack.
Legal issues regarding who pays for damages or home repairs etc. to your house from a falling tree in your yard, or from a neighbor’s yard, vary greatly from state-to-state, county to county and insurer to insurer. It’s best to talk to your insurance agent before anything happens to determine if you are covered in the event of a tree fall.
Have you prepared your plumbing for winter? Damage caused from burst pipes can cost you thousands, of dollars. Not all damage is covered by homeowner’s insurance. We want to make sure you know some simple steps to get you prepared. Follow these 7 simple steps to get off to a great start. Find yourself in a bind? Brogdon Plumbing is here to help! Give us a call.
Prepare your outdoor faucets. Remove and drain your water hoses and store them indoors before the first freeze.
Fix leaks now. Inspect your pipes and have any/all leaks repaired.
Wrap any pipes in unheated areas of the home. This is crucial, for mobile homes. Visit the hardware store and grab some heat tape and/or pipe insulation. There are also easy to install kits, that include a thermostat. These kits can help you in the event of frigid temps for long periods. Don’t hesitate to ask an employee for recommendations. Protecting the pipes in your home, from low temperatures is THE single most important thing that you can do.
Tune up your water heater. You will want to drain and maintain your water heater at this time every year. It’s a little harder to do yourself but we are glad to help! Just give us a call.
Service your furnace. Make sure you have clean filters and call a professional to help with major repairs. Heat means pipes could freeze. If they do, call us!
Selling your home or heading south for winter? Shut off the water, in your home, completely and consider contacting us to drain your pipes. Any water left in your pipes is at risk of freezing and causing pipes to bust. If nobody is home, the damage can be widespread and severe. Don’t take chances.
Call Brogdon plumbing! If you have questions or concerns, contact us for help. We will gladly help with your winter pipe preparations!
What else can you do to prepare your plumbing for winter? Share your personal tips/tricks with us.
Got a leaky toilet? Believe it or not, it’s a common problem. Continue reading to find out the likeliest causes and the easiest ways to remedy the situation.
First, some of the washers between the bowl and tank may have failed. Shut off the supply valve, empty the tank with a flush, then remove the nuts, bolts, and washers from the underside of the tank. Lift the tank, position it on its side, and see if the washers need replacing.
Another culprit may be faulty fasteners securing the fill valve and ballcock to the bottom of the tank. Before you replace those parts, however, first try simply tightening the nuts and bolts holding them in place—that often solves the problem.
On the other hand, if the leak seems to be coming from the base of the tank, chances are the wax ring that seals the toilet to the floor has failed. Replacing the wax ring is a much bigger job, since it involves removing the entire toilet from its base. If you decide to replace the wax ring yourself—preferably with a friend to help with the lifting—take the extra step of also replacing any bolts that show signs of corrosion. And, once you have the toilet back in place, don’t forget to add a bead of caulk around the base.
Our little community may be small in size but large in impact and culture. Our small but thriving areas make living in East Tennessee possibly one of the greatest places in America to live.
One great thing about our little community is that we love big. We stand behind one another in good times and in bad. We support and encourage one another. When one part of our community is struggling or faces disaster, we come alongside them as one unit in helping restore them to their previous state.
At SERVPRO, we are proud of our community. We are privileged to come alongside it and to serve the people that live and do business inside the county lines. We are sure that there are tons of other small towns and communities like ours, but we wouldn't trade ours for the world.
We hope that our community knows that if they face fire, water, mold, or storm damage, that we will be there fast to get them back on their feet in no time. But, the best part is, we are better together!
Packing up your entire home and relocating can be extremely overwhelming. In order to make the move a smooth transition, there are a few things to check up on at your new home prior to moving in. Avoid any extra stresses by checking off these five tasks for your new home.
Change the Locks
Changing the locks on all your doors is an important step to feeling safe in your new home. As kind as the previous owners may have been, it’s nice knowing there isn’t anyone out there but you that has a key to your home. It’s best to schedule this task before moving all your belongings in to avoid any time period of unsecured doors during the transition.
Deep Clean the House
Hopefully, the previous owners took care of cleaning and preparing the house when they first moved out, but there are some areas to check on just to be sure the place is in pristine condition. It’s easiest to clean the hard-to-reach places before you move in and there aren’t any objects in the way. Some areas to deep clean might include inside cupboards, the washer and dryer, fridge, oven, stove, and dishwasher.
Inspect for Mold
The last thing you need is to settle into your new home only to discover it has a mold issue. The minimum you should do is at least inspect for leaks, odors, or visible signs of mold throughout the house. However, now is the prime time to schedule a mold inspection and cleanup to detect the air quality of your home and find any hidden mold.
Check Smoke and Carbon Monoxide Detectors
Speaking of air quality, make sure to check the carbon monoxide detector and smoke alarms throughout the house. It’s a relief knowing that your home is equipped with up-to-date and working monitors for you and your family’s safety. If the house doesn’t have a carbon monoxide detector yet, then now is the perfect time to purchase and install one before moving in.
Inspect the Plumbing
Make sure that the plumbing is in mint condition before moving in rather than discovering it too late. Check for leaks and any signs of water damage, and make any appointments you need to fix leaks and issues. This will not only make things run smoother, but it will also save your water bill. While you’re at it, take a look at the water heater as well. Now is a good time to flush your water heater of sediment and check if it has a water softener as well.
There is already a long list of to-dos when it comes to moving out of your house, but many things go overlooked and forgotten when it comes to the new house. Give careful consideration to the different tasks listed to make your new major change a little easier. You will feel confident and relieved moving into your new home knowing you’ve changed the locks, deep cleaned the place, inspected for mold, checked the air and alarms, and inspected the plumbing.
A man grilling out with a fire flare up happening.
We all know that Holidays revolve around family, food, and friends. So we are sure there are going to be some grills fired up. It is good though to be safe and keep in mind that there are some best practices we want to share with you.
HOW TO PREVENT FLARE-UPS
Trim the fat.
Flare-ups usually happen because of excess fat, sauces or oily marinades. So trim as much excess fat as you can, without sacrificing flavor.
Keep the lid open.
When searing fatty foods, leave the grill lid opened.
Avoid wind.
Try to keep your grill away from windy areas. Wind forces oxygen between the grates, which can fuel a flare-up.
Move your food.
Try not to overcrowd your food on your grill. If a flare-up does happen, you want to be able to move your food away from the flame.
Burn the grease away.
During cooking, if grease pools, remove your food and turn the burners on high with the grill lid open until grease has burned off.
Clean your grill.
Keeping your grill clean and maintained will help prevent the dreaded flare-up. Food residue and old grease are both great fuel for a fire, so removing debris after each use is important.
Turn off the burners.
If your grill flare-up is out-of-control, turn off the burners.
Don't use water.
You’ve heard the adage, “Oil and water don’t mix?” Well that’s especially true for flare-ups. Spraying water on a flare-up can cause grease to explode. Don’t use it.
However, we know accidents happen. That is why SERVPRO is here. To help you if your grill or anything else was to catch your home on fire.
The dryer has caught on fire and been put out. Leaving it fire and smoke damage.
Why dryers catch on fire.
My clothes still need doing, and I still find time in even my busiest day to do so. But it is at these moments that we sometimes forget about the dryers.
Not because it is so often at just such a time but because the dryers are so dangerous. That is why it is important to keep up with tips and strategies to prevent dryer fires. To that end, we have to remember that dryers are like appliances that are set to work as part of the daily laundry cycle and thus use a few small parts to ignite.
Here are a couple of things to remember:
Why you don't leave the dryer going when no one is home.
Why you don't leave the dryer going when no one is home.
A big reason to prevent dryer fires is that the fire often leads to a second or third fire or can be a safety hazard. It's always better to prevent fire than to respond to a fire situation.
Before dryer fires occur, we usually have a fire hazard situation. If you have a hot water pipe in your kitchen and fire could start there, use a fire extinguisher. A fire extinguisher can be used effectively to save your property from dryer fires. A fire extinguisher can also be used effectively to extinguish and prevent a fire from occurring at a dryer.
How to clean the dryer lint.
The heat from the dryer is always intense. The machine uses large heat capacity to absorb the heat, leaving the dryer lint sitting on top of the inside of the machine after every cycle. You'll notice that the top of the dryer is always smeared with dryer lint and what is left over after the dryer door closes. The lint can cause a fire. How to minimize this risk?
Simply make sure you throw away the lint from the lint filter after every use.
But if this does happen and you end up with fire damage. Please call SERVPRO. We can help.
When it comes to your family's safety, smoke detectors and fire alarms can be some of the most important items in your home. These early warning devices can alert your family to fire and hazardous smoke while there is still time to evacuate, but they should be tested periodically to ensure they are working properly.
Electronic devices are not faultless. The batteries will die and other parts of the smoke alarm can wear out over time. Regularly testing them and replacing the batteries (or the entire device) can help keep your family safe in the event of a house fire.
Be sure to read your smoke detector's owner's manual - you may need to check more often if any of the following apply: The detector often gives false alarms.
The alarm emits short beeps regularly without anyone touching it.
Frequent kitchen fumes often activate it, which can cause it to wear out faster.
For battery operated: This type may be prone to defective or worn out batteries. Monthly tests are very important.
Never put old batteries in your smoke detectors and fire detectors. Wired: These detectors are powered by your home's electrical system, but they usually have backup batteries so the device stays operational in the event of a power outage.
Wired smoke alarms should still be tested monthly to ensure both batteries and components are working properly.
You should always check manufacturer's instructions for the correct test method for your smoke detector and fire alarm.
You may want to install additional detectors in areas where the alarm sound is low, muffled or weak. Press and hold the test button on the smoke detector. It may take a few seconds to go off, but a loud, deafening siren should come out of the smoke detector when the button is pressed. If not, then replace it.
If it has been more than six months since you last changed the batteries (whether your detector is battery powered or wired), replace it now and test the new batteries one last time to ensure they are working properly, regardless of the test result. .
You should also look at your smoke alarm to make sure it's not dust or any other substance blocking the grilles and causing it to not work even if the batteries are new. Note that smoke detectors typically have a 10-year lifespan.
Now that you know how to prevent your fire alarms from not working, do keep in mind that if they are not working correctly this can cause a house fire. We don't want this to happen at all, but if it does SERVPRO is here to help! We do fire damage remediation at it's best.
A fire in your home can cause devastating damage and require you to act quickly to save as much of your valuable property as possible. There is also the possibility that your house may go up in flames, causing the surrounding area to be filled with smoke and fumes that can eventually be toxic. This article will outline what you should know about fire and the safety precautions you should take if home fires are to occur.
Why is Fire Risk in Your Home at High?
The factors that determine whether a home will be harmed by fire are many. However, those that appear to be most important are the air and heat in the rooms and the walls, combustible material in the home, a poorly constructed home, and age or damage at the attic level. The National Fire Protection Association, or NFFP, recommends to families that they avoid using open flames in all forms at any time, particularly in any heating system.
There are, however, times when open flames are needed or required for cooking and some other activities. This may come about from using open fires in the fireplace for heat or smoke, or due to open flames in a stove or a clothes washer. Also, if your kitchen is very small, then it may be worth giving consideration to using electric space heaters on the countertops rather than open flames. Another risk to consider is the use of open flames in a gas grill. While a gas grill can operate on a pilot flame and is considered safe in most instances, there is always the possibility that there may be an open flame in the grilling area of a gas grill.
The cost of fire damage.
A great number of fire incidents occur in the home. Many homeowners do not have any insurance on their home, or they have it for only a single year, but a couple of times they have insurance for the whole of their life. This is very important as you have to consider fire damage insurance in your life to save your house from financial ruin.
The most important thing is that you should not ignore fire and gas damage when they are occurring. In most cases, the insurance company will provide a minimum of coverage for fire and gas, but it does not mean it will cover fire damage completely. This is due to the fact that damage is subjective. It is not limited to how many homes a fire or gas strike has destroyed. Even if your home has been completely burnt down by fire, you still have to assess the damage. The best thing is, there are many fire damage insurance companies in the market today willing to pay for your claim, you just have to find the best deal possible.
The first thing to do is assess and inspect which areas are affected by the fire. This part is not so difficult, since you cannot see the extent of the fire damage.
Step 2: Check the property damage claim. Some insurance companies will not cover any damage to the inside of the house, but do offer any property damage claims to the exterior of the house. If there is any damage to any areas that are not covered from all parties, the insurance company will be very helpful in calculating the damage, and will get you the necessary compensation.
Step 3: Request a claim form from the insurance company. Many insurance companies make a claim form available to the homeowner. As you know, there will be a number of claims sent for the homeowner, there will also be a claim number corresponding to the claim number given by the insurance company
If you find yourself with fire damage. Please call SERVPRO. We can help!
A good storm shelter is something everybody should have in their house and on their property for any time of potential or actual danger. Storm shelters for hurricanes and any other type of tropical cyclone is important, even more when you start considering the risks of tornadoes, blizzards, fire storms, and floods, all of which are just a few of the hazards we have to worry about. These storms are all out there for us to experience at any given time, and we all have the power to prepare in a number of ways.
Why we need them.
The answer is simple. You need them in order to keep you and your family safe. Figure out what kind of shelter or disaster preparedness plan you need.
The after math.
In the event we have to actually use a storm shelter, then there will almost always be cleanup. Where there is cleanup, there is help needed. So when you need help, call SERVPRO.
People walking and driving in a street with flooding.
If you live in East TN, then you have heard the words "floods" and "storms", but let's take a closer look at according the ready.gov.
"Flooding is a temporary overflow of water onto land that is normally dry. Floods are the most common natural disaster in the United States. Failing to evacuate flooded areas or entering flood waters can lead to injury or death."
Floods may:
Result from rain, snow, coastal storms, storm surges and overflows of dams and other water systems.
Develop slowly or quickly. Flash floods can come with no warning.
Cause outages, disrupt transportation, damage buildings and create landslides.
If you are under a flood warning:
Find safe shelter right away.
Do not walk, swim or drive through flood waters. Turn Around, Don’t Drown!
Remember, just six inches of moving water can knock you down, and one foot of moving water can sweep your vehicle away.
Stay off bridges over fast-moving water.
Depending on the type of flooding:
Evacuate if told to do so.
Move to higher ground or a higher floor.
Stay where you are.
If your property is damaged by a flood give SERVPRO a call! We can help!
It happens to everyone. A toilet. A leaky faucet. A busted pipe. Hey its manmade and we know that it breaks. The question however, is what actions do we take first.
1. Find and shut of the water source. Now mater where it is, find it and stop it. Even if that means bringing in the professionals.
2. Turn off all the circuit breakers. You never know where that water has traveled or is. Last thing you want to do is electrocute yourself.
3. Now try and move as much water as possible.
4. Removed and prop up wet upholstery so it can dry.
5. Try and remove as much valuable stuff to a dry safe area.
6. Take pictures of everything.
7. Contact your insurance agent and SERVPRO.
Also don't try and dry it with your fans or vacuum cleaners. That is only going to make things worse and cost you a new vac. Call us and our professionals can handle the hard parts.
If you have ever faced water damage in your office, you may have some bad memories that accompany that instance. For example, you may have lost copiers, files, furniture, and a manner of other items of value due to water damage. You may have even had to close the doors of your business if you're a business owner, or if you're an employee, you may have had a period where you weren't able to work.
This water damage could have been a result of a leaky window, roof, or wall, or it could have been a plumbing malfunction or problem. Regardless how it happened, it more than likely caused a pretty big headache.
After the initial water intrusion problem was resolved, you may have had to deal with mold growth and other devastating effects of water damage in your office. So, what can you do to be better prepared in the event that your office was ever hit with water damage again?
First things first. With today's technological advancements, it's a great idea to back-up files and other hard-copy paper files to more than one location. Also, it's a great idea to stay up-to-date on your equipment warranties as well as renter's or owner's insurance on the office itself. If you have the ability to, it's also a great idea to work out a "Plan B" location for your co-workers or employees to meet in the event of office damage in the future. The possibility for remote work is far more probable now than in recent years.
Next, it's important to have a professional water damage and mold remediation team on hand that you can count on. You never know when water damage might strike your office, so knowing that you have a team of professionals on-call and ready to help should give you immense peace of mind going forward. You want someone to show up when you call with full confidence that your problem will be resolved quickly and efficiently.
Our local SERVPRO team is ready to help in the event a disaster like water damage were to strike you. Our team is more than capable to take care of your problems - large or small. You can count on us!
SERVPRO® franchise professionals are uniquely prepared to clean and disinfect your home or business according to the protocols set forth by the CDC. We have years of experience in dealing with biological contaminants, and we will go beyond the scope of work that regular janitorial staff perform on a daily basis. Our professionals are trained to perform a proactive cleanup that involves facility or structure cleaning and disinfection. Cleanup procedures generally include cleaning of porous and non-porous surfaces, disinfecting of non-porous surfaces, cleaning and disinfecting of equipment, tools, and/or supplies used for cleanup process, and disposal of waste.
The CDC encourages cleaning of high-touch surfaces such as counters, tabletops, doorknobs, light switches, bathroom fixtures, toilets, phones, keyboards, tablets and tables. Other spaces mentioned in the CDC’s guidance for commercial spaces include:
Kitchen/Food Areas
Bathrooms
Schools/Classrooms
Offices
Retail Spaces
Water Fountains
Shelving/Racks
Sales Counters
Carpets and Rugs
Stair Handrails
Elevator Cars
Playground Equipment
Fitness Equipment
Specialized Products
The CDC recommends usage of a labeled hospital-grade disinfectant with claims against similar pathogens to the coronavirus. Multiple products in the SERVPRO product line carry the EPA-approved emerging pathogens claims.
Minimize Your Risk
Tips and Best Practices to Reduce Your Risk
Cities and states took drastic measures to curb the severity of the pandemic, including the closing of bars, restaurants, and public venues. In some areas, officials issued “shelter in place” orders in order to compel residents to stay in their homes and limit movement. To protect yourself, minimize your exposure with the following tips:
Practice Good Hygiene
Clean hands with sanitizer and wash your hands frequently
Avoid touching your face and cover coughs and sneezes
Disinfect “high touch” surfaces like doorknobs, light switches, tables, doorknobs, and handrails regularly
Increase ventilation by opening windows or adjusting air conditioning
At The Office
Stop shaking hands – use other noncontact methods of greeting
Use videoconferencing for meetings when possible
When not possible, hold meetings in open, well-ventilated spaces
Disinfect “high touch” surfaces like desks, keyboards, light switches, doorknobs, and telephones
We have all been there. That moment we have buckled down because the weather radio and emergency broadcast system have broadcasted that a storm is on its way. The aftermath can sometimes be devastating. However, storm damage in TN doesn't seem to have any shortage of supply.
Here are steps that can help navigate you:
1. What is the damage?
Take an evaluation of the storm damage. Check your siding, roofing, and structure of the home.
2. Find someone to help you.
You will need 3 people here: A contractor, SERVPRO, and an Insurance Agency.
3. Obtain all your reports and submit your claims.
4. Line up and schedule the work and cleanup.
Remember, SERVPRO of MMP is here to help. Thank You!
We have all been there. That moment we have buckled down because the weather radio and emergency broadcast system have broadcasted that a storm is on its way. The aftermath can sometimes be devastating. However, storm damage in TN doesn't seem to have any shortage of supply.
Here are steps that can help navigate you:
1. What is the damage?
Take an evaluation of the storm damage. Check your siding, roofing, and structure of the home.
2. Find someone to help you.
You will need 3 people here: A contractor, SERVPRO, and an Insurance Agency.
3. Obtain all your reports and submit your claims.
4. Line up and schedule the work and cleanup.
Remember, SERVPRO is here to help for all your storm damage needs. Thank You!
Mold primarily grows because of indoor moisture and spreads on your walls, furniture, floor, carpet, etc. It can cause significant damage. The reason is that wherever mold grows, it weakens that structure, and eventually, it rots. As a result, it can cause heavy structural damage. So, below we will discuss some of the dangerous aspects of mold and how it damages buildings.
1. Building material and structural components
Wherever mold grows, it causes irreversible damages. It’s because when mold grows, it feeds on organic matter by breaking it down. As it spreads, it creeps its way towards the pipes, insulation, carpets, etc. Therefore, whichever office item gets plagued by mold, you need to discard it immediately.
Groundwater or standing water can be a significant cause of mold in crawl spaces or in the basement. As seasons change, you will have air coming in your vents into your crawl space. In the summer, hot, humid air will raise the humidity level in your crawl space, leading to issues like moisture in the wall. Crawl space encapsulation is one of the most effective ways of preventing mold damages caused by indoor humidity.
2. Damages property
A mold is like a parasite you can never really get rid of properly. Unfortunately, the cases of mold are worse in states that experience heavy rain.
Sometimes mold seeps into the object so deeply that it is impossible to remove its spores entirely. As a result, even if you clean it on the surface, the mold will grow and spread again in a matter of days.
3. Spreads in the heating and vent system
Mold contamination is not limited to walls and carpets. It can grow and spread into your ventilation and heating systems as well. Consequently, it becomes tough to clean the mold in such small and cramped systems thoroughly. As a result, the air ventilation or heating system carries the mold towards other parts of the building, where it can spread.
4. Cause rotting and decay
There are various types of molds, some more dangerous to the health and structure than others. The worst part is that molds can grow on any surface. Whether beams, sill, windows, etc., they are all susceptible to develop mold due to excess moisture.
If you do not take appropriate action promptly, it can cause your wood to decay and rot. It will eventually ruin your structure, and its strength and integrity become questionable.
Conclusion
Taking preventive measures will help prevent the growth. In case you still find mold growing in a neglected corner, hire professionals immediately. A professional can adequately assess the situation and use bio-friendly chemicals to remove your property’s mold and excess moisture. Call SERVPRO.
In East TN you find yourself knowing everyone. Especially if you are a teacher. So we wanted to give all you educators out there some tips on keeping that classroom save and sanitized.
Cleaning, Sanitizing, and Disinfecting Know the difference between cleaning, sanitizing, and disinfecting.
Use the right product for the task:
• CLEANING removes dirt and most germs. Use soap and water. Choose green cleaners certified by a third party such as Green Seal or EPA’s Safer Choice. In the classroom, cleaning is the focus.
• SANITIZING reduces germs to safe levels, for example in food service environments. Food code regulations have specific requirements for sanitizers in the cafeteria and kitchen.
• DISINFECTING kills most germs, depending on the type of chemical, and only when used as directed on the label. In schools, custodial staff use disinfectants and sanitizers regularly only in high-risk areas – nurse’s office, bathrooms, cafeterias, kitchens, drinking fountains, sink and door handles, and athletic facilities; preferably, when students are not present. Overuse does not provide any additional protection and can expose students and staff to harmful chemicals. Students should never use disinfectants. Disinfectant wipes shouldn't be used to clean hands. This includes Clorox wipes. If students are helping to clean:
• They should only use soap and water.
• Fragrance-free baby wipes could be used for quick cleaning.
• Most store-bought cleaning products are not safe for children to use.
Many germs and virus are found on the surfaces in your workplace and home. It is important to keep all your work surfaces clean, especially during a pandemic or emerging disease event. Work surfaces that should be cleaned and disinfected regularly include telephones, computer equipment, and other frequently touched surfaces. Be sure that any cleaner you use is safe to use and will not damage office equipment. Use only disinfectants registered by the U.S. Environmental Protection Agency (EPA), and follow all directions and safety precautions indicated on the label.
How long can viruses and germs live on surfaces in the workplace?
Influenza virus can survive on surfaces and still infect a person for up to 2-8 hours after being deposited on the surface.
What kills viruses and germs that live on surfaces in the workplace?
Most viruses are destroyed by heat (167-212°F). Several chemical germicides, including chlorine, hydrogen peroxide, detergents (soap), iodine-based antiseptics, and alcohols are effective against human viruses if used in proper concentration for a sufficient length of time.
If a disinfectant product is not available, you can clean surfaces with a chlorine bleach solution made by adding 1 tablespoon of bleach to a quart (4 cups) of water; use a cloth to apply this to surfaces and let stand for 3 – 5 minutes before rinsing with clean water. (For a larger supply of disinfectant, add ¼ cup of bleach to a gallon [16 cups] of water.)
Wear gloves to protect your hands when working with strong bleach solutions or strong disinfectants.
What surfaces are most likely to be sources of contamination?
Germs and viruses spread when someone touches something that is contaminated and then touches his or her eyes, nose, or mouth. Droplets from a cough or sneeze of an infected person move through the air and carry viruses with them. A person can become infected by touching a surface where these droplets land before touching their eyes, mouth, or nose. Frequent hand washing prevents virus transmission from infected surfaces.
Beginning in 2020, The Centers for Disease Control and Prevention responded to an outbreak of a respiratory disease caused by a new coronavirus that was first detected in China and spread internationally. While the virus is termed coronavirus, the sickness that results after infection is termed COVID-19.
COVID-19 was declared a pandemic, which is a global outbreak of a disease.
Expert Level Cleaning Services
SERVPRO® franchise professionals are uniquely prepared to clean and disinfect your home or business according to the protocols set forth by the CDC. We have years of experience in dealing with biological contaminants, and we will go beyond the scope of work that regular janitorial staff perform on a daily basis. Our professionals are trained to perform a proactive cleanup that involves facility or structure cleaning and disinfection. Cleanup procedures generally include cleaning of porous and non-porous surfaces, disinfecting of non-porous surfaces, cleaning and disinfecting of equipment, tools, and/or supplies used for cleanup process, and disposal of waste.
The CDC encourages cleaning of high-touch surfaces such as counters, tabletops, doorknobs, light switches, bathroom fixtures, toilets, phones, keyboards, tablets and tables. Other spaces mentioned in the CDC’s guidance for commercial spaces include:
Kitchen/Food Areas
Bathrooms
Schools/Classrooms
Offices
Retail Spaces
Water Fountains
Shelving/Racks
Sales Counters
Carpets and Rugs
Stair Handrails
Elevator Cars
Playground Equipment
Fitness Equipment
Specialized Products
The CDC recommends usage of a labeled hospital-grade disinfectant with claims against similar pathogens to the coronavirus. Multiple products in the SERVPRO product line carry the EPA-approved emerging pathogens claims.
Minimize Your Risk
Tips and Best Practices to Reduce Your Risk
Cities and states took drastic measures to curb the severity of the pandemic, including the closing of bars, restaurants, and public venues. In some areas, officials issued “shelter in place” orders in order to compel residents to stay in their homes and limit movement. To protect yourself, minimize your exposure with the following tips:
Practice Good Hygiene
Clean hands with sanitizer and wash your hands frequently
Avoid touching your face and cover coughs and sneezes
Disinfect “high touch” surfaces like doorknobs, light switches, tables, doorknobs, and handrails regularly
Increase ventilation by opening windows or adjusting air conditioning
At The Office
Stop shaking hands – use other noncontact methods of greeting
Use videoconferencing for meetings when possible
When not possible, hold meetings in open, well-ventilated spaces
Disinfect “high touch” surfaces like desks, keyboards, light switches, doorknobs, and telephones
Sewer backups should be considered an emergency since the water may contain viruses, bacteria, and other microbes that cause serious illnesses. SERVPRO has the specialized training and equipment to quickly and safely clean contaminants like sewage.
Toilet Overflow or Sewer Backup?
Water damage can be classified by the three types of contaminated water. SERVPRO will inspect your home or business to determine the appropriate plan of action for the type of water encountered.
The three types of contaminated water:
1:
Category 1 water is from a clean source like a broken water supply line or leaking faucet. If not treated quickly, this water can turn into category 2 or 3, depending on length of time, temperature, and contact with surrounding contaminants.
Water from a clean source like a broken water line
If left untreated, can degrade into category 2 or 3
2:
Category 2 water is contaminated and could cause discomfort or illness. Examples include washing machine overflow; toilet overflow with some urine, but no feces; or dishwasher overflow.
May contain bacteria and viruses
Can quickly degrade into category 3 if left untreated
3:
Category 3 water is grossly contaminated and could cause severe illness or death if ingested and any contact should be avoided. Examples include flooding from rivers or streams, water from beyond the toilet trap, water from the toilet bowl with feces, or standing water that has begun to support microbial growth.
May contain untreated sewage, harsh chemicals, and microbes
Water from flooding rivers or sewer backup
We offer 24-Hour Emergency Service
Water contaminated with sewage backup should be considered an emergency situation and dealt with as quickly as possible. A SERVPRO team near you is available 24 hours a day, 365 days a year. They are water damage restoration specialists with specialized training, equipment and protective gear to safely restore your home or business.
Biohazard contaminants should be considered very dangerous. Sewer backups and flood water are two common biohazard scenarios that can affect homes and businesses. SERVPRO has the training, protective gear, and specialized equipment necessary to safely clean and restore this type of contamination.
What To Do After a Contamination
Stay out of affected areas.
Call emergency service personnel if the situation is life-threatening.
Treat all bodily fluids as if they are contaminated.
Turn off the HVAC system if there is sewage damage.
What Not To Do After a Contamination
Don’t leave wet fabrics in place. Hang furs and leather goods.
Don’t leave books, magazines, or other colored items on wet carpet or floors.
Don’t use your household vacuum to remove water.
Don’t use television or other household appliances.
Don’t turn on ceiling fixtures if ceiling is wet, and keep out of rooms where ceilings are sagging.
24-Hour Emergency Service
Biohazards like flood water or sewer backups should be considered an emergency and dealt with as quickly as possible. SERVPRO professionals are water damage restoration specialists and have specific training and expertise to safely remediate biohazard contaminants.
Two guys at a crime scene prepping it for cleanup.
After the police have finished processing a crime or accident scene, the cleaning and restoration process can begin. Many times, crime and accident scenes have blood and other biohazard contaminants. SERVPRO can respond immediately and has the specialized training, protective equipment, and experience to safely clean trauma and crime scenes.
SERVPRO technicians follow OSHA and EPA protocols to help transform an unsafe environment back into a clean, safe home or business.
Crime Scene and Trauma Cleaning Services
Fingerprint powder and evidence-gathering chemicals
Tear gas and pepper spray residues
Fire extinguisher residue
Blood, bodily fluids, and tissue remnants
Crime Scene Residues
From fingerprint powder and evidence-gathering chemicals to tear gas and pepper spray residues, SERVPRO can clean and restore your property after a crime scene investigation.
Bloodborne Pathogens
SERVPRO can remove and dispose of bodily fluids, tissue and other potentially pathogenic substances resulting from accident, trauma, crime or death. Trained SERVPRO team members clean, disinfect and deodorize the structure.
Methamphetamine Labs: We do that too!
SERVPRO realizes many of the chemicals used in the production of illegal drugs such as methamphetamine are volatile and can leave harmful residues throughout a structure. SERVPRO franchise professionals follow federal and state guidelines to properly clean all surfaces.
It happens to everyone. A toilet. A leaky faucet. A busted pipe. Hey its manmade and we know that it breaks. The question however, is what actions do we take first.
1. Find and shut of the water source. Now mater where it is, find it and stop it. Even if that means bringing in the professionals.
2. Turn off all the circuit breakers. You never know where that water has traveled or is. Last thing you want to do is electrocute yourself.
3. Now try and move as much water as possible.
4. Removed and prop up wet upholstery so it can dry.
5. Try and remove as much valuable stuff to a dry safe area.
6. Take pictures of everything.
7. Contact your insurance agent and SERVPRO.
Also don't try and dry it with your fans or vacuum cleaners. That is only going to make things worse and cost you a new vac. Call us and our professionals can handle the hard parts.
Evacuate immediately, if told to evacuate. Never drive around barricades. Local responders use them to safely direct traffic out of flooded areas.
Contact your healthcare provider If you are sick and need medical attention. Wait for further care instructions and shelter in place, if possible. If you are experiencing a medical emergency, call 9-1-1.
Listen to EAS, NOAA Weather Radio or local alerting systems for current emergency information and instructions regarding flooding.
Do not walk, swim or drive through flood waters. Turn Around. Don’t Drown!
Stay off bridges over fast-moving water. Fast-moving water can wash bridges away without warning.
Stay inside your car if it is trapped in rapidly moving water. Get on the roof if water is rising inside the car.
Get to the highest level if trapped in a building. Only get on the roof if necessary and once there signal for help. Do not climb into a closed attic to avoid getting trapped by rising floodwater.
We have all been there. That moment we have buckled down because the weather radio and emergency broadcast system have broadcasted that a storm is on its way. The aftermath can sometimes be devastating. However, storm damage in TN doesn't seem to have any shortage of supply.
Here are steps that can help navigate you:
1. What is the damage?
Take an evaluation of the storm damage. Check your siding, roofing, and structure of the home.
2. Find someone to help you.
You will need 3 people here: A contractor, SERVPRO, and an Insurance Agency.
3. Obtain all your reports and submit your claims.
4. Line up and schedule the work and cleanup.
Remember, SERVPRO of MMP is here to help. Thank You!
An emergency preparedness kit with shelter and food.
If you live in East Tennessee then you are familiar with our crazy weather. From one hour to the next, you never know what may come. Hail or Rain. Lightning or Winds. Like I said, we never know. However, according to weather.gov there are some things we can do.
1. Be on top of it. Know your weather and what is coming. Keep up today with the forecasts for your area. You can listen to the news or a weather radio.
2. Opt in for updates and notifications. You can do this with many apps on android or apple. Also, most cities have a text line that will send you notifications.
3. Make sure you have a plan that will allow you to communicate with everyone. Have a meeting spot. Make sure its free of things that can hurt you like windows.
4. Practice makes perfect. Run through it. Do the drills. Make sure everyone knows it!
5. Prepare for it. Get yourself some kits that have emergency supplies in it. You never know.
6. Call us @ SERVPRO to go ahead and make a plan for the aftermath.
A good storm shelter is something everybody should have in their house and on their property for any time of potential or actual danger. Storm shelters for hurricanes and any other type of tropical cyclone is important, even more when you start considering the risks of tornadoes, blizzards, fire storms, and floods, all of which are just a few of the hazards we have to worry about. These storms are all out there for us to experience at any given time, and we all have the power to prepare in a number of ways.
Why we need them.
The answer is simple. You need them in order to keep you and your family safe. Figure out what kind of shelter or disaster preparedness plan you need.
In a world where human beings are at the mercy of the elements, where nature is constantly threatening survival, our response is to build shelters to protect ourselves.
In every culture where human beings have settled there have been shelters. From tribal caves to the tipi of the Lakota. Even now, in the great cities of this planet, the only buildings that protect people are the walls of the city.
The after math.
In the event we have to actually use a storm shelter, then there will almost always be cleanup. Where there is cleanup, there is help needed. So when you need help, call SERVPRO.
Remember, in todays world, climate change is a real thing. Adaptation to this is a real thing. Do yourself a favor and go ahead and put a storm shelter in just in case.
When we think about computers we think about data, when we think about data, we think about disaster recovery. Or at least most businesses do in this post pandemic world we live in. How often do we think about the after math and what that looks like?
Here is what that looks like:
No matter the cause of the disaster. It could be electrical, mechanical, water, and all sorts of other causes of the disaster and it would still look the same.
People going in and people coming out. All loading trucks with lots and lots of equipment that was ruined. Servers, office equipment, racks, mounts, phones, TVs, conference system, monitors, cables, security cameras, dvrs, so forth and so on. Maybe smoke, maybe water pouring out of it. Still what is certain is non of can stay.
So what do you do. You call SERVPRO. Why? Because we offer a disaster recovery team. Your gonna need that, along with all the other things you will need that goes right along with it.
Lucky for you, we specialize in:
Commercial Water Damage Restoration
Commercial Fire Damage Restoration
Commercial Mold Remediation
Commercial Storm and Major Events
Disaster Recovery Team
You can rest assured that SERVPRO is here not only to help, but to rescue you from what can and will arise during this devastating moment of disaster striking. So the next time you need us, don't hesitate to call us or send us a message. Big or small, we got this.
The dryer has caught on fire and been put out. Leaving it fire and smoke damage.
Why dryers catch on fire.
My clothes still need doing, and I still find time in even my busiest day to do so. But it is at these moments that we sometimes forget about the dryers.
Not because it is so often at just such a time but because the dryers are so dangerous. That is why it is important to keep up with tips and strategies to prevent dryer fires. To that end, we have to remember that dryers are like appliances that are set to work as part of the daily laundry cycle and thus use a few small parts to ignite.
Here are a couple of things to remember:
Why you don't leave the dryer going when no one is home.
Why you don't leave the dryer going when no one is home.
A big reason to prevent dryer fires is that the fire often leads to a second or third fire or can be a safety hazard. It's always better to prevent fire than to respond to a fire situation.
Before dryer fires occur, we usually have a fire hazard situation. If you have a hot water pipe in your kitchen and fire could start there, use a fire extinguisher. A fire extinguisher can be used effectively to save your property from dryer fires. A fire extinguisher can also be used effectively to extinguish and prevent a fire from occurring at a dryer.
How to clean the dryer lint.
The heat from the dryer is always intense. The machine uses large heat capacity to absorb the heat, leaving the dryer lint sitting on top of the inside of the machine after every cycle. You'll notice that the top of the dryer is always smeared with dryer lint and what is left over after the dryer door closes. The lint can cause a fire. How to minimize this risk?
Simply make sure you throw away the lint from the lint filter after every use.
But if this does happen and you end up with fire damage. Please call SERVPRO. We can help.
Swimming Pool filled with water that could overflow and cause water damage.
What causes a swimming pool to overflow
What causes a swimming pool to overflow? If you have an under- or over-rated pump, it could trigger the overflow. Water and chemicals in soil that drains slowly could cause an overflow. If you have a small pool and have used too much chlorine, there is the problem. The chemicals used can cause a chemical reaction that is not easily detected
How to care and maintain a swimming pool
How to care and maintain a swimming pool properly.
We don’t just take swimming pools for granted though. After all, they are quite vital for one’s well being and are used quite often day and night. Unfortunately though, when they dry up, they can quickly fill with water and become unusable as well as costing a lot
What to do if your swimming pool overflows.
What to do if your swimming pool overflows.
The answer
It is not really a question of what one can do about an overflow, but rather more of an awareness of a possible failure on your part. In the first instance of an over-flowing, it is likely that the main cause exists is your pool emptying slowly and evenly.
If you are not careful, eventually this will lead to water damage.
How to prevent your grill from catching on fire and burning down your house.
A man grilling out with a fire flare up happening.
We all know that Holidays revolve around family, food, and friends. So this father's day, we are sure there are going to be some grills fired up. It is good though to be safe and keep in mind that there are some best practices we want to share with you.
HOW TO PREVENT FLARE-UPS
Trim the fat.
Flare-ups usually happen because of excess fat, sauces or oily marinades. So trim as much excess fat as you can, without sacrificing flavor.
Keep the lid open.
When searing fatty foods, leave the grill lid opened.
Avoid wind.
Try to keep your grill away from windy areas. Wind forces oxygen between the grates, which can fuel a flare-up.
Move your food.
Try not to overcrowd your food on your grill. If a flare-up does happen, you want to be able to move your food away from the flame.
Burn the grease away.
During cooking, if grease pools, remove your food and turn the burners on high with the grill lid open until grease has burned off.
Clean your grill.
Keeping your grill clean and maintained will help prevent the dreaded flare-up. Food residue and old grease are both great fuel for a fire, so removing debris after each use is important.
Turn off the burners.
If your grill flare-up is out-of-control, turn off the burners.
Don't use water.
You’ve heard the adage, “Oil and water don’t mix?” Well that’s especially true for flare-ups. Spraying water on a flare-up can cause grease to explode. Don’t use it.
However, we know accidents happen. That is why SERVPRO is here. To help you if your grill or anything else was to catch your home on fire.
When it comes to your family's safety, smoke detectors and fire alarms can be some of the most important items in your home. These early warning devices can alert your family to fire and hazardous smoke while there is still time to evacuate, but they should be tested periodically to ensure they are working properly.
Electronic devices are not faultless. The batteries will die and other parts of the smoke alarm can wear out over time. Regularly testing them and replacing the batteries (or the entire device) can help keep your family safe in the event of a house fire.
According to the U. S. Fire Administration (USFA), smoke detectors should be tested at least once a month and batteries should be replaced at least twice a year. A good way to remember this is to replace your batteries when replacing your watches.
Be sure to read your smoke detector's owner's manual - you may need to check more often if any of the following apply: The detector often gives false alarms.
The alarm emits short beeps regularly without anyone touching it.
Frequent kitchen fumes often activate it, which can cause it to wear out faster.
For battery operated: This type may be prone to defective or worn out batteries. Monthly tests are very important.
Never put old batteries in your smoke detectors and fire detectors. Wired: These detectors are powered by your home's electrical system, but they usually have backup batteries so the device stays operational in the event of a power outage.
Wired smoke alarms should still be tested monthly to ensure both batteries and components are working properly.
You should always check manufacturer's instructions for the correct test method for your smoke detector and fire alarm.
Smoke detectors have a loud alarm that can frighten small children, so you want to let everyone know that you plan to test the alarms so as not to scare anyone.
You may want to install additional detectors in areas where the alarm sound is low, muffled or weak. Press and hold the test button on the smoke detector. It may take a few seconds to go off, but a loud, deafening siren should come out of the smoke detector when the button is pressed. If not, then replace it.
If it has been more than six months since you last changed the batteries (whether your detector is battery powered or wired), replace it now and test the new batteries one last time to ensure they are working properly, regardless of the test result. .
You should also look at your smoke alarm to make sure it's not dust or any other substance blocking the grilles and causing it to not work even if the batteries are new. Note that smoke detectors typically have a 10-year lifespan.
Now that you know how to prevent your fire alarms from not working, do keep in mind that if they are not working correctly this can cause a house fire. We don't want this to happen at all, but if it does SERVPRO is here to help! We do fire damage remediation at it's best.
Check for water leaks, cracks and damp spots as early as possible
Water leaks and damage are a significant cause of dampness and corrosion. So, you need to check on them regularly.
Water leaks are common and people are usually aware of them because they see water seeping from something. They check for water leaks just to make the problem go away.
But, often they don’t do enough to avoid the damage and costs, or they do it late. The damage and costs can also happen if you fail to notice a leak too early.
Check on the signs of water leaks and damp spots as early as possible, so that they don’t cause damage:
A leak causes water to come from the outside, which can cause dampness and wetness inside. Check for cracks and damp spots near the location of the water leak.
Often people don’t check pipes for the holes that connect them.
You should check the pipe on each side and inside, so that you find the problem. A hole inside the pipe usually mean that someone damaged it. You can use your flashlight to check for that.
What kind of damage is caused by water leaks:
what kind of damage is caused by water leaks? What is the cost of repairs? Find out what causes water damage and what to do in case of water leakage in your home.
What causes a water leak? What happens when the pipe or pipe system is broken? Find out the causes for water damage in your home and what to do to avoid having to fix it or paying for it.
Water damage and how to avoid it - it's time to make your home, office or home and car as resistant to the effects of water as possible!
What is Water Leakage and Is It a Threat to Your Home?
The most dangerous hazard threatening your home is the one related to water. If you want to protect that living space from water, it is of the utmost importance that you follow all of the following tips:
If you have a pipe that leaks, you should know that any small leak inside your house, is a threat to the safety of anyone who's inside it. However, there is one exception to the rule of leaks causing major damage:
This exception occurs with the pipe inside the walls of your house. The temperature in the pipes inside the walls will become higher over time. When the pipes in your walls are installed in
How to fix water leaks:
how to fix water leaks
Solutions designed to keep your home and personal belongings protected when the rain falls.
A strong wall keeps a home and belongings secure. But those bricks and mortar are a lot of weight that can crack over time. In addition, water will seep into those joints and weaken them. We’ve broken a window and a door as a result of water going in and dampness. One of the best solutions to mitigate water infiltration into home and belongings is to fill the space around a wall or door with a water-resistant product.
That water-resistant product is the waterproofing sealer. It can be added directly to the concrete or brick surface, or it can be mixed into a liquid waterproofing mix for application in other applications. Even if your home does sustain water damage, you need to add a water-resistant sealer to keep water from getting inside your home. The next time the roofer installs your new sheeting and siding, make sure to add a waterproofing sealer to the newly-applied material’s surface. This will protect you and your belongings in the future, and it will prevent water damage to your home in the meantime.
In the event you do have leaks and need help. Call SERVPRO.
A fire in your home can cause devastating damage and require you to act quickly to save as much of your valuable property as possible. There is also the possibility that your house may go up in flames, causing the surrounding area to be filled with smoke and fumes that can eventually be toxic. This article will outline what you should know about fire and the safety precautions you should take if home fires are to occur.
Why is Fire Risk in Your Home at High?
The factors that determine whether a home will be harmed by fire are many. However, those that appear to be most important are the air and heat in the rooms and the walls, combustible material in the home, a poorly constructed home, and age or damage at the attic level. The National Fire Protection Association, or NFFP, recommends to families that they avoid using open flames in all forms at any time, particularly in any heating system.
There are, however, times when open flames are needed or required for cooking and some other activities. This may come about from using open fires in the fireplace for heat or smoke, or due to open flames in a stove or a clothes washer. Also, if your kitchen is very small, then it may be worth giving consideration to using electric space heaters on the countertops rather than open flames. Another risk to consider is the use of open flames in a gas grill. While a gas grill can operate on a pilot flame and is considered safe in most instances, there is always the possibility that there may be an open flame in the grilling area of a gas grill.
Do I need to protect a home from fire damage.
If you don't know how to apply fire retardants, you can start here.
Fire damage is arguably the most serious type of disaster that we could be faced with and the only one that could threaten our comfort.
Do We Need To Fireproof Our Home?
Fire damage is common for all homes even small homes. But, in the event that we don’t have insurance to cover a fire, it’s essential that we should have a plan in place that will allow us to prevent damage from occurring to the structure. Even if you don’t expect to need an insurance claim, many homeowners are advised to put a plan in place prior to an impending fire for future fire protection needs.
Before a home burns down, it’s important to do the preparation work that will protect the home from fire damage.
Keep your home’s rooms well lit when you go out and prepare for fire damage.
Avoid leaving electrical appliances in the open and instead install a timer that will turn them off after a certain period of time.
The cost of fire damage.
A great number of fire incidents occur in the home. Many homeowners do not have any insurance on their home, or they have it for only a single year, but a couple of times they have insurance for the whole of their life. This is very important as you have to consider fire damage insurance in your life to save your house from financial ruin.
The most important thing is that you should not ignore fire and gas damage when they are occurring. In most cases, the insurance company will provide a minimum of coverage for fire and gas, but it does not mean it will cover fire damage completely. This is due to the fact that damage is subjective. It is not limited to how many homes a fire or gas strike has destroyed. Even if your home has been completely burnt down by fire, you still have to assess the damage. The best thing is, there are many fire damage insurance companies in the market today willing to pay for your claim, you just have to find the best deal possible.
The first thing to do is assess and inspect which areas are affected by the fire. This part is not so difficult, since you cannot see the extent of the fire damage.
Step 2: Check the property damage claim. Some insurance companies will not cover any damage to the inside of the house, but do offer any property damage claims to the exterior of the house. If there is any damage to any areas that are not covered from all parties, the insurance company will be very helpful in calculating the damage, and will get you the necessary compensation.
Step 3: Request a claim form from the insurance company. Many insurance companies make a claim form available to the homeowner. As you know, there will be a number of claims sent for the homeowner, there will also be a claim number corresponding to the claim number given by the insurance company
Cars and people driving during a rain storm that could lead to potential flooding.
If you live in East TN, then you have heard the words "floods" and "storms", but let's take a closer look at according the ready.gov.
"Flooding is a temporary overflow of water onto land that is normally dry. Floods are the most common natural disaster in the United States. Failing to evacuate flooded areas or entering flood waters can lead to injury or death."
Floods may:
Result from rain, snow, coastal storms, storm surges and overflows of dams and other water systems.
Develop slowly or quickly. Flash floods can come with no warning.
Cause outages, disrupt transportation, damage buildings and create landslides.
If you are under a flood warning:
Find safe shelter right away.
Do not walk, swim or drive through flood waters. Turn Around, Don’t Drown!
Remember, just six inches of moving water can knock you down, and one foot of moving water can sweep your vehicle away.
Below are some of the most common causes of house fires, and some tips to take precautions.
1. Cooking
Pots and pans can overheat and cause a fire very easily if the person cooking gets distracted and leaves cooking unattended. Always stay in the room, or ask someone to watch your food, when cooking on hotplates.
2. Heating
Keep portable heaters at least one meter away from anything that could easily catch fire such as furniture, curtains, laundry, clothes and even yourself. If you have a furnace, get it inspected once a year to make sure it is working to safety standards.
3. Smoking
Bedrooms are best to be kept off limits for smoking. A cigarette that is not put out properly can cause a flame, as the butt may stay alit for a few hours. It could burst into flames if it came into contact with flammable materials, such as furniture. Did you know that fires started in the bedroom or lounge make up 73% of all house fire fatalities?¹
4. Electrical Equipment
An electrical appliance, such as a toaster can start a fire if it is faulty or has a frayed cord. A power point that is overloaded with double adapter plugs can cause a fire from an overuse of electricity. A power point extension cord can also be a fire hazard if not used appropriately. Double check the appliances and power points in your home.
5. Candles
Candles look and smell pretty, but if left unattended they can cause a room to easily burst into flames. Keep candles away from any obviously flammable items such as books and tissue boxes. Always blow a candle out before leaving a room. Did you know that in Perth last year 34 house fires started as a result of candles?²
6. Curious Children
Kids can cause a fire out of curiosity, to see what would happen if they set fire to an object. Keep any matches or lighters out of reach of children, to avoid any curiosity turned disaster. Install a smoke alarm in your child’s room and practice a home escape plan with your children and family in case there was a fire. Teach kids understand the ” drill as well as the "stop, drop, cover and roll" knowing their address if they needed to call 000.
7. Faulty Wiring
Homes with inadequate wiring can cause fires from electrical hazards. Some signs to see if you’ve bad wiring are: 1) Lights dim if you use another appliance; 2) For an appliance to work, you have to disconnect another; 3) Fuses blow or trip the circuit frequently. Have a licensed electrician come and inspect you house, or contact your landlord if you have any of the above occurrences.
8. Barbeques
Barbeques are great for an outdoor meal, but should always be used away from the home, tablecloths or any plants and tree branches. Keep BBQs regularly maintained and cleaned with soapy water and clean any removable parts. Check the gas bottle for any leaks before you use it each time.
9. Flammable Liquids
If you have any flammable liquids in the home or garage such as petrol, kerosene or methylated spirits, keep them away from heat sources and check the label before storing. Be careful when pouring these liquids.
10. Lighting
Lamp shades and light fittings can build up heat if they are very close to light globes. Check around the house to make sure. Lamp bases can become a hazard if they are able to be knocked over easily, and so should be removed if they are. Check that down lights are insulated from wood paneling or ceiling timbers.
The above tips are a good guide to avoiding a fire in your home. However it’s a good idea to protect yourself with adequate home and content insurance, cover to ensure you are covered in the unlikely event a fire were to happen.
Have you prepared your plumbing for winter? Damage caused from burst pipes can cost you thousands, of dollars. Not all damage is covered by homeowner’s insurance. We want to make sure you know some simple steps to get you prepared. Follow these 7 simple steps to get off to a great start. Find yourself in a bind? Brogdon Plumbing is here to help! Give us a call.
Prepare your outdoor faucets. Remove and drain your water hoses and store them indoors before the first freeze.
Fix leaks now. Inspect your pipes and have any/all leaks repaired.
Wrap any pipes in unheated areas of the home. This is crucial, for mobile homes. Visit the hardware store and grab some heat tape and/or pipe insulation. There are also easy to install kits, that include a thermostat. These kits can help you in the event of frigid temps for long periods. Don’t hesitate to ask an employee for recommendations. Protecting the pipes in your home, from low temperatures is THE single most important thing that you can do.
Tune up your water heater. You will want to drain and maintain your water heater at this time every year.
Service your furnace. Make sure you have clean filters and call a professional to help.
Selling your home or heading south for winter? Shut off the water, in your home, completely and consider draining your pipes. Any water left in your pipes is at risk of freezing and causing pipes to bust. If nobody is home, the damage can be widespread and severe. Don’t take chances.
Got a leaky toilet? Believe it or not, it’s a common problem. Continue reading to find out the likeliest causes and the easiest ways to remedy the situation.
First, some of the washers between the bowl and tank may have failed. Shut off the supply valve, empty the tank with a flush, then remove the nuts, bolts, and washers from the underside of the tank. Lift the tank, position it on its side, and see if the washers need replacing.
Another culprit may be faulty fasteners securing the fill valve and ballcock to the bottom of the tank. Before you replace those parts, however, first try simply tightening the nuts and bolts holding them in place—that often solves the problem.
On the other hand, if the leak seems to be coming from the base of the tank, chances are the wax ring that seals the toilet to the floor has failed. Replacing the wax ring is a much bigger job, since it involves removing the entire toilet from its base. If you decide to replace the wax ring yourself—preferably with a friend to help with the lifting—take the extra step of also replacing any bolts that show signs of corrosion. And, once you have the toilet back in place, don’t forget to add a bead of caulk around the base.
Keep your heating bill lower this winter with these easy tricks!
According to the U.S. Department of Energy, the average U.S. family spends at least $2,200 a year on energy bills – with nearly half of that going towards heating and cooling.
And as the temperature begins to fall, the cost to heat our homes starts to rise.
Now’s the time to make sure your home is well-insulated. A properly insulated home will keep the warmth inside, reducing your heating costs and improving comfort.
Use the five tips for insulating your home below to save on energy bills and keep you and your family nice and cozy this winter.
1. Seal Gaps Around Doors
Doors that aren’t correctly fitted to the frame form gaps. One of the simplest ways to insulate your home is to seal the gaps, typically found at the bottom of the door. These can easily be fixed by:
Using weather strips: Weather strips are an easy, inexpensive way to stop air leaks.
Installing draft stoppers: Also known as a door snake or door pillow, draft stoppers sit beneath the bottom of your door and can be made out of socks.
2. Cover or Repair Windows
Another tip for insulating your home is to cover or repair windows that are letting cold air in. For a quick fix, tape clear plastic film to the inside of your window frames and seal tightly. For a more long-term solution, replace old windows with new ones. Older homes that have single-pane windows lack proper insulation, causing your energy bills to skyrocket. To save money and keep those drafts from coming in, consider replacing with double or triple-pane windows.
3. Use Your Curtains
Curtains provide us with a sense of privacy, but they’re also good for insulating homes, especially if you have drafty windows. When the sun is out, open your curtains to let heat and light in. When it’s dark, close your curtains for an extra layer of insulation.
4. Insulate Your Attic
Proper insulation is not only key to finishing your attic, but increasing your energy savings as well. And when it comes to heat, about 25 percent is lost through the roof. You can reduce this by insulating the ceiling and walls. Loose-fill or batt insulation is typically installed in attics, but according to the U.S. Department of Energy, loose-fill insulation is best because it provides better coverage when properly installed.
5. Close Your Fireplace Damper
Fireplaces are a great source of heat, until they’re not. Unless a fire is burning, make sure you close your fire damper. An open damper is like leaving a window open, and if your damper is open, you’re letting heat escape. If you have installed gas logs in your fireplace, however, leave the damper open. Gas fireplaces release large amounts of carbon monoxide and therefore must always have an open damper. If your pilot light is not lit, close the damper to ensure you’re not losing any heat, but be sure to open it back up when your gas fireplace is in use.
Packing up your entire home and relocating can be extremely overwhelming. In order to make the move a smooth transition, there are a few things to check up on at your new home prior to moving in. Avoid any extra stresses by checking off these five tasks for your new home.
Change the Locks
Changing the locks on all your doors is an important step to feeling safe in your new home. As kind as the previous owners may have been, it’s nice knowing there isn’t anyone out there but you that has a key to your home. It’s best to schedule this task before moving all your belongings in to avoid any time period of unsecured doors during the transition.
Deep Clean the House
Hopefully, the previous owners took care of cleaning and preparing the house when they first moved out, but there are some areas to check on just to be sure the place is in pristine condition. It’s easiest to clean the hard-to-reach places before you move in and there aren’t any objects in the way. Some areas to deep clean might include inside cupboards, the washer and dryer, fridge, oven, stove, and dishwasher.
Inspect for Mold
The last thing you need is to settle into your new home only to discover it has a mold issue. The minimum you should do is at least inspect for leaks, odors, or visible signs of mold throughout the house. However, now is the prime time to schedule a mold inspection and cleanup to detect the air quality of your home and find any hidden mold.
Check Smoke and Carbon Monoxide Detectors
Speaking of air quality, make sure to check the carbon monoxide detector and smoke alarms throughout the house. It’s a relief knowing that your home is equipped with up-to-date and working monitors for you and your family’s safety. If the house doesn’t have a carbon monoxide detector yet, then now is the perfect time to purchase and install one before moving in.
Inspect the Plumbing
Make sure that the plumbing is in mint condition before moving in rather than discovering it too late. Check for leaks and any signs of water damage, and make any appointments you need to fix leaks and issues. This will not only make things run smoother, but it will also save your water bill. While you’re at it, take a look at the water heater as well. Now is a good time to flush your water heater of sediment and check if it has a water softener as well.
There is already a long list of to-dos when it comes to moving out of your house, but many things go overlooked and forgotten when it comes to the new house. Give careful consideration to the different tasks listed to make your new major change a little easier. You will feel confident and relieved moving into your new home knowing you’ve changed the locks, deep cleaned the place, inspected for mold, checked the air and alarms, and inspected the plumbing.
First baptist church faces water damage and SERVPRO comes to the rescue!
Recently, a local baptist church faced some water damage issues due to a leaky pipe inside their first floor restrooms. The leak was unnoticed until a few days after the problem arose, and the members were overwhelmed with where to start in the restoration process.
They called us at SERVPRO after they realized the problem, and we were able to be there quickly and were able to remedy the water damage and to prevent future mold growth.
We enjoy serving our community residents, businesses, and non-profits. Together, we all make our community strong and what it is today. We are privileged to serve our community in any way possible.
An empty classroom with desks waiting on students to arrive.
Are classroom messes making you miserable? Get students in on the act and straighten your classroom in no time at all. The ideas below are teacher-tested with excellent cleaning results!
Classroom Clean-Up Ideas
Magic Helpers
Linda, who teaches 1st Grade in Pacific, MO, adds a bit of magic to her clean-up routine. “I found that my little ones will be more willing to help clean up our classroom if we have some fun with it,” she explains. “I tell them that it is time to ‘call in the elves’ to help with the cleanup. Of course, the elves only come out and help with my students, so I turn my back and count to 30 (or more, depending on how messy the room is…) and when I turn around the kids are in their seats, the room is spotless, and the elves have magically disappeared! They love the idea that only they can get the elves to come out and help, and it works every time ! They even beg to “call in the elves” when it looks like the room needs tidying. This has never failed to get the class motivated for some cleanup.”
Mystery Trash
Keep your floors clean with this idea by Sarah, who teaches 3rd grade, in Kentucky. “I always had problems keeping my floor clean throughout the day and by the end of the day it was always messy. In order to get the students motivated to clean up the floor, I pick a mystery piece of trash. Sometimes I plant it in a place that is hard to find, or I pick something that is obvious. As soon as I announce that there is a mystery piece, the students race to pick up as much trash as they can find. If they find the mystery piece, they get a piece of candy. They are happy and I am happy because my floor is spotless!”
Stuck on You
Get students stuck on cleaning with this inexpensive and fun idea by Laurie, a 2nd Grade teacher, from Shannock, Rhode Island. “Clean up after messy cutting projects or even at the end of the day can go quicker when you give each child a masking tape bracelet. The children delight in cleaning up when picking up scraps with their bracelets!”
What are some of your favorite ways to motivate students to help you clean the classroom?
Emergency exit signs and directions are crucial in the event of an actual emergency.
School emergency plans can save lives!
Like individuals and families, schools, daycare providers, workplaces, neighborhoods and apartment buildings should all have site-specific emergency plans.
Ask about plans at the places where your family spends the most time: work, school and other places you frequent. If none exist, consider volunteering to help develop one.
You will be better prepared to safely reunite your family and loved ones during an emergency if you think ahead, and communicate with others in advance.
Schools and Daycare
If you are a parent, or guardian of an elderly or disabled adult, make sure schools and daycare providers have emergency response plans.
Things to keep in mind:
Ask how they will communicate with families during a crisis.
Ask if they store adequate food, water and other basic supplies.
Find out if they are prepared to "shelter-in-place" if need be, and where they plan to go if they must get away.
For more information on developing emergency preparedness plans for schools, please visit the U.S. Department of Education:
Winter storms can be devastating and dangerous if the proper precautions aren't taken.
Each year, hundreds of Americans are injured or killed by exposure to cold, vehicle accidents on wintry roads, and fires caused by the improper use of heaters. Learn what to do to keep your loved ones safe during blizzards and other winter storms!
Take immediate precautions if you hear these words on the news:
Winter Storm WARNING: Life-threatening, severe winter conditions have begun or will begin within 24 hours.
Blizzard WARNING: Sustained winds or frequent gusts of 35 miles per hour or greater, plus considerable falling or blowing snow reducing visibility to less than a quarter mile, expected to prevail for three hours or longer.
More winter storm words to listen for:
WIND CHILL Temperature: How cold people and animals feel when outside. As wind increases, heat is carried away from your body at a faster rate, driving down your body temperature and making you feel much colder. The wind chill temperature is not the actual temperature but rather how wind and cold feel on exposed skin.
Winter Storm OUTLOOK: Winter storm conditions possible in the next two to five days. Stay tuned to local media for updates.
Winter Storm WATCH: Winter storm conditions possible within the next 36 to 48 hours. Review your winter storm plans and stay informed about weather conditions.
Winter Weather ADVISORY: Winter weather conditions expected to cause significant inconveniences and may be hazardous but not life-threatening if you are cautious.
Before
Prepare in Advance
Prepare in advance:
Assembling an emergency preparedness kit.
Creating a household evacuation plan that includes your pets.
Staying informed about your community’s risk and response plans.
Download the Emergency App for iPhone or for Android
How to Prepare for a Winter Storm
Protecting your family:
Talk with your family about what to do if a winter storm watch or warning is issued. Discussing winter storms ahead of time helps reduce fear, particularly for young children.
Have your vehicle winterized before the winter storm season to decrease your chance of being stranded in cold weather.
Have a mechanic check your battery, antifreeze, wipers and windshield washer fluid, ignition system, thermostat, lights, flashing hazard lights, exhaust system, heater, brakes, defroster, and oil.
Install good winter tires with adequate tread. All-weather radials are usually adequate but some jurisdictions require vehicles to be equipped with chains or snow tires with studs.
Keep in your vehicle:
- A windshield scraper and small broom
- A small sack of sand for generating traction under wheels and a set of tire chains or traction mats
- Matches in a waterproof container
- A brightly colored (preferably red) cloth to tie to the antenna
- An emergency supply kit, including warm clothing.
Keep your vehicle’s gas tank full so you can leave right away in an emergency and to keep the fuel line from freezing.
Keep a supply of non-clumping kitty litter to make walkways and steps less slippery.
Service snow removal equipment before the winter storm season and maintain it in good working order.
Keep handy a warm coat, gloves or mittens, hat, water-resistant boots, and extra blankets and warm clothing for each member of the household.
Protecting your pets & animals:
Bring your companion animals indoors.
Ensure that you have supplies for clean up for your companion animals, particularly if they are used to eliminating outdoors (large plastic bags, paper towels, and extra cat litter).
Create a place where your other animals can be comfortable in severe winter weather:
Horses and livestock should have a shelter where they can be protected from wind, snow, ice, and rain.
Grazing animals should have access to a protected supply of food and non-frozen water.
Be aware of the potential for flooding when snow and ice melt and be sure that your animals have access to high ground that is not impeded by fencing or other barriers. You may not be able to get to them in time to relocate them in the event of flooding.
Ensure that any outbuildings that house or shelter animals can withstand wind and heavy snow and ice.
Install snow fences in rural areas to reduce drifting snow on roads and paths, which could block access to homes, barns, and animals' feed and water.
Protecting your home:
Protect pipes from freezing by keeping water dripping if temperatures reach below a certain level.
Make sure your home heating sources are installed according to local codes and permit requirements and are clean and in working order.
Make sure your home is properly insulated. Caulk and weather-strip doors and windowsills to keep cold air out.
Install storm windows or cover windows with plastic from the inside to provide an extra layer of insulation to keep cold air out.
Consider buying emergency heating equipment, such as a wood- or coal-burning stove or an electric or kerosene heater.
- Stoves must be properly vented and in good working order. Dispose of ashes safely. Keep a supply of wood or coal on hand.
- Electric space heaters, either portable or fixed, must be certified by an independent testing laboratory. Plug a heater directly into the wall socket rather than using an extension cord and unplug it when it is not in use.
- Use a kerosene heater only if permitted by law in your area; check with your local fire department. Use only the correct fuel for your unit. Properly ventilate the area. Refuel the unit outdoors only, and only when the unit is cool. Follow all of the manufacturer's instructions.
Consider storing sufficient heating fuel. Regular fuel sources may be cut off. Be cautious of fire hazards when storing any type of fuel.
If you have a fireplace, consider keeping a supply of firewood or coal. Be sure the fireplace is properly vented and in good working order and that you dispose of ashes safely.
Consider purchasing flood insurance, if you live in a flood-prone area, to cover possible flood damage that may occur during the spring thaw. Homeowners' policies do not cover damage from floods. Ask your insurance agent about the National Flood Insurance Program (NFIP) if you are at risk.
Right before a blizzard / winter stormIf you do nothing else:
Listen to local area radio, NOAA radio or TV stations for the latest information and updates.
Be prepared to evacuate if you lose power or heat and know your routes and destinations. Find a local emergency shelter.
Check emergency kit and replenish any items missing or in short supply, especially medications and medical supplies. Keep it nearby.
Be sure you have ample heating fuel.
If you have alternative heating sources, such as fireplaces, wood- or coal-burning stoves, or space heaters, be sure they are clean and in working order.
Check that your fire extinguisher(s) is in good working order, and replace it if necessary.
Bring your companion animals inside and ensure that your horses and livestock have blankets if appropriate and unimpeded access to shelter, food, and non-frozen water.
During
Stay Safe During a Winter Storm
Staying Safe During a Winter Storm or Blizzard
Stay indoors and wear warm clothes. Layers of loose-fitting, lightweight, warm clothing will keep you warmer than a bulky sweater. If you feel too warm, remove layers to avoid sweating; if you feel chilled, add layers.
Listen to a local station on battery-powered radio or television or to NOAA Weather Radio for updated emergency information.
Bring your companion animals inside before the storm begins.
Move other animals to sheltered areas with a supply of non-frozen water. Most animal deaths in winter storms are caused by dehydration.
Eat regularly. Food provides the body with energy for producing its own heat.
Keep the body replenished with fluids to prevent dehydration. Drink liquids such as warm broth or juice. Avoid caffeine and alcohol. Caffeine, a stimulant, accelerates the symptoms of hypothermia. Alcohol, such as brandy, is a depressant and hastens the effects of cold on the body. Alcohol also slows circulation and can make you less aware of the effects of cold. Both caffeine and alcohol can cause dehydration.
Conserve fuel. Winter storms can last for several days, placing great demand on electric, gas, and other fuel distribution systems (fuel oil, propane, etc.). Lower the thermostat to 65° F (18° C) during the day and to 55° F (13° C) at night. Close off unused rooms, and stuff towels or rags in cracks under the doors. Cover the windows at night.
Check on relatives, neighbors, and friends, particularly if they are elderly or if they live alone.
Staying Safe OutsideIf you must go outside, protect yourself from winter storm hazards:
Wear layered clothing, mittens or gloves, and a hat. Outer garments should be tightly woven and water repellent. Mittens or gloves and a hat will prevent the loss of body heat.
Cover your mouth to protect your lungs from severely cold air. Avoid taking deep breaths; minimize talking.
Watch for signs of hypothermia and frostbite.
Keep dry. Change wet clothing frequently to prevent a loss of body heat. Wet clothing loses much of its insulating value and transmits heat rapidly away from the body.
Stretch before you go out. If you go out to shovel snow, do a few stretching exercises to warm up your body. This will reduce your chances of muscle injury.
Avoid overexertion, such as shoveling heavy snow, pushing a vehicle, or walking in deep snow. The strain from the cold and the hard labor may cause a heart attack. Sweating could lead to a chill and hypothermia.
Walk carefully on snowy, icy sidewalks. Slips and falls occur frequently in winter weather, resulting in painful and sometimes disabling injuries.
If you must go out during a winter storm, use public transportation if possible. About 70 percent of winter deaths related to ice and snow occur in automobiles.
Driving in Winter Conditions
Check your vehicle emergency supplies kit and replenish it if necessary.
Bring enough of the following for each person:
- Blankets or sleeping bags
- Rain gear, extra sets of dry clothing, mittens, socks, and wool hats
- Newspapers for insulation
- Plastic bags for sanitation
- Canned fruit, nuts, and high energy snacks (Include a non-electric can opener if necessary)
- Warm broth in a thermos and several bottles of water
- Keep a cell phone or two-way radio with you. Make sure the battery is charged.
- Plan to travel during daylight and, if possible, take at least one other person with you.
Let someone know your destination, your route, and when you expect to arrive. If your vehicle gets stuck along the way, help can be sent along your predetermined route.
Before leaving, listen to weather reports for your area and the areas you will be passing through, or call the state highway patrol for the latest road conditions.
Be on the lookout for sleet, freezing rain, freezing drizzle, and dense fog, which can make driving very hazardous
If You Become Stranded
Stay in the vehicle and wait for help. Do not leave the vehicle to search for assistance unless help is visible within 100 yards (91 meters). You can quickly become disoriented and confused in blowing snow.
Display a trouble sign to indicate you need help. Hang a brightly colored cloth (preferably red) on the radio antenna and raise the hood after snow stops falling.
Run the engine occasionally to keep warm. Turn on the engine for about 10 minutes each hour (or five minutes every half hour). Running the engine for only short periods reduces the risk of carbon monoxide poisoning and conserves fuel. Use the heater while the engine is running. Keep the exhaust pipe clear of snow, and slightly open a downwind window for ventilation.
Leave the overhead light on when the engine is running so that you can be seen.
Do light exercises to keep up circulation. Clap your hands and move your arms and legs occasionally. Try not to stay in one position for too long.
If more than one person is in the vehicle, take turns sleeping. If you are not awakened periodically to increase body temperature and circulation, you can freeze to death.
Huddle together for warmth. Use newspapers, maps, and even the removable floor mats for added insulation. Layering items will help trap more body heat.
Watch for signs of frostbite and hypothermia. Severe cold can cause numbness, making you unaware of possible danger.
Drink fluids to avoid dehydration, which can make you more susceptible to the ill effects of cold and to heart attacks.
Avoid overexertion. Cold weather puts an added strain on the heart. Shoveling snow or pushing a vehicle can bring on a heart attack or make other medical conditions worse.
After
After a Winter Storm
Continue listening to local news or a NOAA Weather Radio for updated information and instructions. Access to some parts of the community may be limited or roads may be blocked.
Help people who require special assistance—infants, elderly people, those without transportation, large families who may need additional help in an emergency situation, people with disabilities, and the people who care for them.
Avoid driving and other travel until conditions have improved.
Avoid overexertion. Heart attacks from shoveling heavy snow are a leading cause of death during the winter.
Check on your animals and ensure that their access to food and water is unimpeded by drifted snow, ice, or other obstacles.
If you are using a portable generator, take precautions against carbon monoxide poisoning, electrocution and fire.
Identifying & Treating Frostbite and Hypothermia
Frostbite and hypothermia are cold-related emergencies that may quickly become life or limb threatening.
Take these steps to avoid frostbite and hypothermia:
Be aware of the wind chill. Dress appropriately and avoid staying in the cold too long. Wear a hat and gloves when appropriate with layers of clothing. Avoid unnecessary exposure of any part of the body to the cold.
Drink plenty of warm fluids or warm water but avoid caffeine and alcohol. Stay active to maintain body heat.
Take frequent breaks from the cold.
Get out of the cold immediately if the signals of hypothermia or frostbite appear.
Frostbite
Frostbite is the freezing of a specific body part such as fingers, toes, the nose or earlobes.
Signs of frostbite:
Lack of feeling in the affected area
Skin that appears waxy, is cold to the touch, or is discolored (flushed, white or gray, yellow or blue)
Recovering After a Winter Storm
Once you are physically safe, take time to ensure your family’s emotional and financial well-being.
Winter storms put people at a higher risk for developing frostbite and hypothermia.
Winter storms can get pretty intense and can be very dangerous if proper precautions aren't taken ahead of time. Freezing temperatures put people at risk for developing frostbite which if left untreated, can become deadly. So, what do you do if you or someone you know experiences what you think to be frostbite this winter?
What to do for frostbite:
1. Move the person to a warm place
2. Handle the area gently; never rub the affected area
3. Warm gently by soaking the affected area in warm water (100–105 degrees F) until it appears red and feels warm
4. Loosely bandage the area with dry, sterile dressings
5. If the person’s fingers or toes are frostbitten, place dry, sterile gauze between them to keep them separated
6. Avoid breaking any blisters
7. Do not allow the affected area to refreeze
8. Seek professional medical care as soon as possible
Hypothermia
Hypothermia is the cooling of the body caused by the failure of the body’s warming system. The goals of first aid are to restore normal body temperature and to care for any conditions while waiting for EMS personnel.
Signs of hypothermia:
Shivering
Numbness or weakness
Glassy stare
Apathy or impaired judgment
Loss of consciousness
What to do for hypothermia:
1. CALL 9-1-1 or the local emergency number
2. Gently move the person to a warm place
3. Monitor breathing and circulation
4. Give rescue breathing and CPR if needed
5. Remove any wet clothing and dry the person
6. Warm the person slowly by wrapping in blankets or by putting dry clothing on the person.
Hot water bottles and chemical hot packs may be used when first wrapped in a towel or blanket before applying. Do not warm the person too quickly, such as by immersing him or her in warm water.
Warm the core first (trunk, abdomen), not the extremities (hands, feet).
We hope you never have to experience either frostbite or hypothermia this winter. However, if you do, we hope you are more prepared on how to handle the situation safely.
An East Tennessee Storm Brings Lightening And Strong Wind To The Area.
Fall is in the air! You can literally feel it and breathe it in! You may have pumpkins, mums, and a variety of other decor out around your home to enjoy the season.
It's easy to love this time of year! Who doesn't like to sit around a fire, over-indulge on smores, and tackle as many craft fairs and festivals in one weekend as possible!? However, just because the weather has cooled off from the warmer months, this doesn't mean East Tennessee is exempt from nasty storms. As a homeowner, it's important to be aware and prepared for the potential storms ahead.
What do fall storms usually bring?
Late summer and fall are known as hurricane season. Coastal states take great measures this time of year to protect their homes from natural disasters derived from hurricanes and other tropical storms or depressions. While we don't live on the coast, we still face some of the wind and rain that are associated with storms that have hit the coast and moved inland. Some of these storms can be devastating with tornadic winds and heavy downpours.
During these storms and other seasonal storms that seem to pop up, you may face damage from the wind and also potential flooding. Simply being aware of the potential for damage is the first step to being on-top-of protecting your home this fall from storm damage.
What can you do?
Now that you know to be aware of the potential for storms in the fall months, what can you do to be prepared?
Yard Furniture
If you have yard furniture or yard ornaments/decor, be sure you have somewhere to store them or that you have means to secure them to the ground when and if winds pick up this fall. By doing this, you can rest assured that your furniture won't go missing or be damaged by the storm's forces. You can also rest knowing that the furniture won't fly into or damage your home including your windows, siding, shingles, etc.
Roof + Siding Inspection
We all know that your roof is the main thing between your family and any storm that comes your way. It's important to make sure that your roof is in good condition leading into the fall and winter months to ensure that you won't be faced with unwanted water leaks.
Your siding is just as important! Without good, secure siding, storms can rip sections off with heavy wind and rain and can cause rot and other interior damage to your home if water gets inside.
The safest thing to do is to evaluate these parts of your home yourself, and if you feel that a specific section or part needs a second, professional opinion, search out professionals in that industry to come out for an inspection. These are usually free and can be great in discovering and remedying a smaller problem before it turns into a larger one.
Whether you need repair or restoration to your home after a fall weather event, SERVPRO is here to help. We are mold remediation experts, as well. Call us if you have experienced water damage or fire damage.
Smoke detectors and fire alarms may be some of the most important items in your home when it comes to your family’s safety. These early warning devices may help alert your family to fire and dangerous smoke while there is still time to evacuate, but they need to be periodically tested to help ensure proper function.
Why Do It?
Electronic devices are not infallible. Batteries die, and other parts of the smoke detector can wear out over time. Testing them regularly and replacing batteries (or the entire device) is one way to help ensure your family stays safe should there be a fire in your home.
How Often?
According to the U.S. Fire Administration (USFA), smoke detectors should be tested at least once a month and batteries should be replaced at least twice a year. A good way to help remember to do this is to change your batteries when you change your clocks for daylight saving time — when you spring forward or fall back. Make sure to review your smoke detector’s user manual — you may need to check more often if any of the following apply:
The detector often gives false alarms.
The alarm emits short beeps regularly without anyone touching it.
Frequent kitchen smoke has caused it to activate often, which may wear it out faster.
There are two main types of smoke detectors, according to the USFA:
Battery-powered: This type can be susceptible to defective or worn-out batteries. Monthly testing is critical. Never put old batteries into your smoke detectors and fire alarms.
Hardwired: These detectors are powered by your home electrical system, but they usually have back-up batteries so the device can remain operational in a power outage. Hardwired smoke detectors still require monthly testing to help ensure that both batteries and parts are functioning properly.
How to Test It
You should always check the manufacturer’s instructions for the proper method of testing your smoke detector and fire alarm. But, in general, most battery-powered and hardwired smoke detectors can be tested in the following way:
Step 1. Alert family members that you will be testing the alarm. Smoke detectors have a high-pitched alarm that may frighten small children, so you’ll want to let everyone know you plan to test the alarms to help avoid frightening anyone.
Step 2. Station a family member at the furthest point away from the alarm in your home. This can be critical to help make sure the alarm can be heard everywhere in your home. You may want to install extra detectors in areas where the alarm’s sound is low, muffled or weak.
Step 3. Press and hold the test button on the smoke detector. It can take a few seconds to begin, but a loud, ear-piercing siren should emanate from the smoke detector while the button is pressed. If the sound is weak or nonexistent, replace your batteries. If it has been more than six months since you last replaced the batteries (whether your detector is battery-powered or hardwired), change them now regardless of the test result, and test the new batteries one final time to help ensure proper functioning. You should also look at your smoke detector to make sure there’s no dust or other substance blocking its grates, which may prevent it from working even if the batteries are new.
Remember, smoke detectors have a normal life span of 10 years, according to the USFA. Even if you’ve performed regular maintenance, and your device is still functional, you should replace a smoke detector after the 10-year period or earlier, depending on the manufacturer’s instructions.
Installing smoke detectors can be a great way to help keep your family safe, but assuming they are working may lead to a dangerous situation. Taking a few minutes to check them regularly can help ensure they’re working properly.
Our little community may be small in size but large in impact and culture. Our small but thriving areas make living in East Tennessee possibly one of the greatest places in America to live.
One great thing about our little community is that we love big. We stand behind one another in good times and in bad. We support and encourage one another. When one part of our community is struggling or faces disaster, we come alongside them as one unit in helping restore them to their previous state.
At SERVPRO, we are proud of our community. We are privileged to come alongside it and to serve the people that live and do business inside the county lines. We are sure that there are tons of other small towns and communities like ours, but we wouldn't trade ours for the world.
We hope that our community knows that if they face fire, water, mold, or storm damage, that we will be there fast to get them back on their feet in no time. But, the best part is, we are better together!
Business' Silver Air Ducts With Forklift Where A Person Was Evaluating Them.
It is important to clean your air ducts regularly.
The air quality in your home or business is important. Keeping dust, pollen, pet dander, and other irritants out of the air you or your customers breathe involves more than changing the air filter(s). What about your air ducts? Contaminants collect in the duct system too, and regular cleaning of the air channel is important.
Energy Consumption
Dirty HVAC systems consume more energy than clean ones. Older ductwork starts leaking and not only do irritants enter through cracks, but air escapes too. Dirty ductwork also impedes airflow that drives up energy bills as much as 20 percent. Plus, dirt stresses your system causing frequent breakdowns. Clean ductwork helps lower your utility bill and helps your HVAC unit last longer.
Smelly Air
If someone in your home or business smokes, an odor hangs not only in the air but in the ductwork. Likewise, if you burned something on the stove, the smoke must go somewhere. These smells and other household odors collect in the ductwork and get circulated five to seven times per day, on average. Odors continue to plague your home or business long after you remove the offensive item(s).
More Reasons
Mold and mildew grow in your duct system especially if your home or business suffered recent water damage from flooding or foundation cracks. Renovations and repair often lead to contaminants settling in your air system, and newly built homes need the air ducts cleaned before occupancy.
Call the Professional
Air duct cleaning is not an easy job. It needs special vacuum hoses and tools to reach throughout the system. This is not a do-it-yourself task.
Contact your local HVAC company and schedule a professional cleaning. Have your system cleaned every three to five years and more often if your family suffers from severe allergies or asthma, includes a smoker, or you have pets that shed a lot.
Make sure you contact a certified HVAC technician for ductwork cleaning. Another helpful idea is to buy a high-quality air filter like the ones sold at home improvement stores. Look for pleated filters costing around $15. Not only do these last a little longer, these filters also catch more debris, including bacteria and viruses, before you breathe it in.
A cleaning bucket, a broom, and a small vacuum all sitting together on floor ready to begin cleaning! Is your home in need of a deep cleaning?
Sparkling in no time.
When the clock springs forward, it signals a time for renewal, rejuvenation, and refreshing. Along with brighter weather and blossoming buds, spring gives us an opportunity to hit the reset button, and that includes some spring cleaning.
Let’s be honest, though, even Southern women dread cleaning the entire house. But, fortunately, it doesn’t have to be overwhelming or an intense scrubbing session. With a little spring in your step, you can easily put that extra hour of daylight to good use with this simple three-day cleaning guide.
The benefits of cleaning on the weekend allow you to entertain guests for a late Sunday night dinner or free up your time on weekdays. So, get ready to roll up your sleeve, and wake up to a clean home when the alarm sounds on Monday.
Friday Evening: Get Ready
If you’ve had a long day at work or running errands, don’t worry. You won’t actually start cleaning until Saturday. Friday should be reserved for setting a plan in motion, buying the necessary supplies, and finding a place or organization where you can donate all the clothes and personal items you want to give away.
Saturday: Get Set
Using a durable pair of cleaning gloves and wash cloths, wipe up the grease on the stovetop and in the bottom of the oven. You can spray the oven lightly with water and wipe it down with a damp rag.
Next, head to the bedroom. First, remove bed linens, mattress pads, and curtains that need to be washed. In addition to washing the sheets, curtains, and comforters, you’ll want to flip the mattresses and put clean, fresh linens on the beds.
Sweep the floors or vacuum carpets in each bedroom. Cobwebs can be found everywhere, from corners and baseboards to ceilings and corners, so make sure you vacuum and clean those hot spot areas thoroughly.
Dust and polish any nightstands, wood furniture, desks, or bookshelves in each room. If your bedroom has mirrors or glass tabletops, clean those too!
Then, make your way to the bathrooms, and begin by removing the shower liners. If they’re washable, wash them on delicate cycle to get mold and mildew off of the curtains, and hang to dry.
Reorganize bathroom cabinets and your closet. This includes donating items you don’t plan on wearing again to charity and tossing those barely-used tubes and expired makeup in the garbage.
Lastly, spray the shower, tub, and toilet with cleaner. Once the cleaning solution has set, wipe them down and rinse clean. Finish up by sweeping or mopping the bathroom floor. You can place or plug in a few air fresheners in the bedroom or bathroom to really freshen up your home.
Sunday: Go Full Steam Ahead
On Sunday, try to focus on the kitchen, entertaining areas, and living room.
Cleaning will be much easier and efficient when dividing the home into four sections: bedrooms, kitchen, living area, and bathrooms. But, you’ll want to spray the oven with cleaner on Friday night so it can soak overnight.
The stove should still be clean from the previous day’s wipe down, but if there are any stubborn stains remaining, use baking soda and a little elbow grease to clean the stove completely.
If necessary, defrost the freezer and wipe down shelves and the vegetable crisper.
Deep clean the microwave, removing grime, splatters, and food remnants from last night’s meal.
Wipe down all surfaces, kitchen counters, and center islands.
Next, mop the kitchen floor to clean any sticky spots. Don’t forget the area behind the fridge!
Make sure to tidy up the pet areas (if any) by cleaning up bowls and discarding puppy pads or litter boxes. (This may be the least favorite part.)
Vacuum the living area, moving furniture around to get to those hard-to-reach spots. Using the attachment, vacuum cushions, blinds, and curtains for dust bunnies, crumbs, and pet hair.
Lastly, take out the trash and wipe down the waste bins before inserting a new bag. Give your home a good once-over to make sure you didn’t miss any spots or forget to put something away.
When the cleaning is done on Sunday, kick up your feet, open up the windows for some fresh air, and congratulate yourself on a job well done. You’ve earned it!
Water damage is known for the havoc it can wreak on a property of any kind. Most of the time, significant water damage will lead to some sort of mold development and growth if the initial water problem isn't resolved. So, if you have come face to face with water damage in the past and are dealing with mold issues now, what can you expect? What are some do's and don'ts associated with mold? Check out the information below.
If you see visible mold, do not disturb it. You can inadvertently spread the mold infestation throughout your home. When mold is disturbed, the mold can release microscopic mold spores which become airborne and can circulate inside your home.
What to Do:
DO stay out of affected areas entirely. This goes for your pets also.
DO turn off the HVAC system and fans. The more air circulation in your home or office, the higher chance that you may inhale some of the spores.
DO contact SERVPRO of McMinn, Monroe, and Polk Counties for mold remediation services immediately.
What Not to Do:
Do NOTtouch or disturb the mold. If possible, leave the premises entirely until the remediation is complete.
Do NOT blow air across any surfaces with visible or suspected mold growth.
Do NOT attempt to dry the area yourself. Stay away and let the professionals take care of it.
Do NOT spray bleach or other disinfectants on the mold. This may only make the situation worse and can cause bad chemical reactions.
We are prepared to help you face this issue when it arises. Our team is prepared to deal with microbial growth and will help you take care of this issue quickly.
If you have any questions about microbial growth or have any concerns about your home or business, let SERVPRO of McMinn, Monroe, and Polk Counties put your mind at ease. Call us today at (423) 745-4165 for any mold or mildew issues you are dealing with in your home or business due to water damage!
Rows of empty school desks sitting in an empty classroom.
Children are precious and should be able to learn in safe, clean environments within our schools. Along with the local first responders, we stand behind and support our school systems in the event an emergency strikes.
Our local school systems can depend on us at SERVPRO for fast, effective service in the event of a fire, water, or mold damage.
Our 24/7 emergency response services provide mitigation, cleanup, and restoration services to reduce recovery costs and to help ensure minimal interruption to curriculum and better opportunities for learning in the classroom.
Schools see other kinds of interior and exterior damage that are not necessarily caused by natural causes. Our local SERVPRO also provides expert cleaning for emergencies or special needs exceeding routine janitorial capabilities, including stain removal, upholstery and drapery dry cleaning, indoor air quality, and vandalism cleanup.
Our Franchise Professionals are trained to clean and sanitize building materials, surfaces, and contents following restoration industry standards, using professional cleaning products and EPA registered cleaners and disinfectants.
Have you prepared your plumbing for winter? Damage caused from burst pipes can cost you thousands, of dollars. Not all damage is covered by homeowner’s insurance. We want to make sure you know some simple steps to get you prepared. Follow these 7 simple steps to get off to a great start. Find yourself in a bind?
Prepare your outdoor faucets. Remove and drain your water hoses and store them indoors before the first freeze.
Fix leaks now. Inspect your pipes and have any/all leaks repaired.
Wrap any pipes in unheated areas of the home. This is crucial, for mobile homes. Visit the hardware store and grab some heat tape and/or pipe insulation. There are also easy to install kits, that include a thermostat. These kits can help you in the event of frigid temps for long periods. Don’t hesitate to ask an employee for recommendations. Protecting the pipes in your home, from low temperatures is THE single most important thing that you can do.
Tune up your water heater. You will want to drain and maintain your water heater at this time every year.
Service your furnace. Make sure you have clean filters and call a professional to help with major repairs. Heat means pipes could freeze.
Selling your home or heading south for winter? Shut off the water, in your home, completely and consider draining your pipes. Any water left in your pipes is at risk of freezing and causing pipes to bust. If nobody is home, the damage can be widespread and severe. Don’t take chances.
Call SERVPRO at 423-745-4165.
Brogdon Plumbing Company. "7 Steps to Prepare Your Plumbing for Winter." BPC. Eternal Marketing Group. January 7, 2015
Smoke detectors and fire alarms may be some of the most important items in your home when it comes to your family’s safety. These early warning devices may help alert your family to fire and dangerous smoke while there is still time to evacuate, but they need to be periodically tested to help ensure proper function.
Why Do It?
Electronic devices are not infallible. Batteries die, and other parts of the smoke detector can wear out over time. Testing them regularly and replacing batteries (or the entire device) is one way to help ensure your family stays safe should there be a fire in your home.
How Often?
According to the U.S. Fire Administration (USFA), smoke detectors should be tested at least once a month and batteries should be replaced at least twice a year. A good way to help remember to do this is to change your batteries when you change your clocks for daylight saving time — when you spring forward or fall back. Make sure to review your smoke detector’s user manual — you may need to check more often if any of the following apply:
The detector often gives false alarms.
The alarm emits short beeps regularly without anyone touching it.
Frequent kitchen smoke has caused it to activate often, which may wear it out faster.
There are two main types of smoke detectors, according to the USFA:
Battery-powered: This type can be susceptible to defective or worn-out batteries. Monthly testing is critical. Never put old batteries into your smoke detectors and fire alarms.
Hardwired: These detectors are powered by your home electrical system, but they usually have back-up batteries so the device can remain operational in a power outage. Hardwired smoke detectors still require monthly testing to help ensure that both batteries and parts are functioning properly.
How to Test It
You should always check the manufacturer’s instructions for the proper method of testing your smoke detector and fire alarm. But, in general, most battery-powered and hardwired smoke detectors can be tested in the following way:
Step 1. Alert family members that you will be testing the alarm. Smoke detectors have a high-pitched alarm that may frighten small children, so you’ll want to let everyone know you plan to test the alarms to help avoid frightening anyone.
Step 2. Station a family member at the furthest point away from the alarm in your home. This can be critical to help make sure the alarm can be heard everywhere in your home. You may want to install extra detectors in areas where the alarm’s sound is low, muffled or weak.
Step 3. Press and hold the test button on the smoke detector. It can take a few seconds to begin, but a loud, ear-piercing siren should emanate from the smoke detector while the button is pressed. If the sound is weak or nonexistent, replace your batteries. If it has been more than six months since you last replaced the batteries (whether your detector is battery-powered or hardwired), change them now regardless of the test result, and test the new batteries one final time to help ensure proper functioning. You should also look at your smoke detector to make sure there’s no dust or other substance blocking its grates, which may prevent it from working even if the batteries are new.
Remember, smoke detectors have a normal life span of 10 years, according to the USFA. Even if you’ve performed regular maintenance, and your device is still functional, you should replace a smoke detector after the 10-year period or earlier, depending on the manufacturer’s instructions.
Installing smoke detectors can be a great way to help keep your family safe, but assuming they are working may lead to a dangerous situation. Taking a few minutes to check them regularly can help ensure they’re working properly.
If you have ever faced water damage in your office, you may have some bad memories that accompany that instance. For example, you may have lost copiers, files, furniture, and a manner of other items of value due to water damage. You may have even had to close the doors of your business if you're a business owner, or if you're an employee, you may have had a period where you weren't able to work.
This water damage could have been a result of a leaky window, roof, or wall, or it could have been a plumbing malfunction or problem. Regardless how it happened, it more than likely caused a pretty big headache.
After the initial water intrusion problem was resolved, you may have had to deal with mold growth and other devastating effects of water damage in your office. So, what can you do to be better prepared in the event that your office was ever hit with water damage again?
First things first. With today's technological advancements, it's a great idea to back-up files and other hard-copy paper files to more than one location. Also, it's a great idea to stay up-to-date on your equipment warranties as well as renter's or owner's insurance on the office itself. If you have the ability to, it's also a great idea to work out a "Plan B" location for your co-workers or employees to meet in the event of office damage in the future. The possibility for remote work is far more probable now than in recent years.
Next, it's important to have a professional water damage and mold remediation team on hand that you can count on. You never know when water damage might strike your office, so knowing that you have a team of professionals on-call and ready to help should give you immense peace of mind going forward. You want someone to show up when you call with full confidence that your problem will be resolved quickly and efficiently.
Our local SERVPRO team is ready to help in the event a disaster like water damage were to strike you. Our team is more than capable to take care of your problems - large or small. You can count on us!
A restaurant kitchen fire can be devastating and dangerous, no doubt. As we all know, a restaurant is only able to operate with a working kitchen. Depending on the severity of the kitchen fire, the doors of the restaurant may have to close for a period of time while the restoration process takes place. This is never good for the business owners or for the public who enjoy the tasty food!
After the restoration team arrives and begins their process, detailed information will be noted about the damage of the fire itself. For example, they may note structural damage, interior damage to seating areas, damage to the kitchen equipment itself, sprinkler systems, etc.
This kind of fire damage requires extensive cleaning to handle soot, ash, and removing smoke odor from the restaurant. In some situations, special chemicals may have to be used for counters, kitchen ranges and exhaust hoods, walls and ceilings, doors, and other appliances, as soot and smoke often create toxic fumes that are hazardous to breathe in.
Smoke odor may not be fully removable in some of the worst cases, and that will mean surfaces have to be deep cleaned and then repainted and or resealed to eliminate the issue altogether.
After the smoke odor and soot remains are gone, it's time to replace the damaged kitchen equipment. The restaurant owner may have to purchase a new stove, oven, warming container, or just about anything between. This can be costly, but if good insurance is in place, the owner can start this part of the re-opening process with confidence.
Any kind of fire is devastating and scary - restaurant kitchen fires are not exempt. If you face fire damage in your restaurant's kitchen, rest assured that our team of fire damage experts is on the way to get the restoration process started. Don't hesitate to give us a call when you need us.
Seven Home Improvement Projects You Won't Want To Postpone
Improving or replacing your roof isn't something you want to postpone any longer.
You may think you have all the time in the world to make repairs to your home, but your property has other ideas.
After my wife and I bought our first house five years ago, we began building a subconscious triage list of issues and potential repairs and started addressing them as best we could. We honestly thought that portions of our house and surrounding property would sit around in suspended animation as we dithered with garden beds, insulation, and myriad other projects that now seem incidental at best.
During the next five years, we’d learn the merits of preemptive planning. When a wind storm felled a 110-year-old pignut hickory tree, we became quickly acquainted with arborists, preventative maintenance, and tools like pruning poles and wood chippers. When a a firewood rack nearly fell through our front porch, we learned the value of selecting the right wood and framing for the job. When our water pump seized not once, but three times, we learned that asking for a professional opinion during a small job (like winterization) is better than asking for it before a big job (like a complete pump replacement).
The biggest takeaway from all of these misadventures is that it isn’t just cheaper to address small problems before they become big ones, it’s often inexpensive to address small problems period. I looked back on my own checklist and came up with a few projects where the bill was not only lower than I thought it would’ve been, but low enough to make me wish I’d called someone in sooner.
Tree Pruning
When we first moved to our house, we inherited two legacy trees. One was a 110-year-old pignut hickory and the other was a 125-year-old black walnut. When a windstorm took down the first, we avoided a nearly $900 removal fee, but spent days with chainsaws, hacksaws, a wood chipper and a log splitter cutting apart a gnarled, knotted, dense mass of a tree.
My father-in-law had much of the equipment that we didn’t, but rental charges would’ve brought us to at least half the removal price. We did have to spring for a $230 excavator rental to get rid of the stump, but sprung for $200 tree pruning for the remaining black walnut tree in the years that followed. With each tree right near our garage, and the hickory fortunate enough to fall away from that building, we likely should have addressed pruning far earlier than we did.
Gutter Cleaning
We have a two-story home that dates back to the early 1850s, which means it has an extremely steep roof on its second story and questionable roofs over some of its entrances. I can get the lower gutters and about 20% of the high gutters fairly easily. It’s the 80% of those highest gutters that have irked me for years.
As the folks at HomeAdvisor point out, the average cost of gutter cleaning nationwide is $150, but that can range from $70 for a smaller job to $335 for a mansion-sized property. Ours was slightly less than the average, but well worth it after a series of unusually snowy and icy Oregon winters threatened to pull gutters clean off of the house.
Driveway Repair
We have a gravel driveway that wasn’t in peak condition when we arrived and was replete with ruts and pits before we finally addressed it. Installing a new driveway would’ve cost us thousands, but repairing a gravel driveway costs roughly $40 a ton for 3/4-inch minus — thick gravel with loose fill that settles into gaps left by potholes.
Combined with the $60 rental of a plate compactor, the entire job will cost us less than $400, which is significantly less than the nearly $1,500 cost of having it completely redone. An asphalt driveway, meanwhile, costs about $2 to 2.50 per square foot to repair but $3 to $4 per square foot to replace.
Well Pump
If your house uses well water or you have an irrigation system that runs on well water, it helps to have a float and cutoff switch installed for the months when the well gets low. It also pays to blow out your lines and winterize your pump before things get too cold.
Before we learned any of this, we overheated two well pumps and had a third crack after its remaining water froze. Each replacement was roughly $250 apiece, while winterization cost nothing (just removing bolts and draining the pump) and the float and switch installation cost roughly $180.
Septic Tanks
As soon as we were told that we were moving into a house with a septic tank, we made plans to have it emptied. We didn’t mind the previous owners leaving behind items like curtains, furniture, and appliances, but having their remnants in our septic tank just made me uneasy. We had a crew come in during the spring and empty it for about $275. While that isn’t insignificant, it’s a cost you incur every 10 years and is far less than the $1,551 average cost of repairing a septic system that’s been pushed beyond its limits.
Insulation
In our house’s more than 150 years of existence, insulation seems to have been a nominal concern. There was some old yellow batting in the floor of the attic, but not much beyond that. The first winter’s natural gas bills for heat were substantial, with even the 12-month flat rate exceeding $190 a month.
The following spring, we rented an AttiCat insulation blower for $53 for four hours and blew in 10 bags of R30 insulation at a cost of roughly $340. This year, our flat-rate bill sat at $147 a month: A 22-percent decrease that came in even above EnergyStar’s estimate for our Western Oregon climate zone.
Landscaping
We have laurel bushes and invasive blackberry ringing our property, but the laurel bushes on one side of the house had grown halfway across the yard. We realized in other parts of the yard and in our garden that, if left unchecked, hedges and blackberry would simply consume everything in their path. That said, these laurel bushes and blackberry were about to consume and outbuilding and reach their way toward the house.
We called in a landscaping crew and, $500 later, we had reclaimed much of the yard and given the goats a bunch of laurel and blackberry to munch on. If the previous owners had simply pruned a bit each year, however, that same hedge could’ve been either pruned by professionals for far less or trimmed by the owners for free.
You probably have heard lectures and read countless brochures and handbooks regarding fire safety. Fire safety is a very important topic that shouldn’t be taken lightly. You may not realize how often you come into contact with a situation that could result in a damaging fire. Some of those situations are recreational with friends and family and some of them are in your own home while cooking dinner. Let’s discuss some of the most common sources of fires.
Campfiresandfirepits. Summers usually involve campfires, bonfires, and firepits depending on where you live. It’s fun to have friends and family over for a cookout and s’mores or coffee by the fire. However, it’s essential that you practice fire safety techniques when lightning any kind of fire.
Moreover, if you are lighting a campfire or bonfire, plan to have adequate water on hand to put it out when you’re ready to leave. Never start a fire when you don’t have access to water.
Be sure that no one is getting too close to the fire, horse-playing, getting intoxicated, and be sure that kids stay away from the flames. There should never be brush, leaves, other trees, buildings, or vehicles nearby when having an outdoor fire. Wind can easily carry sparks and ignite surrounding items causing even more damage and harm to your guests.
If you’re using a firepit, be sure to have water on hand to put the fire out. Also, utilize the cap or top/cover that came with your pit to help contain sparks and ash from spreading around your yard and potentially causing a secondary fire.
Fireworks. Fireworks can be a ton of fun! Especially in the summertime. However, with typically dryer conditions, secondary fires can easily be lit causing damage to homes and vehicles.
If you use fireworks, be sure to have a water source to eliminate the flames after the combustion takes place. Also, be vigilant in making sure that no other sparks or flames ignite after landing. Never shoot fireworks near a home, building, vehicle, or trees.
Electrical. If you have electrical cords running to equipment in your yard or free-standing garage, make sure they are in great shape, insulated properly, and that there is no overloading of electric sources.
Also, be sure that your stove, washer and dryer, etc. are wired correctly and are approved by a licensed electrician to avoid house fires.
Our team is here to help when disaster strikes! Fire is a beautiful thing but can be a devastating thing when it consumes or damages your belongings. If you come face to face with fire damage, call us. We will be there quick to get you the help you need in the restoration process.
Southeast Tennessee has seen some pretty severe storms tear through our counties in the last few years. Some storms have even developed into tornadoes and large hail events. What can you as a homeowner do to prepare your home’s exterior and yard for a nasty storm? Here are a few ways to do just that!
Evaluate your landscaping. This is probably one of the most potentially dangerous parts of your yard when it comes to storms. Do you have trees surrounding your home? Do branches reach far enough over your home to be of concern? When heavy wind and rains hit, there’s always a chance that one of those trees or their limbs could come crashing into your home.
It’s a great idea to have a professional tree trimming/cutting service come out to your home once a year to be sure everything is safe and sound and far enough away from your home in case a storm strikes.
Trash. If you live in the city, you more than likely have some sort of trash pickup service. If you notice that the forecasters are predicting bad weather, avoid putting your trash can out ahead of time until the storm passes.
Also, if you don’t live in the city and don’t have a trash removal service, you may have your trash stored in cans alongside your garage or somewhere around the perimeter of your home. Be sure that those items are secured as to avoid flying debris which could break windows, damage siding, and so much more.
Secure your lawnfurniture. If you don’t already have a place that you store lawn furniture when it’s not being used, it’s a good time to decide on where that location may be in the future. Light lawn furniture is easily picked up and thrown by even moderate winds.
When you hear of storms coming your way, gather all pieces of your lawn furniture that aren’t secured to the ground and place them in your safe place until the weather clears up.
Roofing. It’s always a great idea to check your roof before and after a large storm hits. After the storm is over and it’s safe to go back outside, inspect your roof as best you can. Check to be sure the gutters are still attached to your home and that no missing or damaged shingles appear. If missing pieces of your roof are left untouched, you could face even more damage later on from water leaks.
Sheds. Backyard sheds are great for home storage. However, if they’re not properly secured during high winds, they can be thrown across your yard and hit your vehicles or even your home.
We at SERVPRO are here to help pick up the pieces when the unthinkable happens to your family. The best thing you can do as a homeowner is to be proactive and vigilant when it comes to preparing for damaging storms. If you have water, fire, or storm damage, give us a call.
Mold is a hot topic for today’s homeowners. It’s common knowledge that mold is dangerous for your health, but it’s also unsightly and can really cause the value of a home to decrease. It can even cost a sale when a home inspector reports it to potential home buyers. So, how can you avoid mold growth in your bathroom effectively?
Hang Wet Items Up. Mold loves a warm, wet environment. If left unattended for a long period of time, mold can pop up in things like soaking wet towels left balled up on the floor. It can also appear in showers and tubs.
Change Shower Curtains And Check For Leaks. How long has it been since you changed your shower curtain? If it’s been a while and especially if you don’t clean your shower regularly, you may spot some mold developing around the bottom of the curtain. Also, if you notice excess water escaping your tub or shower, it could be traveling through your flooring and causing mold under the subfloor. This especially happens with prolonged leaks around tubs, commodes, and showers.
Buy A Dehumidifier. Using a dehumidifier in your bathroom, especially if it sees heavy traffic, will be a huge help in creating conditions that mold spores don’t like.
Buy The Right Materials. If you are planning on remodeling your bathroom soon, be sure to pick materials that are mold resistant! (They make those now!)
Cleaning products. There are tons of cleaning products on the market now that claim to fight and defend against mold. Be sure and do your research ahead of time to find the safest and most effective type/brand.
If you happen to find mold in your home, our team of experts is here and ready to help! Give us a call today!
When a disaster strikes, it’s sometimes easy to feel overwhelmed and anxious while you’re waiting for the restoration process to begin. However, there are still things that you as a homeowner or business owner can do while we are on our way to help!
Here’s a super helpful to-do list that will help you stay on the right track:
Safety assessment. First things first, make sure everyone under your care is safe and away from any potential danger the water damage has caused. If you have slick surfaces in your home or office, there could be potential trip hazards that should be addressed. Be sure to look for exposed wires or anything else that could cause harmful electrical shock or fire.
Take stock of the damage. While it may be emotionally difficult to start this process, it’s important that you get it done. Try and take photos of all of the damaged areas and items affected by the water damage. If you can name each photo you take, put a description of the item, and an approximate value it has/had, you’ll be ahead of the game.
Insurance. Times like these are when we tend to be most thankful for our insurance. This is the time when you need to reach out to your rep and explain what happened in detail. They will come out and assess the damage, and will proceed with aid they deem necessary to help get you back on your feet. If there has been significant damage or injuries, you may need to seek legal advice in handling future claims, etc.
Begin Drying The Excess Water. After ensuring that your home or office is safe, you can re-enter and begin the drying process. If you have help that is physically able, move any furniture out of the way so that our team can come in and get to work quick!
Hang in there. We know disasters are never planned, and things can get scary fast. You can rest assured that your local SERVPRO team will be there fast to get the job done right. Together, we will get you back on your feet and back to life as normal.
If your crawl space is a cold zone, that means it shouldn’t be pulling heat from the warm air in your home. If you’re having issues with mold and moisture, you space my not be properly vented. Two vents on either side of your crawl space should be sufficient. You will also need to place insulation under the floors in your home so the hot and cold air don’t meet in the middle and create moisture. While you’re making repairs in the crawl space – double check that any piping in there is properly insulated so they don’t freeze during the winter.
If your crawl space is part of the warm section of your home, that means your space better be properly insulated so you aren’t losing heat to the outside. If it’s not properly insulated, make sure to take care of that first. I like using a closed cell, two pound spray foam because it will keep the heat in, as well as act like a vapor barrier to fight against that moisture. If you’re filling your space with batt insulation instead, make sure you also install a vapor barrier – and it needs to be on the warm side of the house.
You may think that mold and moisture in your crawl space are just a given, but the truth is, it’s not. If you understand how to prevent moisture buildup in the space, you can keep the water out and that will keep the mold at bay. If you would to have a Mold Remediation estimate contact SERVPRO of McMinn, Monroe and Polk Counties.
Spotlight on SERVPRO of McMinn, Monroe, and Polk Counties! Our SERVPRO franchise supported and sponsored a recent community outreach program called "Stock The Pantries". Through this community outreach program we were able to supply non perishable food items to three local food banks within McMinn County. We had an outstanding contributions from many corporate sponsors as well as a concert where we raised over $2,000 dollars and over 2500 pounds of food. SERVPRO of McMinn, Monroe and Polk Counties participated in "Leadership McMinn" which is part of yearly class sponsored by the Athens Tennessee Chamber of Commerce. Part of the class project was "Stock The Pantries". We were recently presented with an award for our course completion. Leadership McMinn was a valuable community experience and we thoroughly enjoyed raising funds and food for Stock The Pantries.
Thank you for sponsoring our event and helping us "Stock the Pantries"!
SERVPRO of McMinn, Monroe and Polk Counties has a commitment to serve our community.
Whether you’re celebrating America’s Independence by celebrating with family and friends, grilling out, splashing in the pool or going to the beach, or getting out of town, making safety first priority is the best way to avoid accidents and losses from ruining your well-designed Holiday plans.
Don’t think safety is a necessity for this independence holiday? Consider a few statistics compiled by WalletHub and NFPA:
2 states ban all consumer fireworks (Delaware and Massachusetts)
68% of all annual fireworks injuries take place within a month of July 4th
On average, 760 people go to the emergency room with fireworks-related injuries
July 4th is America’s top beer-drinking holiday
466 people are killed in Fourth of July car crashes each year
In 2018, fireworks caused an estimated 15,600 reported fires in the U.S., over 1,400 of them were structure fires and 14,000 were outside and other fires
As you celebrate the Declaration of Independence in 2019, do so by keeping you, your guests, and your home protected with these Fourth of July safety tips:
Sparkler & Fireworks
Always supervise young children and never allow them to handle sparklers or fireworks.
Do not point fireworks at yourself or others.
Never attempt to relight a “dud”.
Keep a supply of water or a fire extinguisher nearby as a precaution.
Never light fireworks near homes, garages, buildings, or structures that could catch fire.
Leave an unsafe situation when you feel you or your family’s safety is in danger.
Grill Safety Tips
Clean your grill before using, checking gas tank hose lines for leaks if grilling with propane.
Always follow manufacturer recommendations for appropriate use of your grill.
Keep your grill at least 10-feet away from structures and deck railings place it on stable ground.
Never leave a lit grill unattended.
Be prepared to extinguish grease fires using baking soda (not water!) or a fire extinguisher or bucket of sand for all other fires.
Pool Safety Tips
Clean your pool and make sure chemicals are at proper levels, and circulation and filtration systems are in recommended working order.
Designate a guest or family member to be on “lifeguard duty” whenever swimmers are in the pool. Never leave children unattended.
Create and enforce pool rules with guests, such as no diving, no running, and no playing near drains.
Become certified in CPR and first aid or update a certification you already have.
Install a poolside phone or keep a fully charged cell phone near the pool with emergency numbers programmed.
Gathering Safety Tips
Drink responsibly, and never drink and drive. If you know you’ll be drinking away from home, make plans for rides to and from the gathering before alcohol impairs good judgment.
Watch out for the safety of other guests. Catching up with others, playing yard games, or helping out the host can make it easy for people to become distracted. If you see a potential hazard to a person or structure, act quickly or speak up.
Beware of hidden insects. With open beverages and new bugs out for the season, it’s easy to take a sip and accidentally get stung. Always check cans and cups before drinking, or better yet, keep your drinks covered for added safety.
If fireworks are in the works, be sure to follow local laws before lighting anything off. Fireworks should only be used by sober adults outside and should be kept clear of trees, structures, and other flammable factors. Keep buckets of water or a hose handy to extinguish fireworks as needed.
Everyone here at SERVPRO of McMinn, Monroe and Polk Counties wishes everyone a safe Summer!
Seven Home Improvement Projects It Pays Not to Postpone
Seven Home Improvement Projects It Pays Not to Postpone
You may think you have all the time in the world to make repairs to your home, but your property has other ideas.
After my wife and I bought our first house five years ago, we began building a subconscious triage list of issues and potential repairs and started addressing them as best we could. We honestly thought that portions of our house and surrounding property would sit around in suspended animation as we dithered with garden beds, insulation, and myriad other projects that now seem incidental at best.
During the next five years, we’d learn the merits of preemptive planning. When a wind storm felled a 110-year-old pignut hickory tree, we became quickly acquainted with arborists, preventative maintenance, and tools like pruning poles and wood chippers. When a a firewood rack nearly fell through our front porch, we learned the value of selecting the right wood and framing for the job. When our water pump seized not once, but three times, we learned that asking for a professional opinion during a small job (like winterization) is better than asking for it before a big job (like a complete pump replacement).
The biggest takeaway from all of these misadventures is that it isn’t just cheaper to address small problems before they become big ones, it’s often inexpensive to address small problems period. I looked back on my own checklist and came up with a few projects where the bill was not only lower than I thought it would’ve been, but low enough to make me wish I’d called someone in sooner.
Tree Pruning
When we first moved to our house, we inherited two legacy trees. One was a 110-year-old pignut hickory and the other was a 125-year-old black walnut. When a windstorm took down the first, we avoided a nearly $900 removal fee, but spent days with chainsaws, hacksaws, a wood chipper and a log splitter cutting apart a gnarled, knotted, dense mass of a tree.
My father-in-law had much of the equipment that we didn’t, but rental charges would’ve brought us to at least half the removal price. We did have to spring for a $230 excavator rental to get rid of the stump, but sprung for $200 tree pruning for the remaining black walnut tree in the years that followed. With each tree right near our garage, and the hickory fortunate enough to fall away from that building, we likely should have addressed pruning far earlier than we did.
Gutter Cleaning
We have a two-story home that dates back to the early 1850s, which means it has an extremely steep roof on its second story and questionable roofs over some of its entrances. I can get the lower gutters and about 20% of the high gutters fairly easily. It’s the 80% of those highest gutters that have irked me for years.
As the folks at HomeAdvisor point out, the average cost of gutter cleaning nationwide is $150, but that can range from $70 for a smaller job to $335 for a mansion-sized property. Ours was slightly less than the average, but well worth it after a series of unusually snowy and icy Oregon winters threatened to pull gutters clean off of the house.
Driveway Repair
We have a gravel driveway that wasn’t in peak condition when we arrived and was replete with ruts and pits before we finally addressed it. Installing a new driveway would’ve cost us thousands, but repairing a gravel driveway costs roughly $40 a ton for 3/4-inch minus — thick gravel with loose fill that settles into gaps left by potholes.
Combined with the $60 rental of a plate compactor, the entire job will cost us less than $400, which is significantly less than the nearly $1,500 cost of having it completely redone. An asphalt driveway, meanwhile, costs about $2 to 2.50 per square foot to repair but $3 to $4 per square foot to replace.
Well Pump
If your house uses well water or you have an irrigation system that runs on well water, it helps to have a float and cutoff switch installed for the months when the well gets low. It also pays to blow out your lines and winterize your pump before things get too cold.
Before we learned any of this, we overheated two well pumps and had a third crack after its remaining water froze. Each replacement was roughly $250 apiece, while winterization cost nothing (just removing bolts and draining the pump) and the float and switch installation cost roughly $180.
Septic Tanks
As soon as we were told that we were moving into a house with a septic tank, we made plans to have it emptied. We didn’t mind the previous owners leaving behind items like curtains, furniture, and appliances, but having their remnants in our septic tank just made me uneasy. We had a crew come in during the spring and empty it for about $275. While that isn’t insignificant, it’s a cost you incur every 10 years and is far less than the $1,551 average cost of repairing a septic system that’s been pushed beyond its limits.
Insulation
In our house’s more than 150 years of existence, insulation seems to have been a nominal concern. There was some old yellow batting in the floor of the attic, but not much beyond that. The first winter’s natural gas bills for heat were substantial, with even the 12-month flat rate exceeding $190 a month.
The following spring, we rented an AttiCat insulation blower for $53 for four hours and blew in 10 bags of R30 insulation at a cost of roughly $340. This year, our flat-rate bill sat at $147 a month: A 22-percent decrease that came in even above EnergyStar’s estimate for our Western Oregon climate zone.
Landscaping
We have laurel bushes and invasive blackberry ringing our property, but the laurel bushes on one side of the house had grown halfway across the yard. We realized in other parts of the yard and in our garden that, if left unchecked, hedges and blackberry would simply consume everything in their path. That said, these laurel bushes and blackberry were about to consume and outbuilding an reach their way toward the house.
We called in a landscaping crew and, $500 later, we had reclaimed much of the yard and given the goats a bunch of laurel and blackberry to munch on. If the previous owners had simply pruned a bit each year, however, that same hedge could’ve been either pruned by professionals for far less or trimmed by the owners for free.
The Department of Energy has updated its testing and labeling standards for residential water heaters, replacing Energy Factor (EF) with a new metric called the Uniform Energy Factor (UEF).
Manufacturers say there's nothing different about their water heaters, only the way the government requires performance data to be collected and reported. Consumers shopping for a hot water heater by using the familiar yellow Energy Guides will see more detailed information than in the past.
Rheem Manufacturing said in a fact sheet that the new standard more accurately reflects real world use and should help consumers make "applies-to-apples" comparisons of different brands. The new rules took effect in June 2017, but manufacturers are still working with code officials and consumers to explain what they mean.
Development of the UEF was prompted by a 2012 law passed by Congress requiring the Department of Energy (DOE) to either revise the old EF metric or create a new one. The department decided to develop a completely new standard and test procedures that all manufacturers must follow, Rheem said.
Rheem suggested that part of the problem with the EF protocol was that manufacturers were interpreting it differently, a potentially confusing situation for consumers.
"Due to inconsistent, unreliable interpretations of High Efficiency (EF) ratings across national brands, all water heating manufacturers are now required to comply with the new DOE testing procedures and rating standards," the company's explainer said.
A.O. Smith explained in its own fact sheet that water heaters are now placed in one of four "bins," based on anticipated hot water usage. The bins are "very small" (10 gallons of daily hot water use); "low" (38 gallons); "medium" (55 gallons); and "high" (84 gallons). Based on the first-hour delivery, a water heater gets a UEF within its bin, with higher UEFs representing greater energy efficiency and lower operating costs.
First-hour ratings, rather than nominal hot water capacity, are key. Bradford White said in an online statement that testing protocols for first-hour hot water delivery have been revamped, resulting in new values for the same appliances.
A.O. Smith cautioned that only UEFs within the same bin should be compared. A "high" bin water heater with a UEF of 0.95, for example, will not have the same efficiency as a "low" bin water heater with an identical UEF.
Shopping by the Energy Guide label
Consumers shopping in a local big box store for a water heater will continue to see the yellow "Energy Guide" labels that list some of the performance specs, like the sample label for a tankless heater shown at the top of this column.
Revised energy labels include several pieces of information:
Storage capacity. For tank style water heaters, storage capacity shows the exact amount of hot water the tank will hold, not just a nominal capacity. Tankless water heaters list gallons per minute.
First hour rating: This is the amount of hot water a consumer can expect to get in the first hour, starting with a full tank of hot water. Results are organized by bin.
The most prominent number is the "Estimated Yearly Energy Cost." Like the old labels, this one shows a range of energy costs among similar models and an estimate of how much the consumer will spend for hot water with this particular appliance.
What's missing? The UEF. Nowhere on the label is the numerical value the new testing protocol should produce.
The Federal Trade Commission (FTC), which administers rules about the label, didn't answer an emailed question about why the UEF is missing, and referred questions to the Department of Energy. The DOE didn't reply to a request for more information.
However, Joshua Greene, vice president for government and industry affairs at A.O. Smith, said by telephone that during the rule-making process, the industry recommended that the UEF be included on Energy Guide labels. The FTC decided against it.
"We as an industry collectively recommended to the FTC that the applicable UEF number for that particular water heater be part of the yellow guide label," he said. "The rationale the FTC gave back to us as to why they were not going to take that recommendation is that that would be one step more than a consumer would have to figure out, and not truly having the intuitive understanding to go through what the UEF really means.
"They felt the more pertinent information was the annualized cost of that water heater to them as a consumer," he continued, "that in the end that was more tangible, more understandable rather than shopping by UEF number and bin."
Greene added the issue would be revisited with the FTC in 2019, when manufacturers get another crack at convincing officials to add the UEF to labeling. He also said the industry had tried to convince DOE to write a primer about the UEF for consumers but so far had not been successful. "We're not there yet," he said.
You can still get the UEF
Shoppers who want to compare similarly sized models by UEF can still do so. One source of information are the manufacturers' own web pages. A.O. Smith, Rheem, and Bradford White, for example, all list the UEF on product descriptions posted at their websites.
Or, Greene said, consumers can call customer support numbers for any manufacturer and ask for the UEF from the product's spec sheet.
More detailed information is available by checking a published list of minimum UEF standards for water heaters of various types.
Buyers who don't want to wade into the details can always use an interactive product selector, like the one A.O. Smith offers at Hotwater.com or the less detailed selector from Rheem.
Mixed reviews
The new test procedures got a mixed reaction from the Appliance Standards Awareness Project (ASAP) when they were announced in 2014.
In a blog posted by the American Council for an Energy-Efficiency Economy, then senior analyst Anthony Fryer said the new procedures were designed to measure energy consumption more accurately for newer types of water heaters, such as tankless, heat pump, and condensing gas water heaters. That was the good news.
But Fryer was critical of the decision not to test heat-pump water heaters (HPWH) at low ambient temperatures, when the devices fall back on built-in electric-resistance elements. Those elements use three times as much energy as the heat pump.
"Because of this sensitivity to low ambient temperature, performance can vary depending on where in the house the unit is installed and what region of the country the house is located in," he wrote. "This means that a unit installed in an unconditioned basement in northern Minnesota is likely to perform very differently from one installed in a garage in Florida."
Heat pump compressors on some models shut down at temperatures as high as 57°F while others continue to operate at 30°F, he said. Rather than factor that into the test protocol, DOE decided to test the water heaters at an ambient temperature of between 66.5 and 68.5°F.
"New water heating technologies offer enormous energy savings potential, and the new DOE test procedure goes part of the way to ensure that all water heaters are tested fairly and accurately," he said. "We hope and expect that it will not be long before DOE revises its test method again to better reflect how HPWHs perform in colder temperatures."
Asked whether those concerns remain true today, Chris Granda of the ASAP said by email:
"Testing HPWH at 70 degrees F ambient can result in significantly lower annual electricity consumption than testing at more realistic ambient temperatures because at the higher ambient temperatures HPWH tend to use less resistance heating. That said, HPWH technology continues to evolve and we haven’t reevaluated the current crop of products to see whether the low-temperature cut-out concern is still relevant. In short, ASAP still has this concern, but it requires more study and at the moment there isn’t a water heater rulemaking that we could use to encourage DOE to change the test procedure anyway."
How to Save Money on Your Electricity and Water Bills
While you want to be comfortable in your home, it’s possible to achieve this goal while also saving money. Making small adjustments that you will barely notice can result in significant savings. Keep reading to discover ways to save money on your electricity and water bills.
Stop using your toilet as a wastebasket. “Every time you flush a facial tissue or other small bits of trash, five to seven gallons of water is wasted,” according to Doyle James, president of Mr. Rooter Plumbing.
James also recommends that you refrain from using your garbage disposal so frequently. “In-sink ‘garburators’ require lots of water to operate properly,” he explains. “Start a compost pile as an alternate method of disposing of food waste.”
If you wash your dishes by hand, stop leaving the water running when you’re rinsing them. “If you have a double-basin, fill one with soapy water and one with rinse water,” James says. “If you have a single-basin sink, gather washed dishes in a dish rack and rinse them with a spray device or a pan full of hot water.”
Your water heater accounts for 12% of your electric bill. If you have an older system, James says flushing sediments out of it will improve energy efficiency. However, if the water heater is 15-20 years old, he tells Freshome that replacing it will generate substantial savings. “Tankless ‘on-demand’ systems don’t store water, offering savings up to 30 percent; however, the latest hybrid heat pump systems offer even greater savings – reducing water heating costs up to a whopping 60 percent,” James explains.
Your ceiling fan can lower your energy costs during the summer. According to Richard Ciresi, owner of the Aire Serv of Louisville, KY, ceiling fans create a wind chill effect, allowing you to adjust thermostat settings by 4-7 degrees F (up to 30% savings!) and still remain comfortable. However, make sure that the fan is going in a counterclockwise motion during the summer, and turn it off when you leave the room, because fans cool people, not rooms.
Ciresi also recommends upgrading your lighting. “Lighting accounts for up to 12% of your energy budget, and those old school incandescents give off 90% of their energy as heat, taking a toll on your air conditioner.” He recommends replacing your lightbulbs with CFLs (use 75% less energy and last 10x longer) or LEDs (use 80% less and last 25x longer).
Leave your thermostat alone. You don’t need to cool an empty house. “This practice can actually increase your utility bills,” Ciresi warns. “We recommend, particularly during hot weather, that you set the thermostat to a comfortable temperature and leave it be.” Also, he says the constant temperature change isn’t beneficial to your art, musical instruments, or furnishings.
Observe your humidity levels. If they’re above 50%, Ciresi says you’ll feel warmer than the air temperature. “In most cases lower humidity allows you to be comfortable at slightly higher temperatures, often as much as 78 degrees,” he says. And if you can be comfortable at higher temps, you can save a lot in energy costs. “If your humidity is too high, check for a source like a leaking basement, roof, or plumbing fixture – you may need to a call an air conditioning professional to determine the cause and provide a solution.”
Changing the time you use large appliances can also help you save money. “Operate dishwashers, washers, and dryers only when full, preferable at night or when temperatures are cooler,” recommends Doug Rogers, president of Mr. Appliance. “Also, remember that refrigerators/freezers use less energy when full and make sure to pack them accordingly.
Small appliances – microwaves, toasters, TVs, DVDs – are energy vampires that consume small amounts of energy even when they’re not in use. “Don’t let them drain your budget,” Rogers says. “Plug them into power strips so you can turn them off when you’re not using them.”
If your windows are not properly sealed, this can account for 20% of your home’s energy loss, according to Larry Patterson, franchisee of Glass Doctor in Dallas, TX. If your home was built before 2001, he says the most cost-efficient approach is to keep the window frame material and replace the existing clear glass insulated units with new low-emissivity (low-e) glass insulated units. “This can help save up to 35% on utility bills, while also leading to increased comfort near windows, reduced fading, and less noise.”
If there’s one thing I’ve learned while working at Real Simple, it’s that a successful day of cleaning is reliant on great, effective products. (OK, and maybe an upbeat playlist, too!) As the products editor, I’m always on the hunt for experts' go-to picks that will save time and make life a little easier. I recently tapped the professionals at Fairy, a housekeeping service in New York City and San Francisco, for their secret weapon that quickly gets a house spick-and-span.
Now, I had anticipated them spilling the beans about some magical product I had never heard of, something pricey, or one that’s only available wholesale and difficult to find at a retailer. But reader, you know what they said their go-to is? Good old Formula 409 Multi Surface Cleaner. Yes, the one in the white and red bottle with the impossibly fresh scent.
So why do they like it so much? For one, they say it’s super effective for a variety of uses—from removing toilet stains, to cleaning gunk in ovens, to even polishing up a dull bathtub. They also said the smell is pleasant and that a bottle lasts and lasts. And it’s no wonder why one bottle goes a long way—apparently the experts at Formula 409 even suggest diluting the solution with water to wash floors.
Want one more pearl of cleaning wisdom? The cleaning experts at Fairy also mentioned the one task you should tackle if you're short on time but want to make your home feel instantly cleaner: do a quick vacuum. We're keeping this trick in mind for the next time guests stop by on short notice.
While the pleasures of homeownership are great, there will invariably be repairs along the way, especially when it comes to your hard-working plumbing. Some issues, such as fixing broken sewer lines, should certainly be handled by a pro; others, fortunately, are basic do-it-yourself jobs—no special tools or skills required. Check out five of the most common problems you’re likely to encounter and learn how to make short work of them with these plumbing repairs.
1. STOP A SWEATING TOILET TANK
Condensation on toilet tanks—the kind that ends up dripping into puddles on the floor—generally occurs after taking a long hot bath or a steamy shower. That’s when temperature and humidity levels in the bathroom are high, but the water in the toilet tank is still cool (between 50 and 60 degrees Fahrenheit), causing condensation buildup. Picture how a cold beverage develops droplets outside the glass on a sizzling summer day; the same thing is happening with your toilet tank.
To prevent the pesky problem, this plumbing repair involves installing an anti-condensation tank liner. You’ll find them in kits at DIY stores and plumbing-supply outlets for less than $20. The kit includes instructions and a large sheet of flexible foam, which you’ll cut to fit the inside of the tank. Depending on the brand, the liner will come with a peel-off backing or separate adhesive for installation. You’ll need to drain the tank and let it dry out before starting. Once the liner is securely in place (you may need to wait overnight for adhesive to set), it will form an insulating barrier between the cold water and the outside tank, and puddles will be a thing of the past.
2. REMOVE A SINK TRAP
Removing a sink trap—a P-, J-, or S-shaped pipe that connects to two other pipes beneath the basin—is often the key to common plumbing repairs like unclogging a sink, because that’s where most clogs lodge. Or if someone drops a ring or other valuable down the drain, you’re likely to find it caught in the trap. Follow the steps below to remove, clean, and replace a trap.
1. Position a pan beneath the plumbing pipes under the sink to catch the residual water that will drain out when you remove the trap.
2. Locate the trap that connects to the pipe that drops straight down vertically from the sink drain and the horizontal pipe called the “waste arm.” The trap is threaded on both ends and held in place with nuts. No need to turn off the water supply to the sink, just tell family members not to use the water while you’re working.
3. Loosen both nuts that secure the trap by twisting counterclockwise. You can often do this with your hands, but if a nut’s really stuck, use an adjustable pair of pliers—just go easy to avoid breaking the nut.
4. Detach the trap by pulling it downward. It should fall off easily; if not, pull and wiggle gently till it comes loose. Allow water to drain into the pan you’ve placed below the sink.
5. Scrape out any stuck debris you notice in the trap with an old butter knife, and then take the trap outdoors and spray it out thoroughly with a water hose to remove any sludge that might be coating the inside.
6. Reattach the now-clean trap by sliding it back into place and twisting the nuts that secure it clockwise with your fingers.
3. RE-CAULK A VANITY SINK
The plumber who originally installed your sink applied caulk around the edge to keep water from seeping between the basin and the countertop. Over time, however, this semi-solid waterproof sealant can deteriorate, harden, or crumble, allowing water to seep into the cabinet below, which can damage stored items and lead to mold growth.
To re-caulk the area around the sink, purchase a small tube of 100 percent silicone caulking that’s transparent or in a color that matches either the countertop or the sink. Then follow these steps for the DIY plumbing repair:
1. Scrape away the old caulk with a plastic putty knife; a metal knife could scratch the sink or the countertop.
2. Wipe down the seam between the sink and countertop with a clean rag dampened with denatured alcohol. The alcohol will remove residual traces of soap scum or grime.
3. Let the area dry completely.
4. Apply a small bead of caulk, approximately 1/8” in diameter, all the way around the sink, keeping consistent pressure on the tube to create a uniform bead.
5. Dampen a fingertip with water and carefully run it along the bead of caulk, smoothing the caulk into the crease and forming a nice smooth groove. You may have to rewet your finger a few times.
6. Allow the caulk to dry completely before using the sink. Drying times appear on the caulk tube and average 12 to 24 hours.
4. FLUSH A WATER HEATER FLUSH
Mineral deposit buildup in your water heater can reduce the unit’s efficiency. By flushing your water heater every six months, you’ll extend its useful life and enjoy more hot water. You’ll find flushing instructions in the manual that came with the unit, and while models may vary slightly, for most the following steps are sufficient.
1. Turn off the power to the water heater. If it’s electric, shut off the breaker. If it’s gas, turn the gas off at the shut-off valve.
2. Turn a hot water faucet elsewhere in your house to “On,” and allow it to run until the water cools.
3. Attach the end of a standard garden hose to the drain outlet at the bottom of the water heater, and put the other end in a floor drain or a large bucket.
4. Turn off the water supply to the water heater. The shut-off valve is located on the pipe that connects the cold water supply to the top of the water heater.
5. Use a flat-head screwdriver to open the drain valve located on the drain outlet where the garden hose is attached. Water will begin draining out of the hose, along with built-up sludge and mineral deposits. Be careful to avoid getting splashed—the water will be very hot!
6. Close the drain valve with the screwdriver when water stops draining out, remove the hose, turn on the water supply to the water heater, and then turn the power back on.
5. FIX LOW WATER PRESSURE
It’s so frustrating when you want a strong, powerful stream of water but only a trickle comes out of the faucet! Fortunately, most water flow issues are an easy fix.
• First, check the water pressure at different faucets. If only one faucet is affected, the problem could be mineral deposits. Most faucets have either a small screen or a water-saving filter at the very end of the spigot that twists off. Remove the screen by twisting it off counterclockwise. If it’s clogged with debris, rinse it and reattach it.
• Showerheads are notorious for developing hard water deposits that can turn a refreshing spray into a disappointing dribble. If the low water pressure affects only the shower, remove the showerhead using a set of locking pliers to turn the nut that holds it in place. Soak it overnight in white vinegar, then rinse and reattach.
• Low water pressure at all faucets is a real red flag. Call your local municipality to see if work is scheduled on the water lines that supply your home, which could affect your pressure. If no work is being done, turn off all the faucets and any other water-using appliance, such as a dishwasher. Then check the water meter (usually located near the curb or alley). If the meter is turning, despite all your faucets being off, there’s a leak somewhere between the meter and your home. This indicates a serious situation and a plumber should be called immediately.
Just because something looks dry, doesn't mean that it actually is. That's why we have our trusty infrared camera to help us determine moisture in deceiving areas. It's our job to make sure that, after a water loss, an environment isn't left behind for mold to move in.
How do we do this? We have moisture readers and infrared cameras to confirm where moisture is, which tells us where we need to extract and how long we leave our fans in place.
We want you to feel like the disaster 'never even happened,' so we use our best equipment to ensure you have the best experience.
Call SERVPRO of McMinn, Monroe, and Polk Counties today to take care of your home or business emergency! Call (423) 745-4165 and tell them Kodi sent you!
A shift is taking place in the home building and remodeling industry. Green home renovations, long thought of as too expensive or complex, are more affordable and achievable than ever.
At the same time, homeowners are increasingly concerned with their impact on the environment. That’s why words like energy-efficient, sustainable and recyclable are becoming central to the homebuilding process. On top of that, increasing labor and material costs have a new generation of homebuyers rethinking the entire building and renovation process.
Complete an Energy Audit
Before digging into any major green home renovations, it’s important to know how your home is performing currently. Window and door leaks, outdated appliances and inefficient HVAC systems don’t exactly equate to an efficient, eco-friendly home. Knowing the root of the problem is the first step in completing a green remodel.
Many homeowners end up shocked at how much energy (and money) their home is wasting. Trained professionals can show you exactly where your house is leaking energy or air and provide solutions for problem spots.
To find a certified energy rater for a home energy audit, the U.S. Department of Energy recommends using the Residential Energy Service Network directory. You can also do a DIY energy audit on your own.
DIY Home Energy Audit Checklist:
Check doors and windows for drafts.
Inspect HVAC and ventilation systems.
Use an electricity monitor to find out how much energy your appliances are using.
Replace older lightbulbs with CFLs, LEDs or eco-incandescent bulbs.
Examine your home’s insulation, in both the attic and walls.
Upgrade to Eco-Friendly Windows
Drafty windows are the bane of eco-friendly homes. If yours are taking a toll on your heating and air usage, it may be time to upgrade to more modern, energy-efficient windows.
Using materials that are sustainably sourced is also important for a successful green home remodeling job. For instance, cellular PVC is a popular, energy-efficient window material, but it is produced using a process that releases toxins into the earth’s atmosphere. Here are a few green remodeling tips for purchasing responsibly produced windows.
Tips for Buying Eco-Friendly Windows:
Aluminum and steel are recyclable but offer little insulation, making them inefficient.
Vinyl, like PVC, is made using a toxic, highly inefficient production process.
Double and triple-pane glass cost more, but will insulate your home better.
Sustainably-harvested wooden frames are a good choice for eco-friendly windows.
Fiberglass window frames are made from sand, a virtually limitless resource.
Choose Locally Sourced Materials
Choosing an eco-friendly product is great, but if it has to be shipped across the country, it’s hard to say it’s truly green. Buying locally sourced materials requires far less energy to get the products to your door. Additionally, local professionals are a valuable resource, as their knowledge of nearby communities, the types of homes in the area and even the local climate can be very useful to you and your project.
Beyond supporting small businesses, going local also enables you to choose climate-appropriate materials, making your home more energy-efficient overall.
Switch to Low VOC Paints
Volatile organic compounds, or “VOCs,” are chemicals that evaporate and enter the air at ordinary room temperatures, and they are common in many paints. The VOCs in interior paint come from petroleum-based solvents used in their production.
Low VOC interior paints use water in place of these solvents. Using no or low VOC interior paints lowers the amount of harmful emissions in your home, while also minimizing your consumption of petroleum, a non-renewable resource, making this a great project to add to your list of eco-friendly home improvements.
Best Low VOC Paints for a Green Home Remodel:
Aura ® Bath and Spa
ben ® Interior Paint
Harmony Interior Acrylic Latex
ProMar 400 Zero VOC Interior Latex
Resilience Exterior Acrylic Latex
Insulate Your Home
Wall cavities – the insulated spaces between an inner and outer wall of your home – are often overlooked during green home remodeling projects. However, they can make or break your home’s efficiency. Luckily, there are green solutions that are both inexpensive and effective.
Blowing cellulose is a quick fix since it can often be blown over insulation that’s already there. On top of that, many states offer rebate programs for completing this eco-friendly renovation project. Here’s a thorough guide on picking insulation for your home.
Go for a Passive Solar Home Design
Going solar is a great green remodeling project, but you can harness the power of the sun without dropping your entire budget on new solar panels. Passive solar home design is the art of using the sun to your advantage, allowing it to warm your home in the winter while blocking it out in the summer. You’ll be surprised at what a difference some simple changes can make.
Green Home Renovations for Passive Solar Home Design:
Focus renovations on the sides of your home that receive the most sun.
Plant seasonal trees that block sunlight in the summer, but allow it in during the winter.
Choose smart blinds that open and close with light and temperature changes.
Install a solar chimney to improve your home’s heating and ventilation.
Apply heat reducing film to your windows.
Add eave overhangs or awnings to block direct sunlight from reaching your windows.
And if you’re ever looking for that final push from passive solar to the real thing, remember that “panels will start paying YOU money in under 10 years,” according to Roskowinski.
Replace Old Appliances
Spending thousands on a new fridge may not be the most cost-effective green remodeling tip, so this tip really depends on your budget and how important new appliances are to you. Either way, it’s important to keep in mind that older appliances were built without efficiency in mind. That means your refrigerator, stove, dishwasher and washer/dryer could be sucking up excess energy by the minute.
ENERGY STAR provides a great list of resources for checking how much money and energy appliances with their certification can save you. You can also take advantage of rebate programs to get additional dollars back.
Install a Smart Home Thermostat
One of the best and most popular green remodeling tips today is to install a smart home thermostat. Smart home thermostats can be connected to most electronic devices and controlled from afar, which allows you to adjust your home’s heating and cooling even when you aren’t there.
Some thermostats can even detect when you’ve left the house and adjust the temperature on their own. Installing a smart home thermostat is a great way to cut down your energy bill and increase your home’s efficiency.
Best Smart Home Thermostats for a Green Remodel:
Nest
Ecobee4
Honeywell Wi-Fi Thermostats
KONO Smart Thermostat
Add Skylights to Increase Natural Light
If you hate the idea of using lamps in the middle of the day, try adding skylights to light your home naturally. While it might not be cost-effective to install them in every room, you can strategically place skylights in the most commonly used areas during the day, such as the kitchen, living room or guest bathroom. Remember to fit your skylights with automated blinds to block the sun when needed. Used correctly, skylights can be a great eco-friendly remodeling project for your home and help cut down on your overall electricity use.
Use Responsibly-Sourced Hardwood Flooring
Hardwood flooring is one of the greenest flooring options available, provided you choose responsibly sourced wood. One way to do this is to use FSC Certified wood. The Forest Stewardship Council, or FSC, is dedicated to ensuring that their members market only sustainably harvested and produced hardwood products. By using businesses that sell FSC Certified wood, you’re supporting efforts to keep our forests green and plentiful.
We asked Columbia Forest Products, a provider of FSC Certified products, for advice on buying responsibly forested hardwood flooring:
FSC Certified Hardwood Flooring Companies for a Green Home Remodel:
Columbia Forest Products
Northland Forest Products
American Pole & Timber
Certified Wood Products
US Floors
Additionally, Home Depot makes an effort to stock FSC Certified products – call your local store to see what options they have available. For a full list of FSC Certified Wood providers, check the Forest Stewardship Council’s Member List.
I’ve always been a firm believer that a clean, clutter-free home makes me a generally happier person. In fact, some of my friends consider me a pro at decluttering because I have no remorse when it comes to throwing things away—which is why I decided to pull together a thorough spring-cleaningchecklist. While some things like a closet revamp and bathroom cabinet “cleansing” session are key, spring-cleaning is about more than just getting rid of things. It’s about starting anew—lighter and cleaner.
Of course, we have faith in your basic cleaning skills, but there are little odds and ends you don’t do all the time that will get your place in great shape. Case in point: sanitizing things like doorknobs and light switches or checking cords on your electronics make such a difference. Below find our go-to spring-cleaning checklist that will help you start the season fresh. The best part? We go room by room so you don’t have to do it all at once. It’s time to take baby steps.
THE KITCHEN
—Clean the oven
—Dust on top of cabinets
—Wipe off light fixtures (including those up high)
—Discard expired food items from the refrigerator and freezer; wipe down shelves
—Organize your pantry; purge expired items
—Clean the stovetop, including burners
— Wipe out the inside of the microwave
— Scrub and polish the floor
—Disinfect the counters, the sink, and any tiles
—Wipe out the inside of the trash can
—Clean the dishwasher (put a container filled with white vinegar on the top and run a cycle)
—Replace any water filters
—Wipe down and polish your cabinets
—Sharpen your kitchen knives
—Check your Tupperware and see if you need to order more
—Discard chipped plates, bowls, and glasses and purchase extras
—Clean baking pans and utensils you don’t use often
—Scrub out your blender really well
—Deep-clean all pots and pans
—Organize your pantry; restock with any new items
—Consider making room in your cupboards with shelf risers
THE LIVING ROOM
—Wash or dry-clean throw pillow covers and throw blankets; replace if necessary
—Dust the TV screen
—Wipe down side tables, coffee table, footstools, etc.
—Vacuum any area rugs
—Clean out crevices in your couch with a vacuum attachment
—Spot-treat your chairs and couches
—Check your electronics for frayed wires
—Replace batteries in remote controls if needed
—Clean any lightbulbs
—Sweep out your fireplace
THE DINING ROOM
—Clean your chandelier or light fixtures (including dusty cords)
—Dust the molding in the room
—Dry-clean any linens, including napkins and tablecloths
—Dust cabinets; polish
—Wash any table cushions and seat cushions
—Vacuum and clean the rug
—Wash and polish the floor
—Wipe down table and chairs; remove all dust
—Clean your china cabinet and any drawers
—Wash and polish silverware
THE HOME OFFICE
—Discard any old or unnecessary papers
—Organize items in folders and storage cabinets
—Wipe down the floor and any baseboards; polish floor
—Clean your desk and rearrange it in a way that makes sense for you
—Take stock of supplies like pens, folders, and staples; order more if needed
—Wipe down your chair (don’t forget the wheels)
—Take everything off of the bookshelf and wipe it down (donate old books)
—Use electrostatic dust cloths to clean your tech items
—Vacuum your desk chair
—Sanitize your phone, headset, etc.
THE BATHROOMS
—Clean tissue canisters and other containers
—Organize vanity and space above and below
—Clean toilet, including the top, side, and base
—Deep-clean the shower and tub
—Clean out any hampers and trash bins
—Wash out toothbrush canister (replace toothbrush)
—Wipe down towel hooks and racks
—Remove hair from drains using a tool
—Wash shower curtain and rehang; change liner
—Deep-clean tile and remove mold; clean grout if necessary
—Clean your toilet paper holder (so much dust settles at the top)
—Shine faucets; clean countertops; wipe mirror
—Discard expired makeup and products; replenish as needed
—Check linens; wash and replace as needed
—Wipe down shower caddies
—Sweep floor and mop
—Wash bath mat or replace
THE BEDROOMS
—Rotate your mattress
—Change your sheets; purchase new linens and discard old ones
—Wash your mattress cover
—Clean out your laundry hampers; disinfect
—Dry-clean throw pillow shams
—Dust any ceiling fans and wipe down air conditioner units and heating vents
—Remove frames from the walls and dust everything; replace
—Wipe out any storage bins in dressers, closets, etc.
—Treat wood furniture (that includes patching up scratches)
—Vacuum your mattress
—Clean under bed; move furniture as needed to do a thorough job
—Check pillows for fluffiness; replace when necessary
—Organize both dresser and closet; donate old items
—Wash the floor or vacuum (don’t forget area rugs)
—Wipe down mirrors and windows
—Clean the bed frame; headboard included
—Wash stuffed animals in children’s rooms
—Consider drawer organizers to keep essentials in sight
THE LAUNDRY ROOM
—Wipe down drying racks
—Do a deep-clean on both washer and dryer (a load with white vinegar in the washer works wonders)
—Empty the lint trap in the dryer
—Use bleach to clean the sink
—Organize shelves and closet space; wipe down
—Take stock of products; discard expired and order any essentials you are low on
—Deep-clean the floor—dust bunnies are common in this room
—Deep-clean behind appliances
—Clean out the inside of your iron and steamers; wipe down ironing board
—Wipe down hampers, hangers, etc.
—Dust off tools like vacuums and dust busters
—Clean the bottom of your broom; rinse out your dustpan
—Mop the floor
—Do a linen closet overhaul
—Dust the inside of your dryer hose with an extendable duster or a vacuum attachment
OUTDOORS
—Garden or landscape; add new plants
—Fix dents in your mailbox
—Clean out your shed/garage
—Have your roof cleaned
—Wipe down patio furniture and playground
—Get a new doormat (or clean yours)
Now that you have our ultimate spring-cleaning checklist, it’s time to put it to good use. Your home will be forever grateful.
Bathroom Mold and Mildew
Photo Credit: Chastity Cortijo
Plagued by excess moisture and lack of ventilation, bathrooms are especially susceptible to mildew. The fungus typically appears on walls, tile, or grout, and it can trigger a slew of health problems, including allergies and other respiratory issues. The best method for combating mildew is preventing it from growing in the first place. To stop this scourge in its tracks, check out these 8 ways to mildew-proof your bathroom.
Choose Mildew-Resistant Paint
After you enjoy a steamy shower, your bathroom walls absorb the lingering moisture, which can spur the growth of mildew. Choose a paint that resists mildew, or one that has a mildew-resistant additive mixed into it, to give your walls an extra measure of protection.
Keep It Well Ventilated
Mildew thrives in damp places, which makes the notoriously wet bathroom a prime breeding ground. To eliminate excess moisture, turn on the exhaust fan while you're showering and let it run for 30 minutes after you shut off the water. This ensures that the walls and ceilings will dry properly. If you have a window in the bathroom, open it a crack to air out the room as well.
Let In Light
Mildew loves darkness, so homeowners should think twice before shutting off the bathroom lights directly after showering. Leave curtains open whenever possible or even put the lights on a timer to ward off the pesky fungus.
Mop Up Water
Nip mildew in the bud by getting rid of excess water as soon as possible. After a bath or shower, grab the squeegee to take care of drips on the tub or tiles, and mop up puddles with a towel.
Fix Leaks
You may be great about cleaning up the obvious pools of water by the sink and shower, but don't forget to deal with smaller drips as well. Take care of leaks under the sink or by the toilet as soon as you notice them. Putting off repairs lets more moisture into the room and can over time turn a small mildew problem into an even bigger headache.
Seal Grout Lines
Constantly exposed to water and porous to boot, grout is extremely hospitable to mildew. Scrub your grout every few weeks to keep mildew at bay, and reseal it annually to help it stand up to water.
Clean Items Around the Shower
It's not enough to just mop the floor and scrub the tiles. You also need to pay attention to items that are kept around the shower. Clean underneath shampoo bottles, regularly toss the shower curtain and hand towels into the wash, and replace your loofah often. Mildew loves to hide in these neglected places.
Keep It Clean
The best way to prevent mildew is to clean your bathroom regularly. If you don't clean often enough, you're encouraging mildew to grow and creating more work for yourself down the road.
Pass It On
Put these methods into practice to prevent mildew from growing, so then you don’t have to go through the icky job of cleaning it up. And be sure to share these tips with your friends and family to save them from the task, as well.
More and more people are making the decision to go nontoxic, switching out their commercial beauty, hygiene, and home cleaning products for organic, sustainable options. If you've been contemplating making this lifestyle switch, Pricenomics' list of the most toxic household cleaning products may be a deciding factor.
First off, when you use a household cleaning product, you're actually releasing pollutants back into your home. "Many common cleaning products rely on petroleum-based manufacturing and release toxic compounds into your home," writes the data website. "The EPA broadly classifies these chemicals as volatile organic compounds (VOCs), which includes airborne emissions like formaldehyde and car exhaust, as well as consumable compounds like ethanol and acetic acid." Yes, these chemicals can be found in your beauty and household cleaning products.
Exposure to VOCs, even in small quantities, can cause headaches; nausea; and eye, nose, and throat irritation, contributing to longer-term issues like allergies and asthma over time. In an effort to identify the worst offenders, Pricenomics partnered with its client Ode to Clean, a line of environmentally conscious cleaning products. Together, they tested the amount of VOCs released by the most common cleaning products when used. According to their findings, the products that release the most VOCs per use—and therefore could be considered the most toxic—are air-freshener sprays and cleaning wipes. So next time you're tidying up your home, you may want to keep this in mind. Head over to Pricenomics for the complete list of products.
Do you know how to actually protect yourself during an earthquake or hurricane? What about a tornado or fire? You've probably heard lots of conflicting information over the years. We hope you won't ever need it, this start-to-finish guide to handling disasters will help you remember what you should really do during an emergency and afterwards to recover as quickly as possible.
To break down the best practices to keep you alive in each type of disaster, we talked to Dr. Arthur Bradley, author of The Handbook to Practical Disaster Preparedness for the Family and Disaster Preparedness for EMP Attacks and Solar Storms. Here's what he had to say.
For Any Disaster: Make a Disaster Preparedness Plan
One common thread you'll see in almost every section below is that you'll need a disaster plan. You should be familiar with it before the disaster, and ready to act on it in case the unthinkable happens. We can tell you all about the best thing to do in the heat of the moment—and we will—but when the danger has passed, a disaster or emergency plan for your family or coworkers can be the difference between you meeting up in a secure location or being lost, unable to find one another.
Keep your family's most important documents, like birth certificates, passports, and social security cards in a safe place in case you need to grab them and leave the house. Create a home inventory and keep it with those documents. Make digital copies, and put them on a flash drive in the same place. A portable safe/fireproof box is a good idea.
Make sure you have a well-stocked go-bag that will keep you safe, warm, fed, and any medical needs you have taken care of for at least a few days. Include things like emergency food and water, an emergency radio, batteries, extras of any prescriptions you take, and even a charged cell phone just for 911 purposes.
Make sure you and your family have a planned and practiced escape route from your home, and a place you all agree to meet up if something terrible happens. Whether it's a burglar or a fire, everyone in your home should know the fastest way out of the house safely. Escape ladders from high windows are good investments, but if you live in an apartment building or high-rise, memorize the fastest route to a stairwell. Finally, practice your escape route with your family so everyone's clear on it.
Make sure you're familiar with the emergency or disaster plan at your office. Your company should have evacuation routes from your workplace and meet-up locations outside of the building. If you don't know what they are, ask. If no one knows what they are, come up with them on your own. Ask yourself where the closest stairwell to your desk or work area is, and time yourself getting to it. Find out where the closest first-aid kit in the office is, in case you need it.
Gear and kits are great, and you should definitely have them on hand, but nothing replaces a good escape plan that you can quickly act on without thinking about it in case of an emergency. Many people die in accidents and natural disasters simply because they don't know what to do and find themselves waiting for someone to tell them. Plan accordingly.
5 Unfinished Attic Storage Ideas That Will Help You Find What You’re Looking For
Do you dread every minute you spend in your drafty old attic looking for that egg poacher you got last year? If so, it might be time to change up your storage method (or lack thereof). These five unfinished attic storage ideas will allow you to easily find what you’re looking for without spending an afternoon digging through boxes.
Storage Idea #1: Store Everything in Labeled Boxes
The first idea you should consider is pretty simple: label and box everything. Lisa Zaslow of Gotham Organizers recommends using different colors to help group like-items together:
“Color code your boxes so you’ll know at a glance what’s inside – whether it’s holiday decorations, entertaining items, off-season clothing or sports stuff. Add BIG, clear labels to the sides of the boxes too.”
As for the boxes themselves, sturdy plastic containers are a worthwhile investment since you can easily stack them to take advantage of all that vertical space. Plus, they’ll protect your belongings from the wildly different temperatures in your attic.
A Few Safety Tips to Follow While Organizing Your Attic
Make sure you can see what you’re storing. Add a few inexpensive floor lamps if you have outlets, or battery powered lanterns if you don’t.
Make sure the floor is sturdy enough to support extra weight. Rope off any no-go areas.
Take into account the extreme conditions that can exist in attics – they can get very hot and very cold, very damp or very dry, and dusty. They can also be habitats for critters! Lisa Zaslow | Gotham Organizers
Storage Idea #2: Place Your Boxes in Between Trusses
One of the most useful storage spaces in your attic are the gaps between each truss. However, the floor space between each gap might not be sturdy enough to support the weight of a few boxes. Fortunately, there’s one clever attic shelving idea you can use in this situation. A company called AtticMaxx makes shelving units that fit in between most trusses, capable of holding up to 50 pounds each.
Each shelving unit is pre-assembled. All you have to do is attach the brackets on either side of the shelf to the trusses, then screw in the adjustable straps. Each shelf is 22 inches wide, giving you plenty of space for your boxes. With all the boxes to the side, you can use the main floor of your attic for the big things, such as furniture or luggage.
Storage Idea #3: Install Rods for Your Extra Clothing
Do you keep your off-season clothes in the attic? Rather than boxing them up, treat your attic space as an expansion of your closet. You can install clothing rods along the slant of your ceiling and/or trusses.
Simply head to the hardware store and buy a clothing rod of your desired length, along with the brackets and screws you need to mount it. Make sure you use a level!
Storage Idea #4: Add as Many Shelves as Possible
Another attic storage idea is to splurge on more shelves. Lisa Zaslow suggests using inexpensive plastic or metal shelving as a budget-friendly way to maximize the storage space of your attic. You can find standalone shelving units in a variety of sizes, allowing you to fill in every little nook and cranny with your odds and ends.
Storage Idea #5: Put the Least Important Stuff in the Back
Lastly, make sure you account for the items you’ll use most often. Things like holiday decorations or important documents should be kept in the back of your attic, while items you occasionally use, such as that egg poacher, should be stored front and center.
“Don’t make it a pain – literally – to retrieve things. Put things you’re less likely to use (like old tax files) in the far reaches of the attic and where the ceiling is lowest.” Lisa Zaslow | Gotham Organizers
Once you start using these attic storage ideas, you’ll be able to find everything you keep up there in record time.
Preventing water damage is a whole lot cheaper than paying for repairs. Here are three easy prevention tips.
KEY TAKEAWAYS
Clean your gutters.
Direct downspouts 5-10’ away from the house.
Test your sump pump once a year.
Fix all water leaks.
Replace missing roof shingles.
Water damage is the No. 1 culprit that weakens your home’s foundation and the very core that holds your house together.
You’ve heard about core strength for your body. Well, water damage hits at the core strength of your house, eventually causing serious structural damage. Damp wood invites termites and carpenter ants; plus, it causes mold and mildew.
Here’s how to prevent water damage using three easy strategies that will give you peace of mind the next time heavy storms hit.
#1. Ensure Good Drainage
Why it matters: Poor drainage weakens your foundation, causing cracks, uneven settling, and pathways for water to enter your home.
How to do it:
Clean your gutters routinely. A clogged gutter will send cascades of water down the side of your house, damaging your siding and foundation.
Ensure your downspouts direct water 5 to 10 feet away from your house.
Make sure your yard is sloped at least 6 inches over a 10-foot span away from your foundation. That slope keeps water from getting down right next to your foundation, where it could cause walls to lean, crack the masonry, and create leaks. (For crawl spaces, keeping water away makes sure excess water doesn’t pool underneath your floor, making for damp conditions that encourage mold, rot, and insects.)
But don’t let the soil get too dry, either. Long dry spells let the soil around your house dry out and shrink. A big rain may make the soil expand, putting pressure on your foundation walls. In a drought, run a soaker hose at least 6 inches from the foundation and 3 inches under the soil to keep the soil from contracting and expanding.
Maintenance cost: Very little. Cleaning gutters can be a no-cost DIY job, or you can hire a pro for $50 to $250, depending on the size and height of your home. To get the soil slope you need, you might have to buy some additional topsoil.
Worst case if you put it off: Your foundation could settle, cracking your basement walls. The cost to stabilize, repair, and seal deteriorated foundation walls is a whopping $15,000 to $40,000.
#2. Test Your Sump Pump Regularly
Why it matters: Sump pumps come to life during storms. That’s not when you want to realize yours isn’t working properly. You should check it at least once a year, and ideally perform several checks during heavy storm seasons.
How to test your sump pump:
Slowly fill the sump pump pit with water. Watch for the “float” (similar to the float in your toilet) to rise, which should turn on the pump. Then watch to make sure the water level falls.
Test your backup pump the same way, but unplug the main pump first.
If you don’t have a backup pump — or a generator — and are on municipal water, get one that runs on water pressure. If you’re on well water, your only option is the battery kind.
Maintenance cost: Testing is free; a water-powered backup sump pump, including installation, costs $150 to $350; a new battery for a battery-operated sump starts around $200.
Worst case if you put it off: Your basement could flood, ruining everything in it, including drywall and carpeting. (Did you know your regular insurance doesn’t cover flooding?) Plus you run the risk of mold and mildew — which can also be a very expensive problem.
#3. Check for Water Leaks and Fix Them
Why it matters: Persistent leaks lead to mold and mildew, rot, and even termites and carpenter ants (they like chewing soggy wood, since it’s soft). Yet if you fix a leak soon after it starts, there may be no long-term damage at all.
How to check for leaks:
Check for dark spots under pipes inside sink cabinets, stains on ceilings, toilets that rock, and of course drips.
At least once a year, inspect your roof. Repair missing, loose, and damaged shingles. Repair any cracked caulking and check for leaks around flashing.
Maintenance cost: Negligible for a simple fix, such as a new washer. A visit from a plumber might set you back $250; a roof repair, a few hundred dollars to $1,000.
Worst case if you put it off: Drips ruin the cabinet under the kitchen sink, and run down into the floor sheathing and joists underneath, so you need a structural repair, plus new cabinets and new kitchen flooring. Or the roof rots, so you need a new roof and repairs to rooms directly beneath.
So now you know how to prevent water damage — and add years (and lower maintenance costs to your home!).
Bathroom Mold and Mildew
Photo Credit: Chastity Cortijo
Plagued by excess moisture and lack of ventilation, bathrooms are especially susceptible to mildew. The fungus typically appears on walls, tile, or grout, and it can trigger a slew of health problems, including allergies and other respiratory issues. The best method for combating mildew is preventing it from growing in the first place. To stop this scourge in its tracks, check out these 8 ways to mildew-proof your bathroom.
Choose Mildew-Resistant Paint
After you enjoy a steamy shower, your bathroom walls absorb the lingering moisture, which can spur the growth of mildew. Choose a paint that resists mildew, or one that has a mildew-resistant additive mixed into it, to give your walls an extra measure of protection.
Keep It Well Ventilated
Mildew thrives in damp places, which makes the notoriously wet bathroom a prime breeding ground. To eliminate excess moisture, turn on the exhaust fan while you're showering and let it run for 30 minutes after you shut off the water. This ensures that the walls and ceilings will dry properly. If you have a window in the bathroom, open it a crack to air out the room as well.
Let In Light
Mildew loves darkness, so homeowners should think twice before shutting off the bathroom lights directly after showering. Leave curtains open whenever possible or even put the lights on a timer to ward off the pesky fungus.
Mop Up Water
Nip mildew in the bud by getting rid of excess water as soon as possible. After a bath or shower, grab the squeegee to take care of drips on the tub or tiles, and mop up puddles with a towel.
Fix Leaks
You may be great about cleaning up the obvious pools of water by the sink and shower, but don't forget to deal with smaller drips as well. Take care of leaks under the sink or by the toilet as soon as you notice them. Putting off repairs lets more moisture into the room and can over time turn a small mildew problem into an even bigger headache.
Seal Grout Lines
Constantly exposed to water and porous to boot, grout is extremely hospitable to mildew. Scrub your grout every few weeks to keep mildew at bay, and reseal it annually to help it stand up to water.
Clean Items Around the Shower
It's not enough to just mop the floor and scrub the tiles. You also need to pay attention to items that are kept around the shower. Clean underneath shampoo bottles, regularly toss the shower curtain and hand towels into the wash, and replace your loofah often. Mildew loves to hide in these neglected places.
Keep It Clean
The best way to prevent mildew is to clean your bathroom regularly. If you don't clean often enough, you're encouraging mildew to grow and creating more work for yourself down the road.
Pass It On
Put these methods into practice to prevent mildew from growing, so then you don’t have to go through the icky job of cleaning it up. And be sure to share these tips with your friends and family to save them from the task, as well.
Mold and mildew (mold in its early stage) are fungi that happily and quickly grow anywhere there is moisture. They serve an important purpose in our environment by helping to destroy organic materials such as leaves, thereby enriching the soil. But that same attribute can cause a serious health issue for people living in a moldy home: respiratory problems; sinus congestion; eye, nose, or throat irritation; and headaches. Infants, children, pregnant women, elderly individuals, and people with existing respiratory conditions are at a higher risk for these problems.
Check for areas in your home where there could be high humidity or water damage, such as a damp basement or crawl space. Mildew and mold can grow on wood products, ceiling tiles, cardboard, wallpaper, carpets, drywall, fabric, plants, foods, and insulation. These growths can begin to develop on a damp surface within 24 and 48 hours and produce spores that travel through the air. They will break down and destroy whatever they're growing on and can cause mild to severe health problems for you and your family.
The problem won't go away on its own. Learn how to remove -- and prevent -- mold and mildew with these simple tips.
Arm Yourself with the Right Tools
Planning on doing battle with mold and mildew? Make sure you have these cleaning tools on hand.
Latex or rubber gloves
Buckets and brushes
Vacuum with brush attachment
Mop and sponges
Nonammonia detergent, soap, or commercial cleaner
Disinfectant chlorine bleach
Furniture polish
Keep Your Bathroom Fresh
Few rooms in the home see as much moisture and humidity as the bathroom. Be sure your bathroom stays well-ventilated. An exhaust fan will help circulate the air and remove moisture more quickly. These additional actions will help keep your bathroom fresh and mold-free.
Spread towels out after use so that they dry more quickly.
Minimize containers left in the shower for cleaning ease and better circulation.
Wipe down the shower with a clean towel or squeegee after its last daily use.
Choose shower curtains that dry and clean easily to help avoid soap residue, which fosters mold.
If you're dealing with a mildewed shower curtain made of durable fabric, follow these steps for cleaning it.
Wash using a solution of 1/2 cup liquid disinfectant to 1 gallon of hot water.
Rinse with a mixture of one cup lemon juice and one cup salt to a gallon of hot water.
Wash with detergent and bleach (using color-safe bleach on color fabrics).
Rinse in clear water.
Freshen Fabric and Upholstery
Avoid sending mold spores into the air and throughout the house by first taking fabric and upholstery that's mobile outside. Brush off as much of the mildew as possible. Then treat these pieces individually as follows.
Fabric should be laundered in chlorine bleach and hot water. If chlorine bleach is not a safe option for the material, soak it in oxygen bleach and hot water for a half hour, then wash as directed. Take it outside to dry in the sun if possible.
Upholstery that you can't take outside should be vacuumed first. Replace the vacuum bag or take the canister outside to clean. Then mix 1 cup of ammonia with 1 cup of cool water. (Chlorine bleach and ammonia should never be combined due to the resulting toxic fumes.) Using a clean white cloth, sponge the stains with the ammonia solution. Blot until all the liquid is absorbed. Repeat the process until the stain disappears. To remove the resulting ammonia solution, sponge the area with cold water and blot. Dry thoroughly with a fan or hair dryer set on cool.
Clean Mildew-Stained Carpets
Start by thoroughly vacuuming the affected carpet to remove as much of the mildew as you can. After you are done, either throw away the bag or clean the canister outside. Then proceed as follows.
Briskly mix 1 tablespoon of liquid laundry soap and 2 cups of cool water.
Apply the suds to the stained area with a damp cloth, sponging lightly.
Repeat until the stain is gone, then rinse.
Dry the area completely.
Revive Stored Wooden Furniture
Vacuum mildewed wood furniture with a soft brush to remove any loose spores. After you are done, either throw away the bag or clean the canister outside.
Quickly wipe off any stains using a light touch.
Rinse the area with a damp cloth, let dry, then polish.
Prevent Spores from Getting a Stronghold
Help keep your home free of mold and mildew with a few preventive measures.
Use dehumidifiers, fans, and open windows to help reduce the moisture in your home. Be especially vigilant during hot, humid months.
Fix plumbing leaks as soon as possible.
Do what you can to prevent rain water from seeping into your home. Check potential problem areas regularly.
Clean the fabrics in your home routinely and keep them dry.
Store items in dry, well-ventilated areas.
If It's Too Late, Don't Hesitate to Toss
If the mold and mildew on your fabric, upholstery, carpet, or furniture is beyond cleaning and drying, throw it out or call a professional cleaning service. Don't take a chance with the potential health risks that mold and mildew can cause you and your family.
If spring is in the air, don't let a musty house spoil it. Here are seven tips for giving the season the welcome it deserves.
The best refrigerator cleaner is a combination of salt and soda water. The bubbling action of the soda water combines with the abrasive texture of the salt to make a great cleaner.
The best way to get rid of lime buildup around the faucet it is to lay paper towels over the fixture, soak it with vinegar and let it set for an hour. The deposits will soften and become easier to remove.
Clean screens with a scrap of carpeting. It makes a powerful brush that removes all the dirt.
Clean windows with a rag and soapy water, and then dry them with another rag. You can also go to an auto-parts store and buy a windshield squeegee, which cleans very well.
If drapes are looking drab, take them out of the window, remove the hooks and run them through the air-fluff cycle in the dryer along with a wet towel (to draw off the dust) for 15 minutes. Hang them back in the windows immediately.
Clean the blades of a ceiling fan by covering them with a coat of furniture polish. Wipe off the excess and lightly buff.
Sometimes comforters, blankets and pillows don't need to be cleaned, but they do need to be aired out after a long winter in your closed-up home. Take them outside and hang them on a clothesline for a day.
You may think a house fire will never happen to you. But what if it does? Are you prepared?
Figuring out what to do after a home fire can be a very stressful and overwhelming process, and it can be hard to decide what to do first. With a little help from your insurance agent, though, you may be able to settle your claim more quickly and get your life back to normal.
Here are the six things you should do after a home fire.
1. Call your insurance agent immediately. You will be getting calls at all hours of the day from public adjusters and contractors who will try to offer you a deal on putting your house back together. These calls can create a lot of stress and confusion. I suggest you speak to no one but your agent to discuss your options at this point in the process.
2. Ask about restoration companies that can help with cleaning up soot, boarding up windows, and other construction. Immediately after a fire, especially if it is a minor one, you’ll need to clean up any soot or water damage. It is important to hire a reputable service to deal with these issues. Ask your agent or insurance adjuster to recommend a few different companies. They deal with these situations more often than you do and likely know of some businesses that fit your needs. Many of these restoration companies have connections to good contractors, engineers, and architects, as well.
3. Separate damaged property from undamaged property. The insurance company will need a detailed inventory list from you after they inspect the loss. Separating your damaged property from your undamaged property will make it easier for you to make a list of your damaged items. This list needs to include the date you purchased each item, the brand name, the price you paid, and the serial number, model, or description of each item. If the item was a gift, be sure to indicate that as well.
It’s a good idea to submit your receipts with this inventory list. If the receipts were destroyed in the fire, or you didn’t keep any receipts, request copies of prior bank statements. This can make obtaining duplicate receipts easier. Keep in mind that photos of any damaged items are always helpful if receipts are not available.
4. Save undamaged property from further destruction. Any items that are not damaged should be put in a safe place, even if it means putting them in storage. Insurance adjusters are typically fair when it comes to adding additional costs for storage.
5. Cooperate fully with the insurance company’s investigation. When a fire claim is reported to an insurance company, it is given top priority. Usually the adjusters come out to see the loss within 24 to 48 hours. To help settle your claim in a timely manner and to your satisfaction, be sure you are available and on time for all meetings, that you return calls promptly, that any requested paperwork is completed as quickly as possible, and that you contact the company or your agent immediately with any questions.
6. Find somewhere to stay if you can’t live in your home. Most homeowner’s policies include “Loss of Use or Loss of Rents” coverage, which will pay for the food, clothing, and shelter that you and your family may need for a specified period of time. Keep in mind that your policy will pay for “like kind and quality” living arrangements. You may want to save the Ritz for a special occasion and instead stay in a more reasonably priced hotel.
What to do before disaster strikes
• Review your homeowner’s policy to be sure you have replacement cost coverage, loss of use coverage, and adequate dwelling coverage. The last thing you want to hear after a fire is that you were underinsured.
• Save all your receipts and put them in a metal fireproof box or in a storage facility off the premises, such as a safety deposit box. Better yet, scan the receipts and save them to a computer file. Taking a video of your entire home and the possessions within it is the next best thing to receipts. This will show the insurance company what sort of lifestyle you had prior to the claim.
• Be sure to have smoke detectors in every room of your home to ensure that everyone gets out of the house or apartment safely in the event of a fire. Have exit ladders and fire extinguishers handy, and know how to use them.
• Discuss escape strategies and plans with your family prior to a fire, and consider a fire drill to help ensure everyone’s safety.
Take steps to protect yourself and your loved ones during your cleanup after a hurricane, flood, or other natural disaster. Follow our cleanup tips and monitor your radio or television for up-to-date emergency information.
N95 masks (or a respirator with a higher protection level)
Heavy work gloves
Waterproof boots with steel toe and insole (not just steel shank)
Earplugs or protective headphones (if you’re working with noisy equipment)
At least two fire extinguishers (each with a UL rating of at least 10A)
If sewage is involved, make sure to wear the following during your cleanup:
Rubber boots
Rubber gloves
Goggles
Use teams to move heavy/bulky objects
Have teams of at least two people work together to move heavy or bulky objects.
Avoid lifting any material that weighs more than 50 pounds (per person).
Pace yourself
Cleaning up your home can be a big job. Be sure to take care of yourself:
Rest when you need to.
Decide which cleanup tasks are most important, and focus on those first. That way, you’re less likely to be overwhelmed.
Get help lifting heavy or bulky objects. If you lift too much on your own, you could hurt yourself.
Try to work with other people, so you aren’t alone.
Get support from family members, friends, counselors, or therapists.
Take precaution when using a chainsaw
When using a chain saw, always follow manufacturer’s instructions. Make sure to wear appropriate protective gear, and be sure that bystanders are a safe distance away.
Avoid contact with power lines, and take extra care in cutting trees or branches that are bent or caught under something else.
Use extreme caution to avoid electrical shock when using an electric chain saw.
In hot weather, try to stay cool by staying in air-conditioned buildings, taking breaks in shaded areas or in cool rooms, drinking water and nonalcoholic fluids often, and wearing light and loose-fitting clothing.
Do outdoor activities during cooler hours.
For more information on protecting yourself against heat-related illness, see the CDC Extreme Heat Web site .
Clean up and dry your home quickly after the storm or flood ends- within 24 to 48 hours if possible.
Air out your house by opening doors and windows. Use fans to dry wet areas. Position fans to blow air out doors or windows.
Throw away anything that you can’t clean or dry quickly (such as mattresses, carpeting, carpet padding, rugs, upholstered furniture, cosmetics, stuffed animals, baby toys, pillows, foam-rubber items, books, wall coverings, and paper products).
Remove and discard drywall and insulation that has been contaminated with sewage or flood waters.
Thoroughly clean all wet items and surfaces with hot water and laundry or dish detergent. For example, you’ll want to clean any flooring, concrete, molding, wood and metal furniture, countertops, appliances, sinks, and other plumbing fixtures.
Fix any leaks in roofs, walls, or plumbing as soon as you can.
Clean up mold with a mix of bleach and water
Never use bleach in a closed space. Open windows and doors first.
Put on personal protective equipment to protect your eyes, nose, mouth, and skin. Wear goggles, an N-95 respirator, and protective gloves.
To make your cleaner, mix 1 cup of household bleach with 1 gallon of water.
Remember that anything that’s had contact with floodwater could carry germs. To keep your kids safe, make sure their toys are clean:
Make a cleaning fluid by mixing 1 cup of bleach in 5 gallons of water.
Wash off toys carefully with your cleaner.
Let the toys air dry.
You may not be able to kill germs on some toys — like stuffed animals and baby toys. Throw out toys you can’t clean.
Wash up with soap and water
Wash up with soap and water once you’re done cleaning.
If there is a boil-water advisory in effect:
Use water that has been boiled for 1 minute (allow the water to cool before washing); or
Use water that’s been disinfected for personal hygiene:
When using5-6% unscented liquid household chlorine bleach – add a little less than 1/8 teaspoon (8 drops or about 0.5 milliliters) per 1 gallon of clear water. Stir well, and let it stand for 30 minutes before using. If the water is cloudy, add a little less than ¼ teaspoon (16 drops or about 1 milliliter) per 1 gallon of water.
When using 8.25% unscented liquid household chlorine bleach – add a little less than 1/8 teaspoon (6 drops or about 0.5 milliliters) per 1 gallon of clear water. Stir well, and let it stand for 30 minutes before using. If the water is cloudy, add 12 drops (or about 1 milliliter) per 1 gallon of water.
If you have any open cuts or sores that were exposed to floodwater, wash them with soap and water and apply an antibiotic ointment to prevent an infection.
Seek immediate medical attention if you become injured or sick.
Wash all clothes worn during the cleanup in hot water and detergent. These clothes should be washed separately from uncontaminated clothes and linens.
Be careful with floodwater- it can contain dangerous bacteria
Floodwater can contain dangerous bacteria from overflowing sewage and agricultural and industrial waste. While skin contact with floodwater doesn’t pose a serious health risk by itself, eating or drinking anything contaminated with floodwater can cause diseases.
If you have any open cuts or sores that will be exposed to floodwater, keep them as clean as possible by washing them with soap and applying an antibiotic ointment to discourage infection. (See also Clean Hands Save Lives: Emergency Situations)
To reduce cold–related risks when standing or working in water which is cooler than 75 degrees F (24 degrees C), wear insulated clothes and insulated rubber boots, take frequent breaks out of the water, and change into dry clothing when possible.
Stay away from any damaged buildings or structures until a building inspector or other government authority has had a chance to examine it and certify that it’s safe.
Wait until daylight to return to buildings so it’s easier to see and avoid any hazards- especially if the power is out.
Leave your home or other building if you hear any shifting or strange noises- this could mean it’s about to fall.
If you smell gas or suspect a leak, leave your house/building and contact emergency authorities right away! Don’t turn on the lights, light matches, smoke, or do anything that can cause a spark. Don’t return to the building until you’re told it’s safe to do so.
Keep children and pets away from the affected area until cleanup has been completed.
Prevent carbon monoxide poisoning
Never use generators, pressure washers, or other gasoline, propane, natural gas, or charcoal-burning devices inside your home, basement, garage, or camper—or even outside near an open window, door, or vent. Carbon monoxide—an odorless, colorless gas from these sources that can cause sudden illness and death—can build up indoors and poison the people and animals inside.
If electrical circuits and electrical equipment have gotten wet or are in or near water, turn off the power at the main breaker or fuse on the service panel. If you must enter standing water to access the main power switch, then call an electrician to turn it off.
Never turn power on or off or use an electric tool or appliance while standing in water.
Do not connect generators to your home’s electrical circuits without the approved, automatic-interrupt devices. If a generator is on line when electrical service is restored, it can become a major fire hazard and it may endanger line workers helping to restore power in your area.
According to OSHA (the Occupational Safety and Health Administration), more people are killed by falling trees every year (100+) than are killed by sharks (about 4-7 per year).
Falling trees kill or injure more people than lightning. Although the numbers of tree fall fatalities are relatively low compared with other fatalities, the numbers for property damage from falling trees is much higher, ranging in the hundreds of thousands. According to the National Storm Damage Center, falling trees are the main causes of roof damage, costing more than $1 billion in property damage each year. So, chances are if you are a homeowner with lots of trees in your yard, you may encounter tree damage of some kind in your lifetime and in that situation, you will need to know what to do if a tree falls on your home:
If you’re in the house when a tree falls, leave the house and the property as soon as possible. Beware of downed electrical lines, and if you have gas lines, do not use your cell phone to call for help until you are away from the house. Use the safest route possible to get away from the house.
Call 911 or emergency services. They will send fire or appropriate responders to ensure the house is safe. If anyone has been injured or killed, let the dispatcher know this when you call. Remain at the scene unless you are injured. Seek medical care or wait for an ambulance if you have been injured.
Call your insurance company as soon as possible so they can agree to cover any emergency costs, removal or other details covered in your homeowner’s policy. If your tree has fallen on your neighbor’s property, your neighbor will need to make a claim on their insurance policy, but your insurance company should be aware of the damage as well.
Contact a roofing contractor, tree surgeon, tree removal company, builder or any other home professional to examine any damage, to remove the tree and secure the home so there is no additional damage to your property or possessions. Even if the tree misses the house, tree roots can extend under a property, causing damage to the foundation. So, have your builder or contractor check inside the house for cracks in the drywall, or the outside for cracks in the brickwork. Lowes’ experts say, “Don’t attempt to deal with the tree removal or roof repair yourself. Even if the fallen branches or tree seems small, you never know the extent of the storm damage or if the framework or structural integrity if your home has been compromised.”
If you are unable to live in the house during repairs, make sure any damaged areas are secured to prevent looting and theft. Put valuables in temporary storage, and board up broken windows, holes in the wall etc.
Once the tree has been dealt with, what steps can you take to ensure it doesn’t happen again?
Make sure your trees are healthy
Other than raking leaves, building treehouses, or picking up fallen branches, twigs and debris, most homeowners don’t think about their trees very often. Even fewer know the signs of an unhealthy, dying, or dead branch or tree. Here a few signs from RTEC Treecare, one of the companies that take care of the trees at the mall in Washington, DC to pay attention to:
Large branches attached with tight, V-shaped forks. These branches are prone to failure and may need to be lightened or removed.
Cracks in the trunk of the tree or in major limbs
Fungi growing from the base of your tree or under its canopy. This could be a sign of root decay.
Branches that are pointing/hanging downwards these damaged branches can easily fall during storms.
Partially attached limbs hung up in the high branches that could fall.
Large cavities in the tree trunk.
Wires in contact with tree branches.
Other things you can do to ensure you and your family are safe from tree falls:
Have an arborist inspect your trees every year, or whenever there’s been an injury or damage to a tree – such as a lightning strike, hit by a motor vehicle, or a pest infestation.
Do preventative pruning, and ask your neighbors to do the same. Preventative pruning reduces wind resistance and removes dead branches. This reduces the risk of the tree or the tree’s limbs snapping under the force of wind gusts.
Make sure your trees are mulched correctly if you mulch them. Mulch protects the root system of the tree and allows water and nutrients to drain down through the soil to the roots. This keeps the root system healthy which helps the tree stay strong during storms. Unhealthy root systems can lead to trees uprooting and snapping in heavy winds.
Wrap your young trees to prevent sunscald. Sunscald is winter damage that is commonly seen on young trees, newly planted trees, and thin-barked trees (cherry, crabapple, honey locust, linden, maple, mountain ash, plum). Sunscald causes the tree bark to dry and crack.
Legal issues regarding who pays for damages or home repairs etc. to your house from a falling tree in your yard, or from a neighbor’s yard, vary greatly from state-to-state, county to county and insurer to insurer. It’s best to talk to your insurance agent before anything happens to determine if you are covered in the event of a tree fall.
Smoke detectors and fire alarms may be some of the most important items in your home when it comes to your family’s safety. These early warning devices may help alert your family to fire and dangerous smoke while there is still time to evacuate, but they need to be periodically tested to help ensure proper function.
Why Do It?
Electronic devices are not infallible. Batteries die, and other parts of the smoke detector can wear out over time. Testing them regularly and replacing batteries (or the entire device) is one way to help ensure your family stays safe should there be a fire in your home.
How Often?
According to the U.S. Fire Administration (USFA), smoke detectors should be tested at least once a month and batteries should be replaced at least twice a year. A good way to help remember to do this is to change your batteries when you change your clocks for daylight saving time — when you spring forward or fall back. Make sure to review your smoke detector’s user manual — you may need to check more often if any of the following apply:
The detector often gives false alarms.
The alarm emits short beeps regularly without anyone touching it.
Frequent kitchen smoke has caused it to activate often, which may wear it out faster.
There are two main types of smoke detectors, according to the USFA:
Battery-powered: This type can be susceptible to defective or worn-out batteries. Monthly testing is critical. Never put old batteries into your smoke detectors and fire alarms.
Hardwired: These detectors are powered by your home electrical system, but they usually have back-up batteries so the device can remain operational in a power outage. Hardwired smoke detectors still require monthly testing to help ensure that both batteries and parts are functioning properly.
How to Test It
You should always check the manufacturer’s instructions for the proper method of testing your smoke detector and fire alarm. But, in general, most battery-powered and hardwired smoke detectors can be tested in the following way:
Step 1. Alert family members that you will be testing the alarm. Smoke detectors have a high-pitched alarm that may frighten small children, so you’ll want to let everyone know you plan to test the alarms to help avoid frightening anyone.
Step 2. Station a family member at the furthest point away from the alarm in your home. This can be critical to help make sure the alarm can be heard everywhere in your home. You may want to install extra detectors in areas where the alarm’s sound is low, muffled or weak.
Step 3. Press and hold the test button on the smoke detector. It can take a few seconds to begin, but a loud, ear-piercing siren should emanate from the smoke detector while the button is pressed. If the sound is weak or nonexistent, replace your batteries. If it has been more than six months since you last replaced the batteries (whether your detector is battery-powered or hardwired), change them now regardless of the test result, and test the new batteries one final time to help ensure proper functioning. You should also look at your smoke detector to make sure there’s no dust or other substance blocking its grates, which may prevent it from working even if the batteries are new.
Remember, smoke detectors have a normal life span of 10 years, according to the USFA. Even if you’ve performed regular maintenance, and your device is still functional, you should replace a smoke detector after the 10-year period or earlier, depending on the manufacturer’s instructions.
Installing smoke detectors can be a great way to help keep your family safe, but assuming they are working may lead to a dangerous situation. Taking a few minutes to check them regularly can help ensure they’re working properly.
Got a leaky toilet? Believe it or not, it’s a common problem. Continue reading to find out the likeliest causes and the easiest ways to remedy the situation.
First, some of the washers between the bowl and tank may have failed. Shut off the supply valve, empty the tank with a flush, then remove the nuts, bolts, and washers from the underside of the tank. Lift the tank, position it on its side, and see if the washers need replacing.
Another culprit may be faulty fasteners securing the fill valve and ballcock to the bottom of the tank. Before you replace those parts, however, first try simply tightening the nuts and bolts holding them in place—that often solves the problem.
On the other hand, if the leak seems to be coming from the base of the tank, chances are the wax ring that seals the toilet to the floor has failed. Replacing the wax ring is a much bigger job, since it involves removing the entire toilet from its base. If you decide to replace the wax ring yourself—preferably with a friend to help with the lifting—take the extra step of also replacing any bolts that show signs of corrosion. And, once you have the toilet back in place, don’t forget to add a bead of caulk around the base.
It’s not a shock when mold shows up behind drywall after a flood or covers baseboards in damp basements. But mold can surprise you and hide in unexpected places, making it harder to detect and wipe out.
To get rid of mold, think like a fungus and search out these six moist places where mold likes to grow.
1. Chimneys
Why mold grows there: Brick crevices collect water, dirt, and other organic debris. Rusted chimney caps and faulty flashing lets in rain and snow, encouraging mold to grow.
How to wipe it out: First, replace rusted caps and fix flashing. Then, call a chimney sweep to give your chimney a thorough cleaning. A $200-$300 annual visit from a chimney sweep not only removes mold, but also keeps your chimney free of dangerous creosote and helps it operate at peak efficiency.
2. Refrigerator Drip Pans
Why mold grows there: It’s a rarely noticed place under your fridge that collects moisture and food spills, a perfect environment for mold to grow.
How to wipe it out: Cleaning drips pans should be part of your annual deep cleaning ritual. Spray the pan with a hydrogen peroxide solution (1 teaspoon hydrogen peroxide in 1 cup water). Wipe clean with a rag soaked in white vinegar. Also, clean the floor beneath the pan.
3. Front-Loading Washing Machines
Why mold grows there: The gasket around the door on front-loading washing machines often stays wet because the door is usually closed when not in use. Add some lint to the moisture, and mold happily munches and multiplies.
How to wipe it out: Wipe the gasket and glass dry before you shut the door. If you spot mold, run a hot water wash with some chlorine bleach (no clothes), which will kill the fungi.
4. Window Sashes and Seals
Why mold grows there: Condensation provides the moisture mold loves; dirt and dust supply food.
How to wipe it out: After heavy rains, open windows and wipe moisture from the bottoms of sashes and window sills. If seals between panes are failing, you’ll have to repair or replace window sashes to prevent condensation. Regularly clean windows to deprive mold of food.
5. Dishes
Why mold grows there: When you stack dishes that are a little wet and a little cruddy, mold has the perfect environment to grow — especially if you don’t use those dishes every day.
How to wipe it out: Run moldy dishes through the dishwasher, and wipe cabinets with a vinegar-soaked rag. Completely dry dishes before you store them.
6. Air Conditioners
Why mold grows there: Air conditioning units trap dust and pollen (a good meal for mold) and grab moisture from the air. If you don’t run your AC unit at least every 24 hours in warm weather, humidity in your house climbs and mold may grow in AC ducts and drain pans, and on coils.
How to wipe it out: If mold grows in your central air conditioning unit, you’ll have to hire a mold remediation pro to clean out the system ($400-$1,000). If mold shows up in a window AC unit, remove the front plate, clean the blower with a HEPA filter vacuum, and flush out the coils and clean the drain pan with a 1:1 solution of bleach and water.
Of course, prevention is the best remedy. Run your AC for at least 10 minutes every day to keep air circulating when it’s hot and humid outside, and keep the humidity in your home below 55%.
According to the U.S. Department of Energy, the average U.S. family spends at least $2,200 a year on energy bills – with nearly half of that going towards heating and cooling.
And as the temperature begins to fall, the cost to heat our homes starts to rise.
Now’s the time to make sure your home is well-insulated. A properly insulated home will keep the warmth inside, reducing your heating costs and improving comfort.
Use the five tips for insulating your home below to save on energy bills and keep you and your family nice and cozy this winter.
1. Seal Gaps Around Doors
Doors that aren’t correctly fitted to the frame form gaps. One of the simplest ways to insulate your home is to seal the gaps, typically found at the bottom of the door. These can easily be fixed by:
Using weather strips: Weather strips are an easy, inexpensive way to stop air leaks.
Installing draft stoppers: Also known as a door snake or door pillow, draft stoppers sit beneath the bottom of your door and can be made out of socks.
2. Cover or Repair Windows
Another tip for insulating your home is to cover or repair windows that are letting cold air in. For a quick fix, tape clear plastic film to the inside of your window frames and seal tightly. For a more long-term solution, replace old windows with new ones. Older homes that have single-pane windows lack proper insulation, causing your energy bills to skyrocket. To save money and keep those drafts from coming in, consider replacing with double or triple-pane windows.
3. Use Your Curtains
Curtains provide us with a sense of privacy, but they’re also good for insulating homes, especially if you have drafty windows. When the sun is out, open your curtains to let heat and light in. When it’s dark, close your curtains for an extra layer of insulation.
4. Insulate Your Attic
Proper insulation is not only key to finishing your attic, but increasing your energy savings as well. And when it comes to heat, about 25 percent is lost through the roof. You can reduce this by insulating the ceiling and walls. Loose-fill or batt insulation is typically installed in attics, but according to the U.S. Department of Energy, loose-fill insulation is best because it provides better coverage when properly installed.
5. Close Your Fireplace Damper
Fireplaces are a great source of heat, until they’re not. Unless a fire is burning, make sure you close your fire damper. An open damper is like leaving a window open, and if you’re damper is open, you’re letting heat escape. If you have installed gas logs in your fireplace, however, leave the damper open. Gas fireplaces release large amounts of carbon monoxide and therefore must always have an open damper. If your pilot light is not lit, close the damper to ensure you’re not losing any heat, but be sure to open it back up when your gas fireplace is in use.
Brrr! Why does the furnace quit on the coldest day of the year and always on a weekend?
We feel your pain! So, to help, here are a few things you can do to troubleshoot the problem before you have to call for an emergency repair.
Top 3 Reasons a Furnace Blows Cold Air
#1 – Your Thermostat Is in the ON Position
Your thermostat has an ON and AUTO switch that runs your blower. If the switch is in the ON position, then the blower keeps running, even when the furnace is not heating. As soon as the furnace cycles back on the air will warm up again. All you have to do is switch the thermostat to the AUTO position. Then, the blower only comes on when the furnace heats.
#2 – The Pilot Light Is Out
A gas furnace has a small pilot light that stays on all the time. When the furnace cycles on, then the pilot light provides the flame that lights the gas and warms the air. If the pilot light goes out, then there is nothing to light the gas that fires the furnace. Lighting a pilot light is not hard but there are a few safety measures you need to follow.
Never try to light a pilot light if you smell gas in the room. Call your gas company’s emergency line and they will send someone to inspect your furnace lines.
If you don’t smell gas, then find the pilot light assembly. Most furnaces have a sticker with instructions on how to light the pilot light. If yours does not, then try to locate the gas valve. Switch it to the PILOT setting. Hold a lighted match to the pilot opening. If there is a reset button on the control panel, hold the button until the pilot light burns. Once it is going, set the valve to the ON position. If the pilot light won’t stay lit, then you may have a faulty thermocouple or a dirty port. You can try cleaning the port with a piece of wire. If the thermocouple is bad, you will need to call a professional to make the repair.
Some furnaces have an electric starter instead of a pilot light. If you cannot find a pilot light, then an electric heating element is probably what ignites your furnace. When an element malfunctions, you will need to call an HVAC professional.
#3 – The Furnace Has Overheated
If you can’t get your furnace to blow any air, hot or cold, it’s possible it has overheated. Safeguards are in place that shut off the burners when the unit gets too hot. More often than not, the problem is a dirty air filter. Furnace filters should be checked frequently for dirt and debris. If you have pets you may find that you have to change out your filter as often as once a month. Once the air flow is no longer restricted and the unit cools down, the furnace should start blowing warm air.
Even if you keep your rain gutters clean and in good shape, problems such as ice buildup, ice dams, and icicles can still cause major structural damage to your home.
Yes, even gutters that are properly installed and of the best quality will strain under heavy snow loads and brutal ice.
Here are 5 things you can do to your house gutters to help them work more efficiently — especially through the winter months!
#1 – Install gutter guards.
Gutter guards reduce debris — like autumn leaves and winter snow accumulation — which can cause blockage or weight-bearing damage to your rain gutters.
No gutter guard is perfect, though. Even high-quality gutter guards can’t completely prevent accumulation — so regular gutter cleaning and inspection are still recommended.
How? The gutter heaters keep the water above freezing in both the gutters and the downspouts – allowing it to flow freely away from your house.
Keep in mind, this is actually a bandaid for the true source of the problem. (See #3 below.)
TIP: Heating cables and gutter heating systems should come with thermostatic controls so you can just flip a switch to turn them on when necessary, preventing overheating and excessive electricity use.
#3 – Improve your attic insulation and venting.
Heat from inside your home causes snow to melt on the roof. The subsequent runoff may refreeze in your gutters — eventually building up and causing destructive ice dams.
Most houses have ice and water membranes installed underneath the shingles of the roof during the construction phase. However, even if yours is an older home, you may benefit significantly from an upgrade to the roofing system.
You’ll probably want to wait until you actually need a new roof though — it will be much more affordable to add the ice and water barriers at that time.
When you’re faced with a blizzard, ice storm, mounting snow, and bitter chill, the last thing you want to do is get up on the roof to do major repairs.
By using some or all of these gutter aids, you can reinforce the strength and efficiency of your home’s gutter system. Now your gutters will be strong enough to endure even the harshest winter!
We’re fortunate to be living in an era dominated by technology and innovation. Smart technology, transportation efficiencies and useful apps are everywhere, making it easier for all of us to live more efficiently. So, with all of this amazing innovation, I often wonder why so many people still aren’t living greener.
If all of us made just one eco-friendly change, we would significantly impact the Earth, our communities and our energy bills. In case some of you are willing to make small changes but don’t know what to do to be energy-efficient, here are 16 things you can do to be greener at home. I’ve included low-cost and big-ticket changes you can make.
Low-Cost Savings
Lower Your Thermostat
Adopt the habit of lowering the temperature on your thermostat while away from home. Dropping the temp by just three to five degrees will reduce your monthly utility bill and use less energy. According to Energy.gov, lowering your thermostat by 10 to 15 degrees during the work day will save 5% to 15% every year.
Start a Compost Pile
You don’t need a ton of space in your backyard to start a compost pile. Compost is the result of organic waste that’s kept in a pile or container that decomposes over time. Your fruit and vegetable waste not only becomes valuable fertilizer for your lawn or garden, but it reduces the amount of trash you produce on a daily basis.
Install Low-Flow Showerheads
Installing low-flow showerheads improves your home’s water efficiency. Low-flow showerheads have a flow rate of less than 2.5 gpm (gallons per minute), while most conventional showerheads use 5 gallons per minute. Mother Earth will thank you!
Seal All Windows
Go the extra mile by sealing the air leaks in and around the windows in your home. If your windows are drafty, consider adding weatherstripping around the frames. Add a bead of silicone caulk over any cracks in your drywall or apply a sheet of shrink film to your windows. Sealing gaps and cracks is an easy and inexpensive way to lower energy costs.
Limit Space Heater Use
Although electric and gas space heaters keep your feet nice and toasty in cooler weather, they aren’t the most efficient way to heat your home. Many space heaters use 1,500 watts of energy to run and are considered to be a costly way to drain your energy bill. Be sure the model of your space heater is energy-efficient; consider layering clothing or investing in blankets instead of cranking up your thermostat.
Turn Off Unnecessary Water
According the U.S. Environmental Protection Agency (EPA), the average homeowner can save about $170 a year with small changes to their water usage. Be conscious of running water while brushing your teeth or shaving. Also, bathing typically uses 75 gallons of water compared to a shower that uses about 17.2 gallons on average. You also should avoid running half-loads of laundry in your washer. A full load means more clothes get washed at once, which in turn conserves water (and money).
Replace Incandescent Bulbs
In 2014, manufacturers stopped producing 60-watt and 40-watt incandescent lightbulbs (100-watt and 75-watt bulbs were already phased out). But we’re not doomed to live in the dark. Halogen bulbs, compact fluorescent lamps (CFLs) and light-emitting diode (LED) bulbs offer longer lasting light and are more energy-efficient than your old incandescent bulbs. Since the average home uses 40 bulbs, switching over to greener bulbs is a great way to save on your electrical bill.
Unplug Unused Chargers
Cell phone and battery chargers that are plugged in but not in use are often referred to as energy vampires. According to Energy.gov, the average charger consumes 0.26 watts of energy when not in use and 2.24 watts when connected to your phone. Alone, one charger won’t make much impact, but collectively energy vampires can be responsible for 10% of your energy bill. So, unplug your chargers when not in use.
Don’t Wash with Hot Water
Avoid running your washer with hot water and opt for cold or warm water when possible. According to Treehugger.com, 90% of the energy used by your washer is used to heat the water, and the other 10% is used to run the machine. This means using cooler water for every load can potentially save a significant amount of energy.
Big-Ticket Ideas
Add Insulation to Your Attic
Adding insulation to your attic can help seal air leaks and improve your home’s heating and cooling costs. The amount of insulation needed to cover your attic depends on your home’s size and the climate in your region, but according to HomeAdvisor.com, the average cost to blow in additional insulation into your attic is $1,356.
Install Solar Panels
Although solar panels aren’t exactly cheap, they’re becoming a popular way to heat hot water and generate electricity for homes. Solar panels have many benefits! They help you save money on energy bills in the long run, promote lower fossil fuel usage and may help you qualify for annual tax incentives. Typically, they are installed on your roof and cut your electricity costs by generating energy independently of your utility company. Consider the do’s and don’ts of home solar panel systems.
Install a Storm Door
Even if you have an energy-efficient front or side door, adding a storm door gives you an extra layer of protection from the weather year-round. Storm doors typically have low-emissivity glass or a protective coating that can help reduce energy loss by up to 50%, according to the U.S. Department of Energy. Most storm doors last between 25 and 50 years and can cost as little as $75.
Perform an Energy Audit
Consider hiring a professional energy auditor to your home and evaluate the inefficiencies and wasted energy in your home. A certified and trained auditor will inspect in and around your home to pinpoint savings opportunities and identify areas that need improvements. Auditors typically charge by the square footage of your house or by the hour.
Buy Energy Star Products
Energy Star products, such as refrigerators, televisions, stoves, washers and air conditioners, meet energy-efficient specifications set by the EPA. Energy Star-qualified appliances use 10-50% less energy than standard appliances and help reduce emissions of greenhouse gases. If you plan to replace an appliance soon, consider getting an Energy Star-certified product.
Tune Up Your HVAC System
An annual tune-up on your heating and cooling system will ensure that your furnace and A/C are running at peak efficiency, which will save you money every month. A home heating and cooling check-up improves efficiency by ensuring connections are tightened, parts are properly lubricated and coils are cleaned. Tuning up your HVAC system can also help you avoid replacing your furnace, which can cost between $2,000 and $8,000.
Replace Your Desktop Computer
Most tech experts estimate that you should replace your computer every four years. When the time comes for your desktop computer, consider replacing it with a laptop. According to SmallBusinessChron.com, laptops use up to 80% less electricity and run on less energy. Laptop computers typically peak at a maximum energy draw of only 60 watts, whereas most desktops peak around 175 watts. Laptops don’t come with a cheap price tag, but they are greener.
Seriously, everyone should be able to find at least one or two things on this list to do to green-ify their home. Below, share other ways to create an energy-efficient home.
When Jack Frost comes nipping at your nose, it's time to turn up the heat. For many people, this just means raising the temperature on the central heating system's thermostat. In many cases, though, you only need heat in a small area for a brief time, and it makes more sense to use a space heater than to heat the whole house.
The best way to use a space heater to save money is to only heat one room, but leave the rest of your home cooler. That said, the National Fire Protection Association (NFPA) reminds us that space heaters account for 1/3 of all home fires and 4 out of 5 home heating fire deaths, so paying close attention to safety is a must.
Whatever your reasons for using a space heater, here are tips to help you choose, use, and maintain yours so you can stay safely toasty warm, even when the weather outside is frightful.
Safety First
No matter what type or brand of space heater you opt to use, follow these safety tips from the NFPA to reduce the chances of fires and injury:
Keep anything that can burn, including bedding, furniture, and curtains at least 3 feet away from a space heater.
Have a three-foot "kid-free zone" around space heaters and never use a space heater in a child's bedroom.
Run power cords on top of carpet and step over them to avoid abrading the cord. Do not use extension cords.
Turn off space heaters when going to bed or leaving a room.
Don't use a space heater in a damp or wet area unless it's specifically made for that purpose.
Turn space heaters off before leaving the room or going to bed.
Never put a space heater on a countertop unless it's specifically designed for it.
Install smoke and carbon monoxide alarms and test monthly.
Only purchase "UL Listed" heaters which display the UL mark on their label. This is an independent organization which tests for safety.
Don't use gas- or oil-burning space heaters indoors, only outdoors or in spaces open to the outdoors like tents or porches.
Read and follow all manufacturer's directions for your space heater.
How They Work
Space heaters heat you and the room they occupy in two ways: through radiant heat and convection. Radiant heat is like the warmth you feel when sunlight hits your skin. The closer you are to the space heater, the more of the radiant warmth you'll feel. Convection happens when air surrounding the heater is heated. That hot air rises toward the ceiling, pulling surrounding cool air toward the heater, where that air is heated and also begins to rise. Air at the ceiling then begins to cool and fall, until it's drawn toward the heater once again. This is called a convection loop and, while air toward the ceiling will tend to feel warmer, the convective loop will eventually help to heat the whole room. A heater with an integrated fan will naturally spread more of the heat farther from the heater than relying on convection alone, warming a room more evenly and quickly.
Gas- and Oil-Burning Space Heaters
Gas/propane/kerosene space heaters, due to the fact that they produce dangerous combustion gases from burning fuel, should only be used in well-ventilated areas open to the outdoors. This includes areas like tents, screened porches, or new construction homes before the windows and doors are installed. It's best to find a model with a low-oxygen shut-off or oxygen depletion sensor. This safety feature automatically detects when oxygen levels are getting dangerously low in a space, and stops fuel from flowing to the heater, shutting off the flame.
Output for gas- and oil-burning space heaters is measured in British Thermal Units (BTUs). Smaller heaters may have outputs of 4,000 to 9,000 BTUs, which is enough to heat a 200 square-foot tent. Medium-sized heaters will have outputs of 12,000 to 30,000 BTUs, which will heat a space of 600-800 square feet. Larger, commercial grade propane heaters combine propane heat with a powerful electric fan to heat much larger spaces. These units can reach 150,000 to 200,000 BTUs and can heat spaces over 3,000 square feet.
Caution: While "vent-free" gas heaters for residential use do exist, they are only safe if very carefully monitored and maintained. The safety of vent-free units relies on all of the catalytic and safety elements to be clean and in good working order to function properly at all times. If sensors or elements become dusty or dirty, the performance of a vent free unit can be compromised. Even with a properly maintained unit, burning of gas creates not only dangerous combustion gases, but also a surprising amount of water vapor. Aside from safety issues, excessive use of a vent-free gas heater indoors can result in moisture problems like mold, mildew, and condensation damage of wooden windows. Ideally, all gas heaters for indoor use should have sealed combustion chambers which are properly vented to the outdoors.
Electric Space Heaters
For indoor use, electric models come in many shapes and sizes, but all work in a similar way. They pass electricity through a poorly conducting substance, which resists the electricity passing through it, producing heat. That's why this type of heat is also called "resistance heating." Regardless of whether the heater uses wire, ceramic, quartz, or radiator-type elements, they all work essentially the same way. Some will use a highly reflective backing to concentrate radiant heat in one direction. Ceramic and quartz heaters aim to keep the surface of the heater cool to the touch.
The best electric space heaters employ safety features like a tip-over switch, overheat sensor, and touch sensor (which shuts the unit off if the grill is touched, to prevent burns), to make them as safe as possible. A space heater that features a longer, heavy-duty power cord will mean you won't need an extension cord. Under-sized and frayed power cords are a major source of fire danger.
To determine how much heat an electric space heater will produce, look at the output, which is measured in watts. Generally speaking, outputs range from 400 to 1,500 watts. Most modern models will allow you to adjust the output over a given range.
One of the more advantageous features on an electric space heater is a built-in fan. A built-in fan will spread heat over a wider area as it circulates air through the heater and the room. An integrated fan also means that a heater will heat up an area faster. Space heaters with a thermostat will automate the heater's operation, so you don't have to continually turn it on and off manually to keep a space from getting too warm for comfort. Larger units may even include faux wood cabinets and faux flames for a warmer, fireplace-like look.
The Long Run
If you've turned to a space heater because your home is constantly cold and drafty in the winter, you may end up spending more money on energy in the long run than necessary. Electric space heaters are inherently inefficient as a heating source. As a matter of fact, the Department of Energy's EnergyStar program doesn't certify space heaters in the EnergyStar program for this reason. A central heat pump or gas furnace, even an older model, is likely much more efficient at heating your home. That's why it's important not to use a space heater as anything more than a temporary bandage for spot heating. Instead, solve the real problem: the poor efficiency of your home's shell. Spend a modest amount of money to insulate and air-seal your home to stop cold air infiltration and retain heat from your existing central heat system. Improving the energy efficiency of your home's shell will save you money and make your home a more comfortable and safer place to live in the long run.
If you’ve found yourself saying this a time or two, you probably had the best intentions, but not a plan to follow through. As with any resolution, you start out strong, but slowly fizzle out as time goes on.
This cleaning plan will help you distinguish a daily, weekly, monthly and seasonal cleaning schedule, and help you set organization goals. The best part about this plan is that even if you start to veer off course, you can jump back in at any time. The key to your success lies in the calendar. You must write out your cleaning plan for a month on a calendar, laminate it and post it somewhere where you will see it daily.
Daily There are a few quick, basic chores that need to be done on a daily basis to keep your home looking and feeling clean. I try to do tiny bits of cleaning as I go about my day, so I don’t have to do them later.
Examples of Daily Chores: Morning: Make bed, put dirty clothes in hamper, wipe down sinks and counters in the bathroom. Evening: Open mail and toss or organize as needed, wipe down sinks and counters in the kitchen, wash dishes, spot vacuum or sweep high traffic areas (if needed), and pick up toys and extra clutter around the house.
You can refer back to the “A Game Plan for Daily Cleaning” blog, for more tips. http://blog.maids.com/2012/a-game-plan-for-daily-cleaning/
Weekly Weekly chores usually have a specific day assigned to them. At my house, Saturday is laundry day and Sunday designated for the kitchen. By assigning a specific day to certain chores, you are creating a routine and will be more likely to keep up with your duties..
Examples of Weekly Chores: Day 1 – Bedrooms: Laundry, including linens Day 2 – Kitchen: Clean appliances (microwave, toaster, coffee maker), bleach the sink, scrub stovetop and disinfect counters, knobs and handles. Day 3 – Bathroom: Wipe down mirrors, wash curtains and rugs, deep clean shower walls and tub, bleach the sink, disinfect counter tops and scrub the toilet. Day 4 – Entire House: Dust furniture, deep vacuum, mop and sweep floors, and wipe down light switches. Day 5 – Paperwork: Sort out bills, throw away clutter, file important documents in a filing cabinet and take out the trash. Go through extra paperwork and toss or organize as needed. Day 6 –Organization Day
Monthly Once a week, you’re going to have to get down and dirty, and really clean something. Most monthly chores tend to get overlooked, which is why it’s great to have a visual reminder.
Examples of Monthly Chores: Week 1: Clean windows, floorboards, ceiling fans and decorative mirrors. Week 2: Clean the refrigerator (inside and out). Week 3: Vacuum furniture, walls and air vents. Week 4: Clean kids’ toys. Organize play areas, bookshelves and toy compartments. Or, clean office areas. Wipe down keyboard, mouse, and other desk supplies. Organize loose paperwork and files.
Organization Goals: If you have areas in your home that you desperately want organized, but can’t find the motivation to start a big project, then you’ll need to set an organization goal. Part of developing your goal is planning which days will be devoted to the task.
Example of an organization goal: I will go through the boxes in the attic. Frequency: I will spend 2 hours every Friday going through boxes. Estimated Timeframe: 3 months
Install smoke alarms on every level of your home, inside bedrooms and outside sleeping areas.
Test smoke alarms every month. If they’re not working, change the batteries.
Talk with all family members about a fire escape plan and practice the plan twice a year.
If a fire occurs in your home, GET OUT, STAY OUT and CALL FOR HELP. Never go back inside for anything or anyone.
We partner with the American Red Cross and also our local fire departments so fire prevention is VERY important to us! These tips are from REDCROSS.ORG
Here are some tips on WHAT TO DO AFTER A FIRE:
Call 9-1-1. Give first aid where needed; cool and cover burns to reduce the chance of further injury or infection.
Let friends and family know you’re safe.
People and animals that are seriously injured or burned should be transported to professional medical or veterinary help immediately.
Stay out of fire-damaged homes until local fire authorities say it is safe to re-enter.
Caring for Yourself & Loved Ones
Pay attention to how you and your loved ones are experiencing and handling stress. Promote emotional recovery by following these tips. Discard any food that has been exposed to heat, smoke or soot.
Watch pets closely and keep them under your direct control.
Help people who require additional assistance- infants, elderly people, those without transportation, large families who may need additional help in an emergency situation, people with disabilities, and the people who care for them.
Also from REDCROSS.ORG, check it out for more information and make sure you are prepared in case an emergency happens in your Tennessee home!
Each year, hundreds of Americans are injured or killed by exposure to cold, vehicle accidents on wintry roads, and fires caused by the improper use of heaters. Learn what to do to keep your loved ones safe during blizzards and other winter storms!
Take immediate precautions if you hear these words on the news:
Winter Storm WARNING: Life-threatening, severe winter conditions have begun or will begin within 24 hours.
Blizzard WARNING: Sustained winds or frequent gusts of 35 miles per hour or greater, plus considerable falling or blowing snow reducing visibility to less than a quarter mile, expected to prevail for three hours or longer.
More winter storm words to listen for:
WIND CHILL Temperature: How cold people and animals feel when outside. As wind increases, heat is carried away from your body at a faster rate, driving down your body temperature and making you feel much colder. The wind chill temperature is not the actual temperature but rather how wind and cold feel on exposed skin.
Winter Storm OUTLOOK: Winter storm conditions possible in the next two to five days. Stay tuned to local media for updates.
Winter Storm WATCH: Winter storm conditions possible within the next 36 to 48 hours. Review your winter storm plans and stay informed about weather conditions.
Winter Weather ADVISORY: Winter weather conditions expected to cause significant inconveniences and may be hazardous but not life-threatening if you are cautious.
Talk with your family about what to do if a winter storm watch or warning is issued. Discussing winter storms ahead of time helps reduce fear, particularly for young children.
Have your vehicle winterized before the winter storm season to decrease your chance of being stranded in cold weather.
Have a mechanic check your battery, antifreeze, wipers and windshield washer fluid, ignition system, thermostat, lights, flashing hazard lights, exhaust system, heater, brakes, defroster, and oil.
Install good winter tires with adequate tread. All-weather radials are usually adequate but some jurisdictions require vehicles to be equipped with chains or snow tires with studs.
Keep in your vehicle:
- A windshield scraper and small broom
- A small sack of sand for generating traction under wheels and a set of tire chains or traction mats
- Matches in a waterproof container
- A brightly colored (preferably red) cloth to tie to the antenna
- An emergency supply kit, including warm clothing.
Keep your vehicle’s gas tank full so you can leave right away in an emergency and to keep the fuel line from freezing.
Keep a supply of non-clumping kitty litter to make walkways and steps less slippery.
Service snow removal equipment before the winter storm season and maintain it in good working order.
Keep handy a warm coat, gloves or mittens, hat, water-resistant boots, and extra blankets and warm clothing for each member of the household.
Protecting your pets & animals
Bring your companion animals indoors.
- Ensure that you have supplies for clean up for your companion animals, particularly if they are used to eliminating outdoors (large plastic bags, paper towels, and extra cat litter).
Create a place where your other animals can be comfortable in severe winter weather:
- Horses and livestock should have a shelter where they can be protected from wind, snow, ice, and rain.
- Grazing animals should have access to a protected supply of food and non-frozen water.
Be aware of the potential for flooding when snow and ice melt and be sure that your animals have access to high ground that is not impeded by fencing or other barriers. You may not be able to get to them in time to relocate them in the event of flooding.
- Ensure that any outbuildings that house or shelter animals can withstand wind and heavy snow and ice.
- Install snow fences in rural areas to reduce drifting snow on roads and paths, which could block access to homes, barns, and animals' feed and water.
Make sure your home heating sources are installed according to local codes and permit requirements and are clean and in working order.
Make sure your home is properly insulated. Caulk and weather-strip doors and windowsills to keep cold air out.
Install storm windows or cover windows with plastic from the inside to provide an extra layer of insulation to keep cold air out.
Consider buying emergency heating equipment, such as a wood- or coal-burning stove or an electric or kerosene heater.
- Stoves must be properly vented and in good working order. Dispose of ashes safely. Keep a supply of wood or coal on hand.
- Electric space heaters, either portable or fixed, must be certified by an independent testing laboratory. Plug a heater directly into the wall socket rather than using an extension cord and unplug it when it is not in use.
- Use a kerosene heater only if permitted by law in your area; check with your local fire department. Use only the correct fuel for your unit. Properly ventilate the area. Refuel the unit outdoors only, and only when the unit is cool. Follow all of the manufacturer's instructions.
Consider storing sufficient heating fuel. Regular fuel sources may be cut off. Be cautious of fire hazards when storing any type of fuel.
If you have a fireplace, consider keeping a supply of firewood or coal. Be sure the fireplace is properly vented and in good working order and that you dispose of ashes safely.
Consider installing a portable generator, following our safety tips to avoid home fires and carbon monoxide poisoning
Consider purchasing flood insurance, if you live in a flood-prone area, to cover possible flood damage that may occur during the spring thaw. Homeowners' policies do not cover damage from floods. Ask your insurance agent about the National Flood Insurance Program (NFIP) if you are at risk. More information on NFIP is available atwww.fema.gov/nfip.
Right before a blizzard / winter stormIf you do nothing else:
Listen to local area radio, NOAA radio or TV stations for the latest information and updates.
Check emergency kit and replenish any items missing or in short supply, especially medications and medical supplies. Keep it nearby.
Be sure you have ample heating fuel.
If you have alternative heating sources, such as fireplaces, wood- or coal-burning stoves, or space heaters, be sure they are clean and in working order.
Check that your fire extinguisher(s) is in good working order, and replace it if necessary.
Bring your companion animals inside and ensure that your horses and livestock have blankets if appropriate and unimpeded access to shelter, food, and non-frozen water.
During
Stay Safe During a Winter Storm
Staying Safe During a Winter Storm or Blizzard
Stay indoors and wear warm clothes. Layers of loose-fitting, lightweight, warm clothing will keep you warmer than a bulky sweater. If you feel too warm, remove layers to avoid sweating; if you feel chilled, add layers.
Listen to a local station on battery-powered radio or television or to NOAA Weather Radio for updated emergency information.
Bring your companion animals inside before the storm begins.
Move other animals to sheltered areas with a supply of non-frozen water. Most animal deaths in winter storms are caused by dehydration.
Eat regularly. Food provides the body with energy for producing its own heat.
Keep the body replenished with fluids to prevent dehydration. Drink liquids such as warm broth or juice. Avoid caffeine and alcohol. Caffeine, a stimulant, accelerates the symptoms of hypothermia. Alcohol, such as brandy, is a depressant and hastens the effects of cold on the body. Alcohol also slows circulation and can make you less aware of the effects of cold. Both caffeine and alcohol can cause dehydration.
Conserve fuel. Winter storms can last for several days, placing great demand on electric, gas, and other fuel distribution systems (fuel oil, propane, etc.). Lower the thermostat to 65° F (18° C) during the day and to 55° F (13° C) at night. Close off unused rooms, and stuff towels or rags in cracks under the doors. Cover the windows at night.
Check on relatives, neighbors, and friends, particularly if they are elderly or if they live alone.
Staying Safe OutsideIf you must go outside, protect yourself from winter storm hazards:
Wear layered clothing, mittens or gloves, and a hat. Outer garments should be tightly woven and water repellent. Mittens or gloves and a hat will prevent the loss of body heat.
Cover your mouth to protect your lungs from severely cold air. Avoid taking deep breaths; minimize talking.
Watch for signs of hypothermia and frostbite.
Keep dry. Change wet clothing frequently to prevent a loss of body heat. Wet clothing loses much of its insulating value and transmits heat rapidly away from the body.
Stretch before you go out. If you go out to shovel snow, do a few stretching exercises to warm up your body. This will reduce your chances of muscle injury.
Avoid overexertion, such as shoveling heavy snow, pushing a vehicle, or walking in deep snow. The strain from the cold and the hard labor may cause a heart attack. Sweating could lead to a chill and hypothermia.
Walk carefully on snowy, icy sidewalks. Slips and falls occur frequently in winter weather, resulting in painful and sometimes disabling injuries.
If you must go out during a winter storm, use public transportation if possible. About 70 percent of winter deaths related to ice and snow occur in automobiles.
Driving in Winter Conditions
Check your vehicle emergency supplies kit and replenish it if necessary.
Bring enough of the following for each person:
- Blankets or sleeping bags
- Rain gear, extra sets of dry clothing, mittens, socks, and wool hats
- Newspapers for insulation
- Plastic bags for sanitation
- Canned fruit, nuts, and high energy snacks (Include a non-electric can opener if necessary)
- Warm broth in a thermos and several bottles of water
- Keep a cell phone or two-way radio with you. Make sure the battery is charged.
- Plan to travel during daylight and, if possible, take at least one other person with you.
Let someone know your destination, your route, and when you expect to arrive. If your vehicle gets stuck along the way, help can be sent along your predetermined route.
Before leaving, listen to weather reports for your area and the areas you will be passing through, or call the state highway patrol for the latest road conditions.
Be on the lookout for sleet, freezing rain, freezing drizzle, and dense fog, which can make driving very hazardous
If You Become Stranded
Stay in the vehicle and wait for help. Do not leave the vehicle to search for assistance unless help is visible within 100 yards (91 meters). You can quickly become disoriented and confused in blowing snow.
Display a trouble sign to indicate you need help. Hang a brightly colored cloth (preferably red) on the radio antenna and raise the hood after snow stops falling.
Run the engine occasionally to keep warm. Turn on the engine for about 10 minutes each hour (or five minutes every half hour). Running the engine for only short periods reduces the risk of carbon monoxide poisoning and conserves fuel. Use the heater while the engine is running. Keep the exhaust pipe clear of snow, and slightly open a downwind window for ventilation.
Leave the overhead light on when the engine is running so that you can be seen.
Do light exercises to keep up circulation. Clap your hands and move your arms and legs occasionally. Try not to stay in one position for too long.
If more than one person is in the vehicle, take turns sleeping. If you are not awakened periodically to increase body temperature and circulation, you can freeze to death.
Huddle together for warmth. Use newspapers, maps, and even the removable floor mats for added insulation. Layering items will help trap more body heat.
Watch for signs of frostbite and hypothermia. Severe cold can cause numbness, making you unaware of possible danger.
Drink fluids to avoid dehydration, which can make you more susceptible to the ill effects of cold and to heart attacks.
Avoid overexertion. Cold weather puts an added strain on the heart. Shoveling snow or pushing a vehicle can bring on a heart attack or make other medical conditions worse.
After
After a Winter Storm
Continue listening to local news or a NOAA Weather Radio for updated information and instructions. Access to some parts of the community may be limited or roads may be blocked.
Help people who require special assistance—infants, elderly people, those without transportation, large families who may need additional help in an emergency situation, people with disabilities, and the people who care for them.
Avoid driving and other travel until conditions have improved.
Avoid overexertion. Heart attacks from shoveling heavy snow are a leading cause of death during the winter.
Check on your animals and ensure that their access to food and water is unimpeded by drifted snow, ice, or other obstacles.
If you are using a portable generator, take precautions against carbon monoxide poisoning, electrocution and fire.
Identifying & Treating Frostbite and Hypothermia
Frostbite and hypothermia are cold-related emergencies that may quickly become life or limb threatening.
Take these steps to avoid frostbite and hypothermia:
Be aware of the wind chill. Dress appropriately and avoid staying in the cold too long. Wear a hat and gloves when appropriate with layers of clothing. Avoid unnecessary exposure of any part of the body to the cold.
Drink plenty of warm fluids or warm water but avoid caffeine and alcohol. Stay active to maintain body heat.
Take frequent breaks from the cold.
Get out of the cold immediately if the signals of hypothermia or frostbite appear.
Frostbite
Frostbite is the freezing of a specific body part such as fingers, toes, the nose or earlobes.
Signs of frostbite:
Lack of feeling in the affected area
Skin that appears waxy, is cold to the touch, or is discolored (flushed, white or gray, yellow or blue)
What to do for frostbite:
1. Move the person to a warm place
2. Handle the area gently; never rub the affected area
3. Warm gently by soaking the affected area in warm water (100–105 degrees F) until it appears red and feels warm
4. Loosely bandage the area with dry, sterile dressings
5. If the person’s fingers or toes are frostbitten, place dry, sterile gauze between them to keep them separated
6. Avoid breaking any blisters
7. Do not allow the affected area to refreeze
8. Seek professional medical care as soon as possible
Hypothermia
Hypothermia is the cooling of the body caused by the failure of the body’s warming system. The goals of first aid are to restore normal body temperature and to care for any conditions while waiting for EMS personnel.
Signs of hypothermia:
Shivering
Numbness or weakness
Glassy stare
Apathy or impaired judgment
Loss of consciousness
What to do for hypothermia:
1. CALL 9-1-1 or the local emergency number
2. Gently move the person to a warm place
3. Monitor breathing and circulation
4. Give rescue breathing and CPR if needed
5. Remove any wet clothing and dry the person
6. Warm the person slowly by wrapping in blankets or by putting dry clothing on the person.
Hot water bottles and chemical hot packs may be used when first wrapped in a towel or blanket before applying. Do not warm the person too quickly, such as by immersing him or her in warm water.
Warm the core first (trunk, abdomen), not the extremities (hands, feet).
Recovering After a Winter Storm
Once you are physically safe, take time to ensure your family’s emotional and financial well-being.
Most homeowners are aware holiday decorations should be used with care. Each year, statistics tell the story of the fire danger resulting from frayed wires, proximity to heat sources, and lights left on unattended. But disaster recovery specialist SERVPRO wants homeowners to know that the danger of fire caused by holiday decorating, and by Christmas trees specifically, actually increases after the holiday. Citing research from the National Fire Protection Association (NFPA), the fire and water damage experts at SERVPRO say while four out of five Christmas tree fires happen in December and January, the 10 days with the highest average number of fires were all after Christmas Day.
"For many families, preparing for the holiday season is a very busy time," said Sue Steen, SERVPRO Industries, Inc. chief executive officer. "Come December 26, it’s tempting to relax and stop watering the Christmas tree, replacing bulbs in outdoor lights and tucking indoor garlands back into place. Dry greens, open sockets and decorations that slip dangerously close to light sockets or fireplaces can all increase the risk of fire in the days after the Christmas holiday."
The American Christmas Tree Association quotes Nielsen research that says Americans purchased 21.6 million live Christmas trees in 2011. That number is significant because, according to the NFPA, Christmas trees remain the number one culprit in holiday fires. Forty-three percent of Christmas tree fires happen in December, but January is close behind, claiming 39 percent—numbers that demonstrate the danger of allowing Christmas trees to dry out during and after the holiday season. Tragically, Christmas tree fires are particularly deadly, claiming on average one life in every 40 fires compared to an average of one death per 142 total reported home fires.
Steen encourages homeowners who choose to decorate with live Christmas trees to be diligent about watering their trees both before and after the holidays. "When a Christmas tree dries out, it takes only a single spark from the fireplace, a draft that blows a candle flame too near, or a carelessly held cigarette to turn your holiday celebration into a tragedy," says Steen . "Beyond the damage from the fire itself, a Christmas tree fire, like any fire, can result in extensive smoke and water damage throughout your home, and can even be deadly."
As the holiday season moves into full swing, SERVPRO reminds homeowners to take common sense precautions based on a clear understanding of the potential danger to help prevent holiday traditions from turning into a holiday nightmare. For more fire prevention tips and information about fire and water damage restoration services, please visit www.SERVPRO.com.
Source: https://www.SERVPRO.com/141205
Post Thanksgiving Dinner: How To Clean Your Over Naturally
Cleaning your oven doesn’t require harsh chemicals or a self-cleaning oven. You can get a naturally clean oven using just a few household ingredients.
There is a common misconception that getting your oven clean requires the use of harsh chemicals and a lot of time. The truth is, you only need a few ingredients that you already have in your kitchen pantry to make a super effective oven cleaning paste that works wonders on the inside of an oven.
INGREDIENTS FOR NATURAL OVEN CLEANER PASTE
1 Cup of Baking Soda
2 Tablespoons of Castile Soap
15 Drops of Orange Essential Oil
2 Tablespoons of Water
To start, spray the entire inside of the oven and the oven door down with distilled white vinegar to moisten the area and get it ready for scrubbing.
Add some of the Oven Cleaner Paste to a scrub sponge.
Scrub the inside of the entire oven and door with the oven cleaner paste.
The paste will work with the scrub sponge to remove any burned on foods or spills. If you have tough to remove spots, let some of the paste sit on the spot for 10 minutes, then come back and scrub the spot away.
Use a cloth or dish rag to remove all of the dirty paste, then wipe the inside of your oven down with warm water.
Take 1: If you're in full-blown fall-cleaning mode…
Apartment Therapy suggests cleaning your art supply or crafts area in order to "make your home and mind feel lighter." These areas of your home tend to accumulate the most clutter, and they are often strewn with unfinished projects (which are a feng shui no-no).
Take 2: If you're sick of finding your news through Facebook…
We hear you, and we've found a solution in Flipboard. The site basically aggregates the best articles on the internet and turns them into a "personal magazine" of all your interests. Create your own account, and enjoy web browsing sans political commentary from your high school graduating class.
Take 3: If you're looking to refresh your home for fall…
We're loving Paddywax's newest line of earth-inspired, matte-speckled ceramic candles. Dubbed the "Mesa" collection, each votive and dust cover doubles as a stackable cream and sugar pottery set once the candle is finished burning. Snag a set for $32.
Take 4: If Amber Lewis is one of your favorite interior designers…
Then you'll be pleased to hear that she's curated a limited-edition collection with Saatchi Art. Brimming with bohemian-inspired prints that you'd find in any one of Amber's stunning projects, you can decorate like the acclaimed designer at a fraction of the price.
Take 5: If you're more than ready for the turn of the season…
We assume you're beyond excited for the stunning fall foliage that's about to sweep our nation. To plan the ultimate fall foliage excursion, check out Apartment Therapy's interactive map to see when the colors will peak in your city.
Your afternoon pick-me-up:
Following Starbucks's and Le Pain Quotidien's lead, Pret a Manger is now on the turmeric latte train. The chain's brand-new drink is described as "a warm and earthy balance of organic almond milk, turmeric, and spices." Happy sipping!
Heating homes accounts for over 70 per cent of household energy consumption.
So reducing this figure – while keeping homes warm enough – not only cuts energy bills, but helps meet the carbon reduction commitments that governments strive to achieve.
So here are 10 simple tips for keeping your home warm for little or no extra cost – just in time for that severe weather warning.
1. USE YOUR CURTAINS
Heat from the sun is free so make the most of it.
Open your curtains and let the sunlight in during the day to make use of this free heat.
When it gets dark, shut your curtains, which act as another layer of insulation and keep warmth in your rooms.
You should also make sure you don't have any leaks or gaps so that the warm air can stay in and the cold air stays out – this also helps to reduce condensation.
2. USE TIMERS ON YOUR CENTRAL HEATING
The Centre for Sustainable Energy advises that programming your boiler to turn the heating on a little earlier – such as 30 minutes before you get up in the morning – but at a lower temperature is cheaper than turning it on just as you need it at a higher temperature.
This is because a boiler heats up at a constant speed whether you set your thermostat to 20°C (68°F) or 30°C (86°F).
But don't make the mistake of leaving your heating on low all day – because then you're just paying for heat when you don't need it.
3. MOVE YOUR SOFA
It might feel great to have your favourite seat in front of the radiator, but it's absorbing heat that could be warming your home.
By moving it away from the radiator, hot air can circulate freely.
The same goes for your curtains or drying clothes – keep them away from the radiator so that you can get the most out of your heat source.
4. MAXIMISE YOUR INSULATION
When it comes to heat, around 25 per cent is lost through the roof.
This can be easily reduced by installing 25cm of insulation throughout your loft.
It's also worth seeing what's going on in your walls, as around a third of the heat in an uninsulated home is lost this way.
Although it's not as cheap to install as loft insulation, cavity wall insulation could save up to £160 ($198) a year in heating bills.
It's also worth checking with your energy supplier to see if they have any insulation schemes running – which can sometimes mean cheap or free installation.
5. WRAP UP WARM
If you have a hot water tank, make sure it is properly lagged – or insulated.
This will keep the water warmer for longer, and reduce heating costs.
The Energy Community reckons that insulating an uninsulated water tank could save up to £150 ($185) a year – but even just upgrading your tank's 'old jacket' will help to save money.
6. TURN DOWN THE DIAL
This may seem a little counter-intuitive, but bear with me.
The World Health Organisation previously recommended a minimum temperature of 21°C (70°F) in the living room, but Public Health England revised this to 18°C (61°F) in 2014.
And research shows that turning your thermostat down by 1°C (34°F) could cut your heating bill by up to 10 per cent.
So keep the dial at 18°C (61°F), save money and avoid the negative impacts of a cold home.
7. BLOCK OUT THE DRAUGHTS
Even a simple solution such as a making your own sausage dog draught excluder will help keep the warmth in your home.
The Energy Saving Trust estimates that DIY draught-proofing your doors, windows and cracks in the floor could save £25 ($31) per year.
You can do this yourself for very little cost.
Self-adhesive rubber seals around doors and windows and door draught excluders are relatively cheap and easy to install.
So it's worth getting those doors and windows sealed before winter properly kicks in.
8. INSTALL THERMOSTATIC RADIATOR VALVES
Research at the University of Salford has shown that installing heating controls and theromostatic radiator valves results in energy savings of 40 per cent compared to a house with no controls.
These work by allowing you to programme your heating to come on at predefined times – so you only use energy when you need it.
New smart thermostats can also be controlled remotely via your mobile so you can turn on your heating on the way home, ensuring it's nice and toasty when you arrive.
9. UPGRADE YOUR BOILER
If your boiler is more than 10 years old, it may be time to replace it with a new, more efficient model.
Depending on your old boiler type and house, you could save up to £350 ($433) with a new A-rated condensing boiler – which uses less energy to produce the same amount of heat.
Plus, if it's new, you're less likely to have any issues going into the winter season.
10. REFLECT THE HEAT
Radiator panels are relatively cheap, easy to install, and ensure that heat from your radiators warms up your room and not your walls.
They work by reflecting the heat back into the room.
A house can easily catch fire from the misuse of appliances and heating equipment to smoking in bedrooms. In Australia’s hot summer months, temperatures can soar past 40°C and teamed with a dry climate, conditions are ideal for fires to break out.
However you can take measures to avoid fire in home and ensure the safety of your family. Below are some of the most common causes of house fires, and some tips to take precautions.
1. Cooking Equipment
Pots and pans can overheat and cause a fire very easily if the person cooking gets distracted and leaves cooking unattended. Always stay in the room, or ask someone to watch your food, when cooking on hotplates.
2. Heating
Keep portable heaters at least one metre away from anything that could easily catch fire such as furniture, curtains, laundry, clothes and even yourself. If you have a furnace, get it inspected once a year to make sure it is working to safety standards.
3. Smoking in bedrooms
Bedrooms are best to be kept off limits for smoking. A cigarette that is not put out properly can cause a flame, as the butt may stay alit for a few hours. It could burst into flames if it came into contact with flammable materials, such as furniture. Did you know that fires started in the bedroom or lounge make up 73% of all house fire fatalities?¹
4. Electrical Equipment
An electrical appliance, such as a toaster can start a fire if it is faulty or has a frayed cord. A power point that is overloaded with double adapter plugs can cause a fire from an overuse of electricity. A power point extension cord can also be a fire hazard if not used appropriately. Double check the appliances and power points in your home.
5. Candles
Candles look and smell pretty, but if left unattended they can cause a room to easily burst into flames. Keep candles away from any obviously flammable items such as books and tissue boxes. Always blow a candle out before leaving a room. Did you know that in Perth last year 34 house fires started as a result of candles?²
6. Curious Children
Kids can cause a fire out of curiosity, to see what would happen if they set fire to an object. Keep any matches or lighters out of reach of children, to avoid any curiosity turned disaster. Install a smoke alarm in your child’s room and practice a home escape plan with your children and family in case there was a fire. Teach kids understand the “stop, drop, cover and roll” drill as well as knowing their address if they needed to call 000.
7. Faulty Wiring
Homes with inadequate wiring can cause fires from electrical hazards. Some signs to see if you’ve bad wiring are: 1) Lights dim if you use another appliance; 2) For an appliance to work, you have to disconnect another; 3) Fuses blow or trip the circuit frequently. Have a licenced electrician come and inspect you house, or contact your landlord if you have any of the above occurrences.
8. Barbeques
Barbeques are great for an outdoor meal, but should always be used away from the home, tablecloths or any plants and tree branches. Keep BBQs regularly maintained and cleaned with soapy water and clean any removable parts. Check the gas bottle for any leaks before you use it each time.
9. Flammable Liquids
If you have any flammable liquids in the home or garage such as petrol, kerosene or methylated spirits, keep them away from heat sources and check the label before storing. Be careful when pouring these liquids.
10. Lighting
Lamp shades and light fittings can build up heat if they are very close to light globes. Check around the house to make sure. Lamp bases can become a hazard if they are able to be knocked over easily, and so should be removed if they are. Check that down lights are insulated from wood panelling or ceiling timbers.
The above tips are a good guide to avoiding a fire in your home. However it’s a good idea to protect yourself with adequate home and content insurance, cover to ensure you are covered in the unlikely event a fire were to happen.
Have you prepared your plumbing for winter? Damage caused from burst pipes can cost you thousands, of dollars. Not all damage is covered by homeowner’s insurance. We want to make sure you know some simple steps to get you prepared. Follow these 7 simple steps to get off to a great start. Find yourself in a bind? Brogdon Plumbing is here to help! Give us a call.
Prepare your outdoor faucets. Remove and drain your water hoses and store them indoors before the first freeze.
Fix leaks now. Inspect your pipes and have any/all leaks repaired.
Wrap any pipes in unheated areas of the home. This is crucial, for mobile homes. Visit the hardware store and grab some heat tape and/or pipe insulation. There are also easy to install kits, that include a thermostat. These kits can help you in the event of frigid temps for long periods. Don’t hesitate to ask an employee for recommendations. Protecting the pipes in your home, from low temperatures is THE single most important thing that you can do.
Tune up your water heater. You will want to drain and maintain your water heater at this time every year. It’s a little harder to do yourself but we are glad to help! Just give us a call.
Service your furnace. Make sure you have clean filters and call a professional to help with major repairs. Heat means pipes could freeze. If they do, call us!
Selling your home or heading south for winter? Shut off the water, in your home, completely and consider contacting us to drain your pipes. Any water left in your pipes is at risk of freezing and causing pipes to bust. If nobody is home, the damage can be widespread and severe. Don’t take chances.
Call Brogdon plumbing! If you have questions or concerns, contact us for help. We will gladly help with your winter pipe preparations!
What else can you do to prepare your plumbing for winter? Share your personal tips/tricks with us.
The air quality in your home is important. Keeping dust, pollen, pet dander, and other irritants out of the air you breathe involves more than changing the air filter. What about the air ducts? Contaminants collect in the duct system too, and regular cleaning of the air channel is important.
Energy Consumption
Dirty HVAC systems consume more energy than clean ones. Older ductwork starts leaking and not only do irritants enter through cracks, but air escapes too. Dirty ductwork also impedes airflow that drives up energy bills as much as 20 percent. Plus, dirt stresses your system causing frequent breakdowns. Clean ductwork helps lower your utility bill and helps your HVAC unit last longer.
Smelly Air
If someone in your home smokes that cigarette or cigar order hangs not only in the air but in the ductwork. Likewise, if you burned something on the stove, the smoke must go somewhere. These smells and other household odors collect in the ductwork and get circulated five to seven times per day, on average. Odors continue to plague your home long after you remove the offensive item.
More Reasons
Mold and mildew grow in your duct system especially if your home suffered recent water damage from flooding or foundation cracks. Home renovations and repair often lead to contaminants settling in your air system, and newly built homes need the air ducts cleaned before occupancy.
Call the Professional
Air duct cleaning is not an easy job. It needs special vacuum hoses and tools to reach throughout the system. This is not a do-it-yourself task. Contact your local HVAC company and schedule a professional cleaning. Have your system cleaned every three to five years and more often if your family suffers from severe allergies or asthma, includes a smoker, or you have pets that shed a lot.
Make sure you contact a certified HVAC technician for ductwork cleaning. Another helpful idea is to buy a high-quality air filter like the ones sold at home improvement stores. Look for pleated filters costing around $15. Not only do these last a little longer, these filters also catch more debris, including bacteria and viruses, before you breathe it in.
If you lead a busy lifestyle, you know the drill. You start off the week with a mostly clean and tidy house (depending on how many chores you achieved over the weekend). By midweek, though, you realize that you haven’t put away your dry-cleaning and haven’t folded your laundry. There’s a growing stack of mail in the hallway, a used gym bag by the door, a pile of fresh laundry on the bed, dirty dishes in the sink (and clean ones in the dishwasher that didn’t just finish its cycle). To top it off, your vanity looks as if a bomb went off in the beauty aisle at Saks. By Friday, the house is a full-blown disaster zone—that is, until you rest from your week, and tackle the massive (and much-needed) tidying up job. Then, the cycle starts all over again. Do yourself a favor, and adopt these clever daily housecleaning tips so you never have to spend precious weekend hours tidying up. We promise it’s quicker than you think.
Keep scrolling to study up on the housecleaning tips that will transform the state of your home.
BEDROOM
In the morning:
Make the bed as soon as you get up. Making the bed first thing in the morning will kick-start your productivity levels and make it that much harder to crawl back into bed.
Wipe your bedside table each morning. Keep wipes near your bedside table, and give your bedside table a quick wipe when picking up your phone in the morning. That’s one less chore to tackle on the weekend.
Edit your closet as you go. Keep a hamper or bag in your closet where you can throw items of clothing that don’t work anymore as you’re getting ready in the morning. Sort through it once a month, and toss, donate, or sell.
At night:
Immediately rehang items you wore. Don’t just throw clothes on a chair if they can be worn once more before laundry day—hang them. Keep dry clean–ready items in a separate section of your closet.
Have a dedicated hamper for every person in your home. One hamper is not enough. Have a laundry basket for each person in your house, plus an extra one for linens. If you’re feeling extra organized, use hampers that have two baskets in each so you can separate whites in advance.
Start a wash cycle as soon as you get home. If you have enough laundry, start a wash cycle first thing in the evening so you have time to dry and fold. Don’t ever let unfolded laundry make it into your bedroom. Keep a folding area near your washer/dryer, and be ruthless about folding/ironing as soon as the drying cycle is done.
BATHROOM
In the morning:
Spray your shower with cleaner after each shower. Give your shower a quick clean daily by spraying it with cleaner, quickly wiping surfaces, and letting it rinse out.
Hang towels on bars and robes on hooks. Your towels need to properly air-dry in order to be able to reuse them two to three times. Make sure they are properly hung to dry. If you’re a bathrobe person, a dedicated hook for it in the bathroom will make your space feel a little more like a hotel room.
Keep a laundry hamper in your bathroom for towels. Your bathroom is not a hotel; don’t leave towels on the floor or in the tub. If they’ve gone past their three-day use, quickly throw them in the hamper.
At night:
Clear your countertops of clutter. We get it, mornings get busy. Make a point at night to clear out and put away every product that was used to get ready in the morning.
Clean your toilet during your nighttime routine. The time you need to brush your teeth and wash your face is probably the exact time you need to let an average toilet cleaner product work before giving it a quick scrub. Use a wipe to quickly clean the seat. Doing this every other day will keep your toilet neat in between deep cleans.
Wipe down countertop after getting ready for bedtime. Once yournighttime beauty routine is done, give your bathroom countertops a quick wipe. Keep a stash of cleaning products in your vanity to make this process seamless.
KITCHEN
In the morning:
Empty the dishwasher while you brew your coffee. It should be ready for your breakfast dishes so they don’t pile up in the sink and sit there all day.
When you notice a spill, clean it right away. It’s easier to notice tiny spills in broad daylight, so inspect your countertops and floors in the morning. While it’s easy to tell yourself oh, I’ll just take care of that when I clean this weekend, getting it done will get you into the habit of cleaning as you go.
Swap out your dish towel. It turns out that dish towels should be changed more often than we think, so get into the habit of swapping them out in the morning and tossing the old ones into the laundry basket.
At night:
Clean as you cook. There are two types of cooks in this world: Those who clean as they cook and those who don’t. Learn to be the former by starting with your prep work and cleaning that before you start cooking. Once your meal is ready, quickly rinse utensils before sitting down to eat. It will make it much easier to clean up after a meal.
Fill and start the dishwasher at night. Don’t leave it until the morning, no matter how tempting it is to go lie down in front of Game of Thrones.Do it during commercials if you must, but get it done.
Wipe countertops and cooking surfaces. Wipe down your counters and stove each night before you go to bed. Get into the habit of wiping the microwave after each use. You’ll love waking up to a spotless kitchen.
LIVING ROOM
In the morning:
Keep baskets in every room. Once a day, do a quick walk-through of each space. Fill up your basket with accumulated clutter, and leave it by the door. Put each item back in its place first thing when you get home.
At night:
Wipe down your coffee table and side tables during commercial breaks. While watching your favorite show, there’s bound to be a moment when you have to endure the inevitable commercial break. Take the time to quickly wipe down your living room tables.
Fluff your pillows after each use. Get into the habit of fluffing your pillows when you turn the TV off. You wouldn’t leave your TV on all night, so why would you leave your pillows deflated?
ENTRY WAY
In the morning:
Keep your bag, keys, and coat in the same spot. Make it easy to get out the door in the morning by having everything you need to organize in the same spot.
Take out the trash and recycling when you leave the house. You can alternate days between the two, but getting into this habit will prevent from having garbage pile up at home.
At night:
Keep a mail sorter in the entryway. Drop your mail in when you get in your house, and empty your tray once a week when paying bills. Unless you’re waiting for something urgent, most mail can wait a few days. That way you’ll keep everything in one spot and address it in bulk. Store paperwork immediately—or even better: Go paperless, and scan everything.
Immediately launder and store workout gear. Don’t leave your gym bag to linger. Sort the dirty clothes, and store away the rest.
Heating, holiday decorations, winter storms and candles all contribute to an increased risk of fire during the winter months.
NFPA and the United States Fire Administration (USFA) are teaming up to help reduce your risk to winter fires and other hazards, including carbon monoxide and electrical fires. Learn more about these specific elements of winter fire safety to help keep you safe this winter.
Heating
Heating is the second leading cause of U.S. home fires, deaths and injuries. December, January and February are the peak months for heating fires. Space heaters are the type of equipment most often involved in home heating equipment fires, figuring in two of every five fires (40%).
Get additional information and resources on heating safety.
Often called the invisible killer, carbon monoxide (CO) is an odorless, colorless gas created when fuels such as gasoline, wood, coal, propane, etc. do not burn. In the home, heating and cooking equipment that burn fuel are potential sources of CO. Carbon Monoxide incidents are more common during the winter months, and in residential properties.
Most of the U.S. is at risk for winter storms, which can cause dangerous and sometimes life-threatening conditions. Blinding wind-driven snow, extreme cold, icy road conditions, downed trees and power lines can all wreak havoc on our daily schedules. Home fires occur more in the winter than in any other season, and heating equipment is involved in one of every six reported home fires, and one in every five home fire deaths.
Get additional information and resources on severe storms.
Generators
Portable generators are useful during power outages, however, many homeowners are unaware that the improper use of portable generators can be risky. The most common dangers associated with portable generators are carbon monoxide (CO) poisoning, electrical shock or electrocution, and fire hazards.
According to a 2013 Consumer Product Safety Commission (CPSC) report, half of the generator-related deaths happened in the four coldest months of the year, November through February, and portable generators were involved in the majority of carbon monoxide deaths involving engine-driven tools.
December is the peak time of year for home candle fires; the top four days for home candle fires are New Year’s Day, Christmas, New Year’s Eve and Christmas Eve. Each year between 2009 and 2013, an average of 25 home candle fires were reported each day.
Get additional information and resources on candle safety.
Electrical home fires are a leading cause of home fires in the U.S. Roughly half of all home electrical fires involved electrical distribution or lighting equipment, while nearly another half involved other known types of equipment like washer or dryer fans, and portable or stationary space heaters.
Christmas trees are combustible items that become increasing flammable as they continue to dry out in your home. Nearly 40 percent of home fires that begin with Christmas trees occur in January. Although Christmas tree fires are not common, when they do occur they’re much more likely to be serious.
If you see visible mold, do not disturb it. You can inadvertently spread the mold infestation throughout your home. When mold is disturbed, the mold can release microscopic mold spores which become airborne and can circulate inside your home.
What to Do:
DO stay out of affected areas.
DO turn off the HVAC system and fans.
DO contact SERVPRO of McMinn, Monroe, and Polk Counties for mold remediation services.
What Not to Do:
Do NOT touch or disturb the mold.
Do NOT blow air across any surfaces with visible or suspected mold growth.
Do NOT attempt to dry the area yourself.
Do NOT spray bleach or other disinfectants on the mold.
We are prepared to help you face this issue when it arises. Our team is prepared to deal with microbial growth and will help you take care of this issue quickly. If you have any questions about microbial growth or have any concerns about your home or business, let SERVPRO of McMinn, Monroe, and Polk Counties put your mind at ease. Call us today at (423) 745-4165 for any mold or mildew issues you are dealing with in your home or business!
In an emergency, every second counts- that’s why it’s crucial to have a game plan, and why this year’s National Preparedness Month theme is “Don’t Wait Communicate.”
This September, as part of National Preparedness Month, the Red Cross encourages all Americans to develop a family game plan. Get started using the steps below!
How Red Cross Supports National Preparedness Month
Different types of disasters and emergencies happen in communities across the country, but there are key steps that every household can take to be better prepared for them. If you do nothing else this month, take time to create a disaster plan including a home fire escape plan.
All Red Cross regions are celebrating National Preparedness Month by implementing programs in communities throughout the county. Some examples of our work include:
Conducting in-home visits to test and install smoke alarms and provide fire safety and disaster education
Presenting The Pillowcase Project, a youth preparedness program sponsored by Disney, to thousands of 3rd-5th grade children across the country.
Participating in America’s PrepareAthon! by working collaboratively with local government entities to support community-specific initiatives, like registrations for emergency notification systems
Encouraging households with children to download the free Monster Guard app, which teaches youth about preparedness through a fun game
Serving as a NOAA Weather-Ready Nation AmbassadorTM
Collaborating with United States Fire Administration on the Fire Is Everyone’s FightTMcampaign, and planning smoke alarm installation events during Fire Prevention Week
Source: American Red Cross http://www.redcross.org/get-help/how-to-prepare-for-emergencies/national-preparedness-month
For a lot of people, Labor Day means two things: a day off and the end of summer. But why is it called Labor Day? Labor Day is a day set aside to pay tribute to working men and women. It has been celebrated as a national holiday in the United States and Canada since 1894.
Labor unions themselves celebrated the first labor days in the United States, although there's some speculation as to exactly who came up with the idea. Most historians credit Peter McGuire, general secretary of the Brotherhood of Carpenters and Joiners and a cofounder of the American Federation of Labor, with the original idea of a day for workers to show their solidarity. Others credit Matthew Maguire, later the secretary of Local 344 of the International Association of Machinists in Paterson, N.J.
The first Labor Day parade occurred Sept. 5, 1882, in New York City. The workers' unions chose the first Monday in September because it was halfway between Independence Day and Thanksgiving. The idea spread across the country, and some states designated Labor Day as a holiday before the federal holiday was created.
President Grover Cleveland signed a law designating the first Monday in September as Labor Day nationwide. This is interesting because Cleveland was not a labor union supporter. In fact, he was trying to repair some political damage that he suffered earlier that year when he sent federal troops to put down a strike by the American Railway Union at the Pullman Co. in Chicago, IL. That action resulted in the deaths of 34 workers.
In European countries, China and other parts of the world, May Day, the first day in May, is a holiday to celebrate workers and labor unions. Before it became an international workers holiday, May Day was a celebration of spring and the promise of summer.
Membership in labor unions in the United States reached an all-time high in the 1950s when about 40 percent of the work force belonged to unions. Today, union membership is about 14 percent of the working population. Labor Day now carries less significance as a celebration of working people and more as the end of summer. Schools, government offices and businesses are closed on Labor Day so people can get in one last trip to the beach or have one last cookout before the weather starts to turn colder.
The Back Sacks Program serves to eliminate food insecurity by providing weekend meals to students in need at McMinn County High School and Etowah City School. Back Sacks are prepared by volunteers and members of Education Angels, our partnering student organization. The Back Sacks are then delivered to the guidance office at McMinn County High School and the principal's office at Etowah City School, who oversee the distribution process. The weekend meals typically include a canned protein, vegetable, fruit, grain, juice or breakfast drink, and a few snacks.
The Love Thy Neighbor Project is working to expand this program both within McMinn County High School, Etowah City School and other schools in need. If you’re a parent of a student who needs a Back Sack, please contact us at 423-746-5273.
Fighting Childhood Hunger
How can a child focus on solving a math problem or memorizing a new word when she or he is trying to ignore the persistent pangs of hunger?
Across the country, teachers and school nurses have found that in some instances, Monday morning comes and they are forced to compete against hunger for the attention of their students. More than 18 million children qualify for free or reduced price meals through the National School Lunch Program, the fuel that they need to get them through the week (via Feeding America). Over 70 percent of students in the Athens City School System and 62 percent of students in the McMinn County School System received free or reduced lunch during the 2013-14 academic year.
What happens to these children when they go home over the weekend? Many students who are on these free and reduced lunch lists go home every weekend and have very little to eat until the beginning of the next school week. Childhood hunger impacts one’s ability to cognitively process new information, stay attentive during class, and is a significant predictor of chronic illness (Weinreb et al., 2002). Studies show that students who go hungry are not able to focus as much on school work, and when students are not able to focus on school, they do not perform well in the classroom. When these students reach high school, it's tempting to drop out of school, in order to help support their families. This continues the cycle of poverty on to the next generation. The Back Sacks Program offers assistance to break this cycle and keep students in school.
Credit: Tennessee Wesleyan University https://www.tnwesleyan.edu/student-life/service-and-leadership/love-thy-neighbor-project/community-members/back-sacks/
Like individuals and families, schools, daycare providers, workplaces, neighborhoods and apartment buildings should all have site-specific emergency plans.
Ask about plans at the places where your family spends the most time: work, school and other places you frequent. If none exist, consider volunteering to help develop one. You will be better prepared to safely reunite your family and loved ones during an emergency if you think ahead, and communicate with others in advance.
For more information on working together, visit Citizen Corps.
Schools and Daycare
If you are a parent, or guardian of an elderly or disabled adult, make sure schools and daycare providers have emergency response plans.
When the clock springs forward, it signals a time for renewal, rejuvenation, and refreshing. Along with brighter weather and blossoming buds, spring gives us an opportunity to hit the reset button, and that includes some spring cleaning. Let’s be honest, though, even Southern women dread cleaning the entire house. But, fortunately, it doesn’t have to be overwhelming or an intense scrubbing session. With a little spring in your step, you can easily put that extra hour of daylight to good use with this simple three-day cleaning guide. The benefits of cleaning on the weekend allow you to entertain guests for a late Sunday night dinner or free up your time on weekdays. So, get ready to roll up your sleeve, and wake up to a clean home when the alarm sounds on Monday.
Friday Evening: Get Ready
If you’ve had a long day at work or running errands, don’t worry. You won’t actually start cleaning until Saturday. Friday should be reserved for setting a plan in motion, buying the necessary supplies, and finding a place or organization where you can donate all the clothes and personal items you want to give a
Saturday: Get Set
Using a durable pair of cleaning gloves and wash cloths, wipe up the grease on the stovetop and in the bottom of the oven. You can spray the oven lightly with water and wipe it down with a damp rag.
Next, head to the bedroom. First, remove bed linens, mattress pads, and curtains that need to be washed. In addition to washing the sheets, curtains, and comforters, you’ll want to flip the mattresses and put clean, fresh linens on the beds.
Sweep the floors or vacuum carpets in each bedroom. Cobwebs can be found everywhere, from corners and baseboards to ceilings and corners, so make sure you vacuum and clean those hot spot areas thoroughly.
Dust and polish any nightstands, wood furniture, desks, or bookshelves in each room. If your bedroom has mirrors or glass tabletops, clean those too!
Then make your way to the bathrooms, and begin by removing the shower liners. If they’re washable, wash them on delicate cycle to get mold and mildew off the curtains, and hang to dry.
Reorganize bathroom cabinets and your closet. This includes donating items you don’t plan on wearing again to charity and tossing those barely-used tubes and expired makeup in the garbage.
Lastly, spray the shower, tub, and toilet with cleaner. Once the cleaning solution has set, wipe them down and rinse clean. Finish up by sweeping or mopping the bathroom floor. You can place or plug in a few air fresheners in the bedroom or bathroom to really freshen up your home.
Sunday: Go Full Steam Ahead
On Sunday, try to focus on the kitchen, entertaining areas, and living room.
way. Cleaning will be much easier and efficient when dividing the home into four sections: bedrooms, kitchen, living area, and bathrooms. But, you’ll want to spray the oven with cleaner on Friday night so it can soak overnight.
The stove should still be clean from the previous day’s wipe down, but if there are any stubborn stains remaining, use baking soda and a little elbow grease to clean the stove completely. Replace drip pans.
If necessary, defrost the freezer and wipe down shelves and the vegetable crisper.
Deep clean the microwave, removing grime, splatters, and food remnants from last night’s meal.
Wipe down all surfaces, kitchen counters, and center islands.
Next, mop the kitchen floor to clean any sticky spots. Don’t forget the area behind the fridge!
Make sure to tidy up the pet areas (if any) by cleaning up bowls and discarding puppy pads or litter boxes.
Vacuum the living area, moving furniture around to get to those hard-to-reach spots. Using the attachment, vacuum cushions, blinds, and curtains for dust bunnies, crumbs, and pet hair.
Lastly, take out the trash and wipe down the waste bins before inserting a new bag. Give your home a good once-over to make sure you didn’t miss any spots or forget to put something away.
When the cleaning is done on Sunday, kick up your feet, open up the windows for some fresh air, and congratulate yourself on a job well done. You’ve earned it!
Credit: Michelle Darrisaw, Southern Living
Everybody Clean-Up! Tips for Keeping Your Classroom Clean
Are classroom messes making you miserable? Get students in on the act and straighten your classroom in no time at all. The ideas below are teacher-tested with excellent cleaning results!
Classroom Clean-Up Ideas
Magic Helpers
Linda, who teaches 1st Grade in Pacific, MO, adds a bit of magic to her clean-up routine. “I found that my little ones will be more willing to help clean up our classroom if we have some fun with it,” she explains. “I tell them that it is time to ‘call in the elves’ to help with the cleanup. Of course, the elves only come out and help with my students, so I turn my back and count to 30 (or more, depending on how messy the room is…) and when I turn around the kids are in their seats, the room is spotless, and the elves have magically disappeared! They love the idea that only they can get the elves to come out and help, and it works every time ! They even beg to “call in the elves” when it looks like the room needs tidying. This has never failed to get the class motivated for some cleanup.”
Mystery Trash
Keep your floors clean with this idea by Sarah, who teaches 3rd grade, in Kentucky. “I always had problems keeping my floor clean throughout the day and by the end of the day it was always messy. In order to get the students motivated to clean up the floor, I pick a mystery piece of trash. Sometimes I plant it in a place that is hard to find, or I pick something that is obvious. As soon as I announce that there is a mystery piece, the students race to pick up as much trash as they can find. If they find the mystery piece, they get a piece of candy. They are happy and I am happy because my floor is spotless!”
Stuck on You
Get students stuck on cleaning with this inexpensive and fun idea by Laurie, a 2nd Grade teacher, from Shannock, Rhode Island. “Clean up after messy cutting projects or even at the end of the day can go quicker when you give each child a masking tape bracelet. The children delight in cleaning up when picking up scraps with their bracelets!”
What are some of your favorite ways to motivate students to help you clean the classroom? Share them with us below!
Credit: Brandi Jordan, Really Good Stuff http://www.reallygoodstuff.com/community/classroom-clean-up/
Fire and smoke damage can be devastating to personal property and structures. Quick action is the only way to minimize the destruction. The Institute of Inspection Cleaning and Restoration Certification, IICRC, is a globally recognized organization whose mission is to establish higher industry standards. As a referral source for consumers, IICRC certified firms are more likely to provide a faster, better service than non-certified competitors.
Restoration costs increase and damages escalate when the cleaning process is extended. By hastening the hiring process and using an IICRC certified technician, owners will be rewarded by having the damage stopped so repairs can begin.
What happens only minutes after the disaster?
Immediately after a fire, soot residue settles onto the property. Discoloration of porous materials is permanent, but other surfaces may be properly cleaned to remove the discoloration. Acidic soot begins staining other surfaces if not treated quickly.
Within hours all surfaces begin to suffer from fire and smoke damage. Wooden furniture may require refinishing. Metal begins to rust, pit and corrode. Painted walls begin to yellow. Clothing can become permanently stained. And finally, flooring may require refinishing or replacement.
If left untreated, within weeks the restoration process will take longer and cost more. Prolonged soot exposure permanently harms all surfaces and embeds in fibers. Replacement of property may be the best option at this point. The structure may continue deteriorating if not properly restored.
IICRC suggests the following steps after the incident:
Remember safety comes first. Do not enter the property without proper work gloves and appropriate respiratory protection. Exposure to soot residue causes respiratory distress and other medical emergencies.
Bring along a few box fans. Upon entering the property open the windows and place the box fans in the windows to force out the contaminated air and dust. Proper ventilation helps to prevent further smoke damage and reduces potential injury to people.
Remove loose smoke contamination with a professional dry cleaning soot sponge.
Clean every surface with soap and water. Begin at the top and work down to the floor. Be sure to get inside cabinets and cupboards.
Using a high efficiency vacuum cleaner with a HEPA (High-Efficiency Particulate Air) Filter, vacuum upholstery and carpet. A good filtration system on a high efficiency vacuum prevents the soot from being blown back into the cleaned space. Clean or change the filter regularly.
Launder bedding, clothes, curtains, and other washable materials. An alkaline cleaner neutralizes the acid found in the soot. Fine materials should be professionally dry-cleaned by a dry-cleaner who is experienced in smoke damaged articles.
Clean the exterior walls and eaves using a water hose attached to the proper cleaner. Agitate and loosen stuck-on soot. The smoke damage to the outside of the property will continue until the soot is removed.
Though heavy residues require the assistance of professional restoration technicians, a certified technician may be contacted for any amount of smoke damage. Improper processes can further harm the property or belongings.
IICRC certified technicians have training and experience in the techniques needed to restore the property. If structural distortion or warping has occurred, it may be necessary to consult a general contractor. Luckily, most insurance companies will cover the cost of the restoration, less your deductible, so get started today to get the property back into original condition.
Article By:
IICRC
The Institute of Inspection, Cleaning and Restoration Certification (IICRC) is a certification and standard-setting nonprofit organization for the inspection, cleaning and restoration industries. The IICRC serves the United States, Canada, United Kingdom, Australia and Japan, in partnership with regional and international trade associations. http://www.iicrc.org/what-after-smoke-damage-has-happened-a-140.html
Mold is detectable by smell and signs of water damage on walls or ceiling, and can grow in places invisible to the human eye. It may be found behind wallpaper or paneling, on the inside of ceiling tiles, the back of drywall, or the underside of carpets or carpet padding. Piping in walls may also be a source of mold, since they may leak (causing moisture and condensation).[8]
Spores need three things to grow into mold:
Nutrients: Cellulose (the cell wall of green plants) is a common food for indoor spores.
Moisture: To begin the decaying process caused by mold
Time: Mold growth begins from 24 hours to 10 days after the provision of growing conditions.
Mold colonies can grow inside buildings, and the chief hazard is the inhalation of mycotoxins. After a flood or major leak, mycotoxin levels are higher even after a building has dried out.[7]
Food sources for mold in buildings include cellulose-based materials such as wood, cardboard and the paper facing on drywall and organic matter such as soap, fabrics and dust-containing skin cells. If a house has mold, the moisture may originate in the basement or crawl space, a leaking roof or a leak in plumbing pipes. Insufficient ventilation may accelerate moisture buildup. Visible mold colonies may form where ventilation is poorest and on perimeter walls (because they are nearest the dew point).
If there are mold problems in a house only during certain times of the year, the house is probably too airtight or too drafty. Mold problems occur in airtight homes more frequently in the warmer months (when humidity is high inside the house, and moisture is trapped), and occur in drafty homes more frequently in the colder months (when warm air escapes from the living area and condenses). If a house is artificially humidified during the winter, this can create conditions favorable to mold. Moving air may prevent mold from growing, since it has the same desiccating effect as low humidity. Molds grow best in warm temperatures, 77 to 86 °F (25 to 30 °C), although growth may occur between 32 and 95 °F (0 and 35 °C).[9]
Removing one of the three requirements for mold reduces (or eliminates) new mold growth:
Moisture
Food for the mold spores (for example, dust or dander)
Warmth; mold generally does not grow in cold environments.
HVAC systems can produce all three requirements for mold growth. The air conditioning system creates a difference in temperature, encouraging condensation. The high rate of dusty air movement through an HVAC system may furnish ample food for mold. Since the air-conditioning system is not always running, warm conditions are the final component for mold growth.
All the leaves and grime that you neglected while you were out swimming, hiking, or riding your bicycle this summer have built up in your gutters. If left full of debris, clogged gutters and drains can form ice dams that prevent your drainage systems from working properly. This can lead to water seeping into your home, which—as seen in the Conquering Moisture blog—can lead to all sorts of issues and extra energy costs. Save yourself the hassle of repairing a leak by simply cleaning your gutters and drains now. When you do, run water through the gutters to check for misalignments that could also cause water damage.
2. KEEP THE OUTSIDE AIR OUT AND THE INSIDE AIR IN
We talk about this a lot, but it is hugely important for your energy savings to ensure there are no air leaks in your home. Warm air will escape out of any cracks and can make your heating system work harder and cost you more to heat your home. Use caulk to seal cracks and openings between stationary house components like a door frame and weatherstripping to seal components that move like an operable window.
3. SHOW SOME TLC TO YOUR FURNACE
Your furnace may be a distant memory since you last powered it on, but before the cold weather descends and you must reluctantly switch it on, give it some TLC. Clean your furnace annually each autumn. Sediment build-up can cause your system to work less efficiently or potentially become a fire-hazard. Cleaning your system and getting it inspected will reduce the risks.
During the winter try to change your filter regularly; a dirty filter will decrease air flow and energy-efficiency. And if your furnace is ready to be replaced, buy an energy-efficient model. It will save you money and energy each month!
4. GET YOUR DUCTS IN A ROW
Your ducts are often times out of sight, out of mind, tucked away in the attic or basement, but a home with central heating can lose about 20% of the air that moves through the duct system. Make sure your ducts are in order by properly sealing and insulating them. Tightly sealed and insulated ducts can potentially reduce your annual energy bills by $120 or more!
5. LIGHT THE WAY
The fall and winter months mean less daylight. I know we are all keen on saving energy, but we don't want any falls while you carry in your groceries. Luckily, you can still use your outdoor lights without wasting money and energy. Because outdoor lights are typically left on for long periods of time, buying ENERGY SAVER products and bulbs to light your outdoor pathways or porches can save a lot of energy. ENERGY STAR even makes CFL and LED flood lights that can withstand snow and rain. As an extra energy-saving effort, look for ENERGY STAR products that come with automatic daylight shut-off and motion sensors. And be sure to decorate with LED holiday lights to reduce the cost of decorating your home for the winter holidays.
Colder weather is on its way, and using these tips will help you stay warm and cozy, while saving energy and money in your home. Stay tuned for part two with five more tips for getting your home ready for fall and winter!
Terlip, Paige. "Cozy Up to Colder Weather: 5 Ways to Prepare Your Home for Fall and Winter (Part 1)." Energy.Gov Energy Saver. U.S. Department Of Energy. September 24, 1014.
Have you prepared your plumbing for winter? Damage caused from burst pipes can cost you thousands, of dollars. Not all damage is covered by homeowner’s insurance. We want to make sure you know some simple steps to get you prepared. Follow these 7 simple steps to get off to a great start. Find yourself in a bind? Brogdon Plumbing is here to help! Give us a call.
Prepare your outdoor faucets. Remove and drain your water hoses and store them indoors before the first freeze.
Fix leaks now. Inspect your pipes and have any/all leaks repaired.
Wrap any pipes in unheated areas of the home. This is crucial, for mobile homes. Visit the hardware store and grab some heat tape and/or pipe insulation. There are also easy to install kits, that include a thermostat. These kits can help you in the event of frigid temps for long periods. Don’t hesitate to ask an employee for recommendations. Protecting the pipes in your home, from low temperatures is THE single most important thing that you can do.
Tune up your water heater. You will want to drain and maintain your water heater at this time every year. It’s a little harder to do yourself but we are glad to help! Just give us a call.
Service your furnace. Make sure you have clean filters and call a professional to help with major repairs. Heat means pipes could freeze. If they do, call us!
Selling your home or heading south for winter? Shut off the water, in your home, completely and consider draining your pipes. Any water left in your pipes is at risk of freezing and causing pipes to bust. If nobody is home, the damage can be widespread and severe. Don’t take chances.
Call SERVPRO of Athens Tn, at 423-745-4165.
Brogdon Plumbing Company. "7 Steps to Prepare Your Plumbing for Winter." BPC. Eternal Marketing Group. January 7, 2015


 24/7 Emergency Service
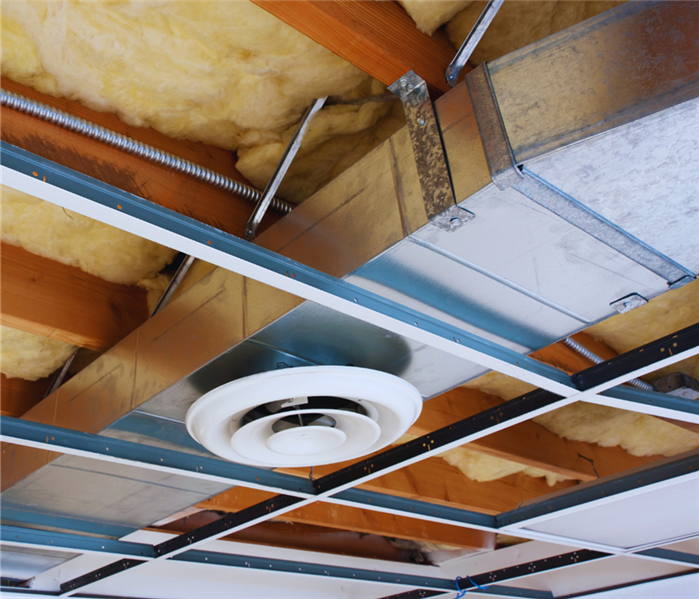 Photo of an air vent ductwork.